Throw Back Thursday - My First Quilt

I've been looking back at some of the "early years" lately.  The links on the My Work page go back to the first blog I started as a quilt diary for myself of the projects I'd done.  I'd never seen another quilt blog (crazy, huh?) when I began the first one in 2010, and after a couple months I left it abandoned to start GXQ.  Now realizing that here on GXQ lies the real story of my quilting journey, I'd like all my projects housed in one place.

So I'm sorry to make you suffer along through the early blog entries...  I definitely didn't know how to take pictures or edit or what makes an interesting read!  You'll catch some early pics of the kiddos - if you're a regular reader, you know that I pretty much never show those.

So here it is.  The very first one.  We all start somewhere!  
Feb. 2006
After receiving a sewing machine for Christmas, I decided to make a baby quilt when I was pregnant with my first son. I didn't know how to sew a straight line or what a bobbin was, but I figured I could wing it. I went to Joann's, bought some flannel Pooh fabric, and started cutting squares with scissors. Knowing that nothing I was making was square, I decided to stagger the rows, so no seams would need to line up. I was flying blind! No pattern and no plan. This is what I came up with... We used this blanket very much when he was a baby.

Odd Fellow's Chain Mini Quilt Finish & GiveAway

My latest finish is a mini!  I'm into mini quilts lately.... I've got a new sewing studio to decorate and, of course, that calls for me to make a bunch of new ones, right?  This mini is the first one completed that I plan to hang in my new space.

I was cross-stitching this same block, for Little Miss Shabby's Quilty Stitches project, and fell in love with it.  How had I not made this quilt block before?  It's called Odd Fellow's Chain.
First, I decided that instead of leaving the center square of the smallest star plain, I wanted a fussy cut.  I found part of Sarah Jane's Children at Play panel that my mom had given me and thought the yellow and oranges of the little bicycle boy went perfectly with the Crosshatch Floral prints from Yuwa of Japan.
Then I decided I would try my hand at free motion quilting some embellished details on the fussy cut square.  I added two little swoops of bunting in the colors shown on the print.  I still think I need some practice... this always looks adorable when I see others' work.  It was fun to try something new.
Part way through piecing this block, I realized why I hadn't sewn one before.  To piece the sections with the blue star, I had to sew 3 different sets of triangles.  Usually I can do ok with 1 or 2 sets.  But piecing with that many sets, something is bound to end up a little off for me.  I was able to square up the block with a little help from some Instagram friends urging me to pull the block into shape with a little pressing and starching.  I got it - although it's not perfect.... :)
I can't wait to hang this little bicycle boy up in my sewing studio.  The Yuwa prints combined with the soft white and yellow solids are very soothing to me.  Makes me long for sunny spring...
Quilt Stats.
Name: Odd Fellow's Chain Mini (I know, so original)
Size: 22 1/2" x 22 1/2"
Design: by AnneMarie Chany
Fabric:  Crosshatch Floral by Yuwa of Japan in yellow, orange, and blue; White solid from a curtain lining, Kona Maize, binding unknown 30s print from my stash
Piecing:  Me
Quilting: Me
Would you love to sew with these gorgeous prints yourself?  Becca of Sew Me A Song is giving away this fat quarter bundle of the Crosshatch Floral prints from Yuwa.  Look - there's even a grey print too!
There are also some lovely coordinating stripes.

Enter the giveaway below for your chance to win this yummy bundle.  This giveaway is now closed.

a Rafflecopter giveaway
Disclosure:  Yuwa prints for my mini were provided by Sew Me A Song.

Needle Sorting Pincushion Tutorial

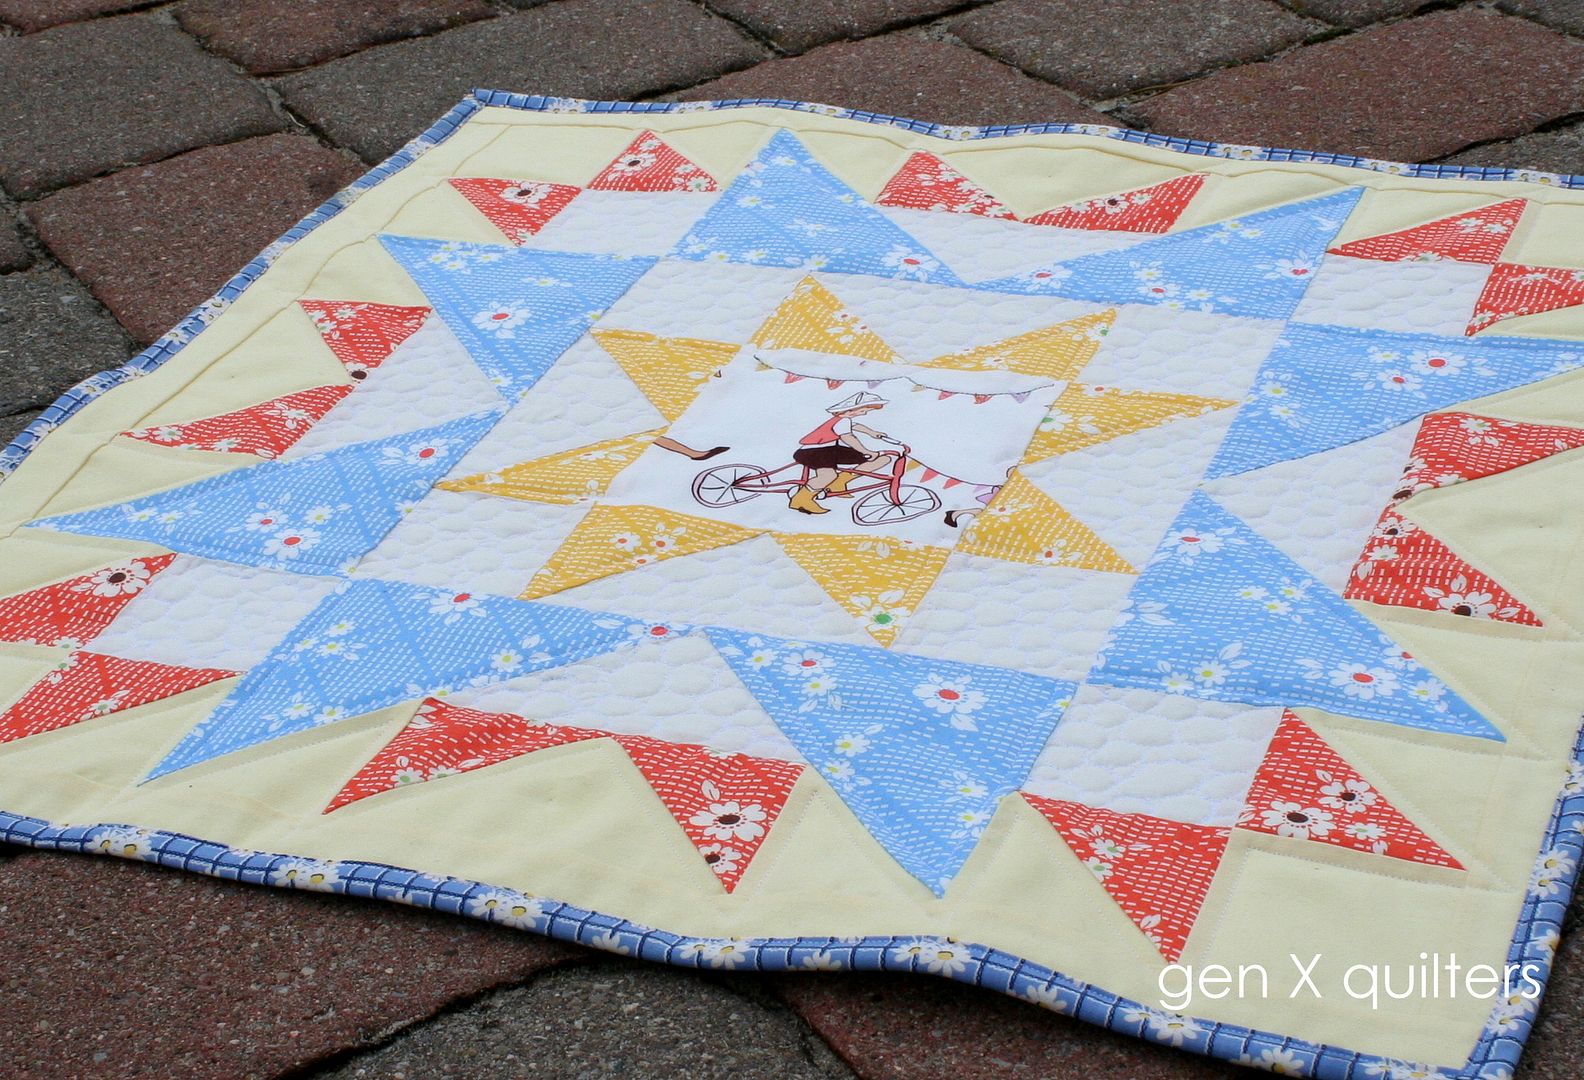
During my research on 
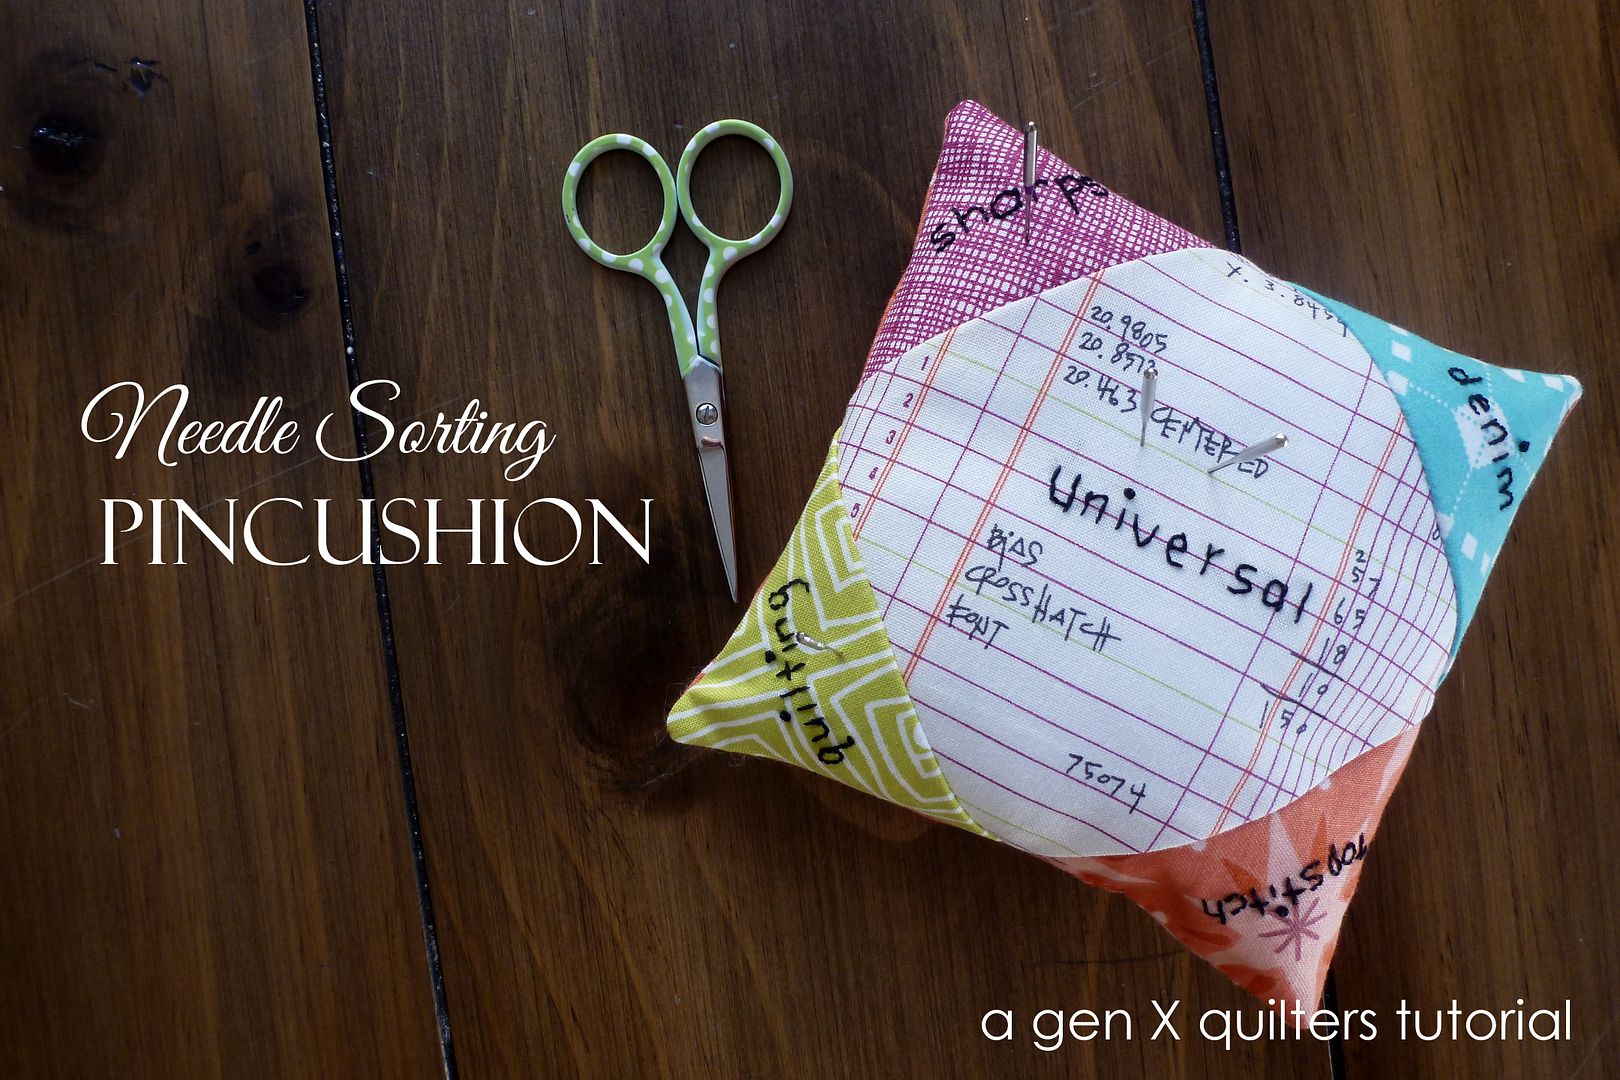
sewing machine needles, I realized that when I did change my needle, I had been putting my slightly used needles back into the little case it came from along with the new needles. I had no way of discerning which needles were truly new and which I had used before.  I decided a pretty new pincushion was in order to help me keep the used needles separate from the brand spanking new ones.

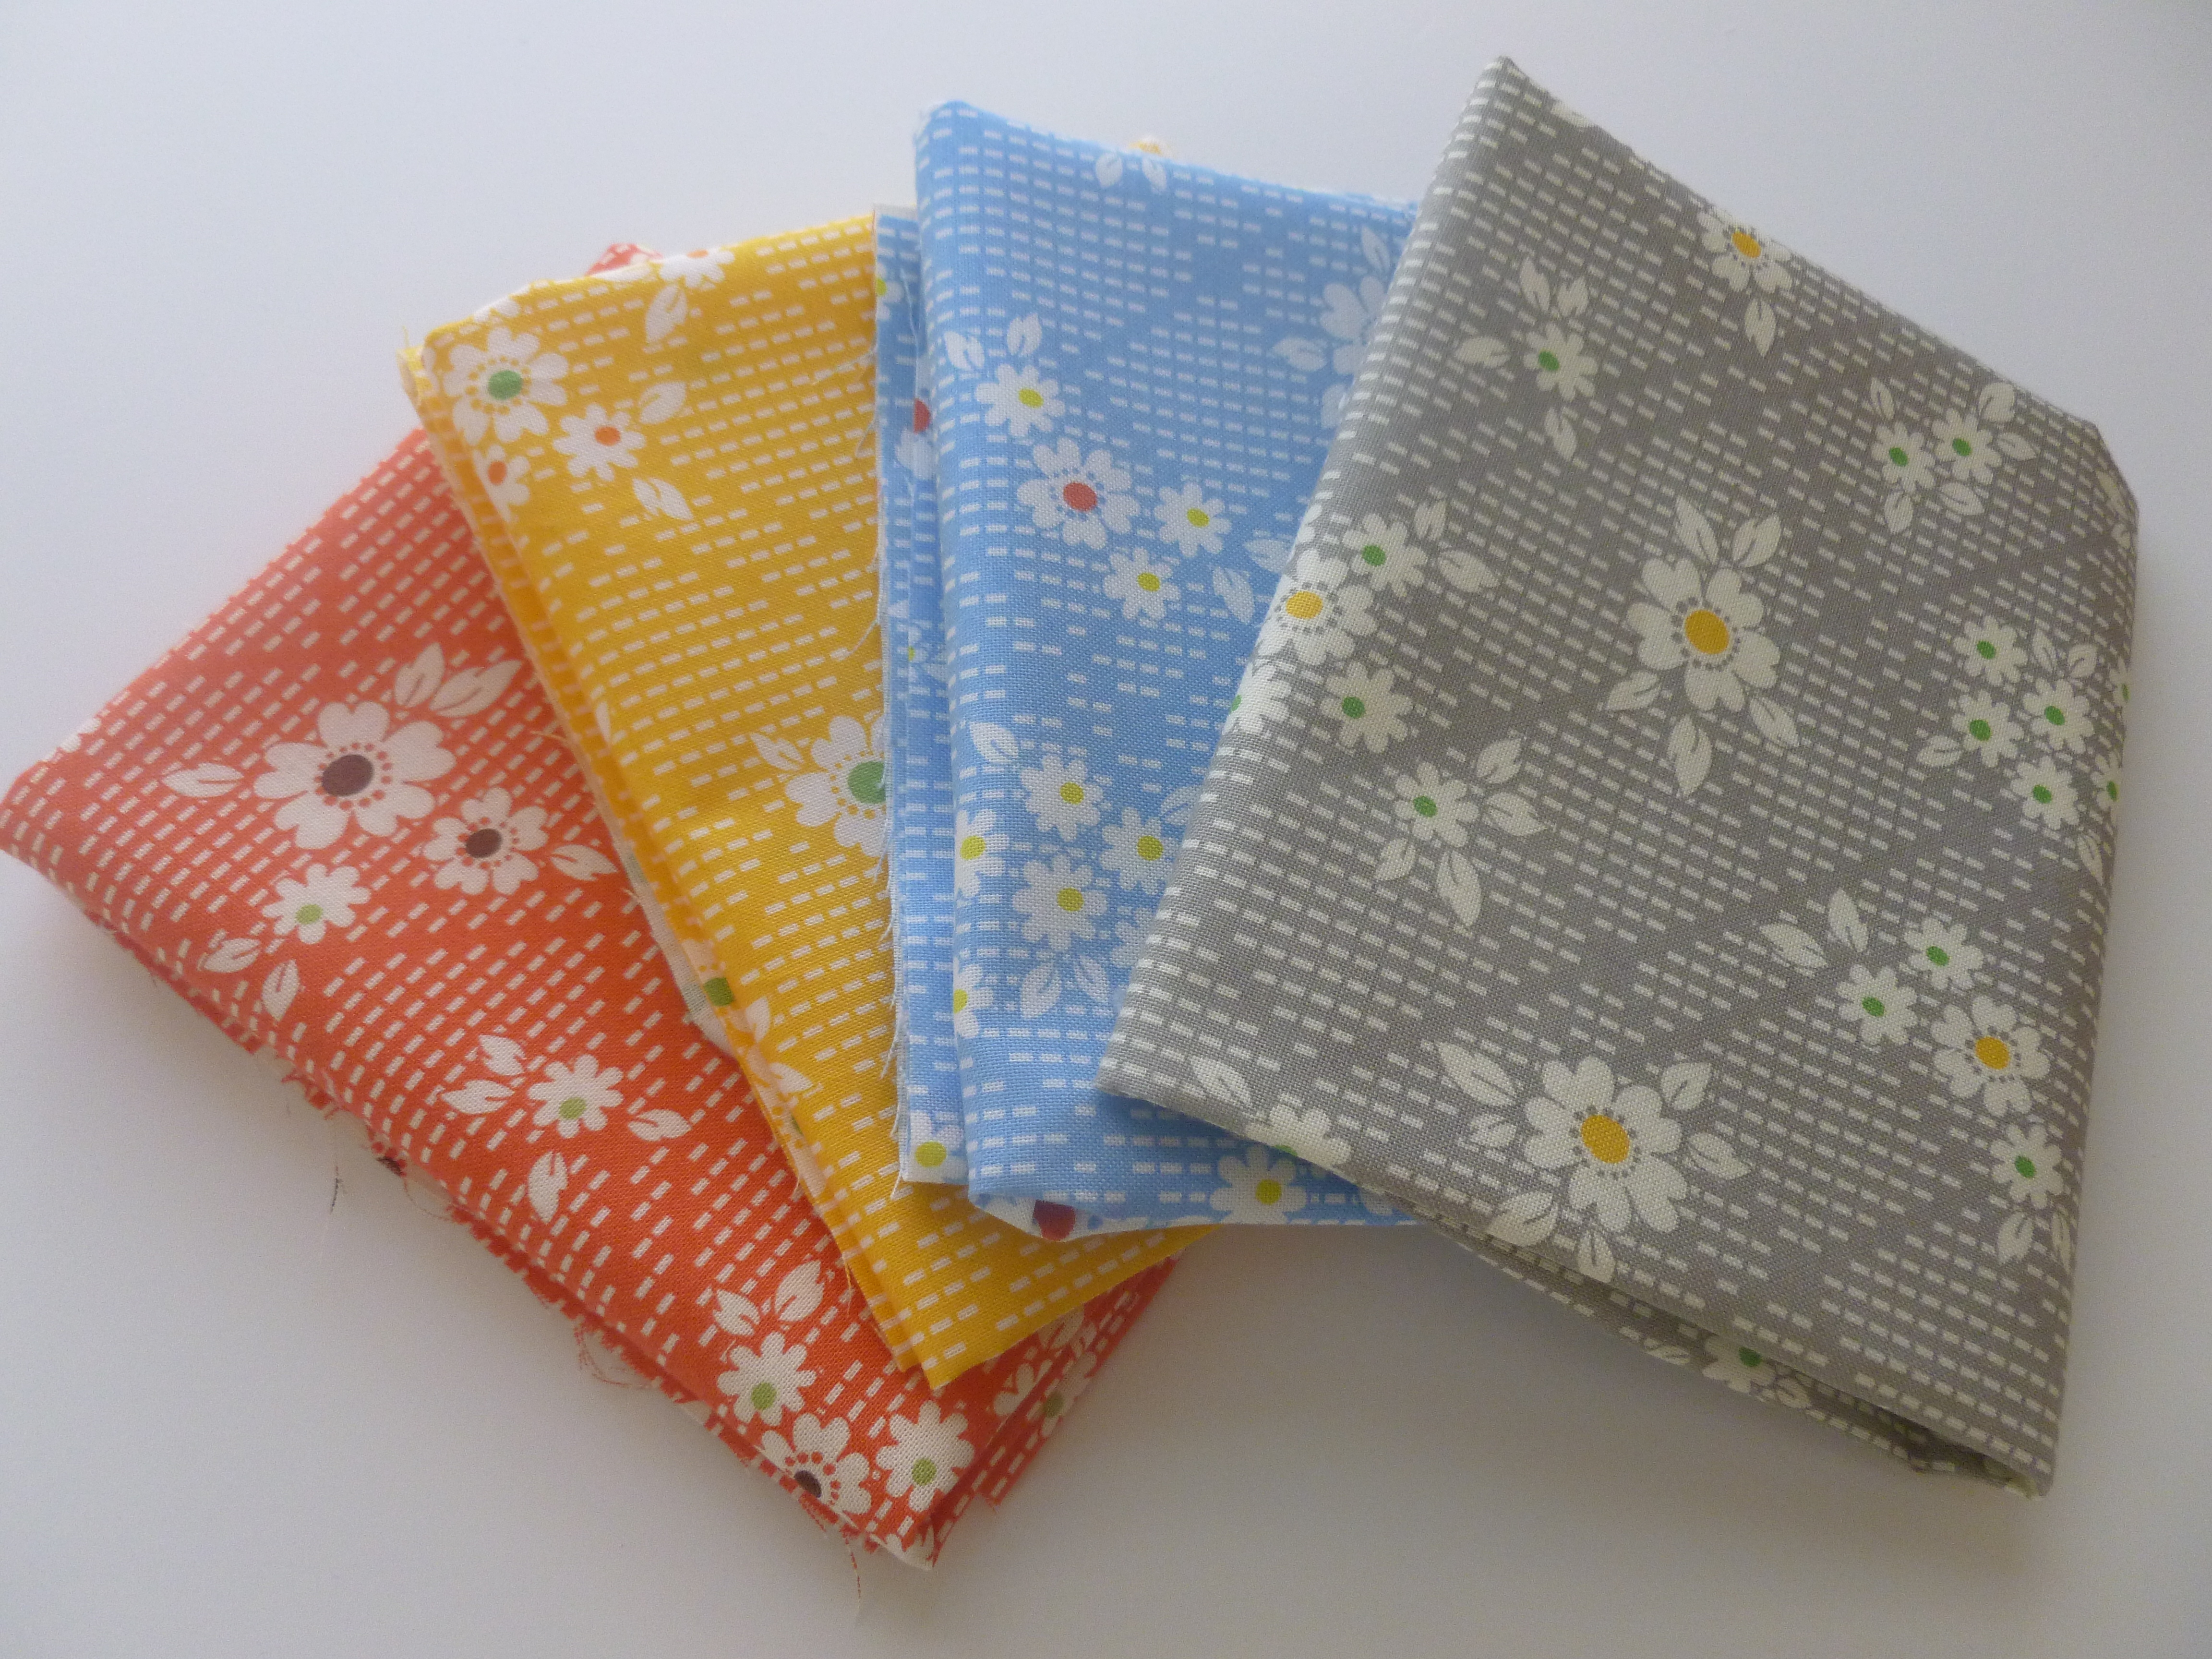
The colors I've chosen for the corners on this pincushion correspond with the color markings on my Schmetz needles (i.e. quilting needles are marked with a green dot, sharps marked by a purple dot).  I suggest looking to see what colors denote the needle types for the ones you buy to make sorting them easy!

Materials.
  • 4 assorted scraps in blue, green, orange and purple.  Scraps should be large enough to fit in a small embroidery hoop
  • (1) 4" x 4" square white print for the center
  • (1) 5 1/2" x 5 1/2" for scrap for back
  • black embroidery floss (DMC 310)
  • polyester fiberfill
  • print out of templates

Instructions.
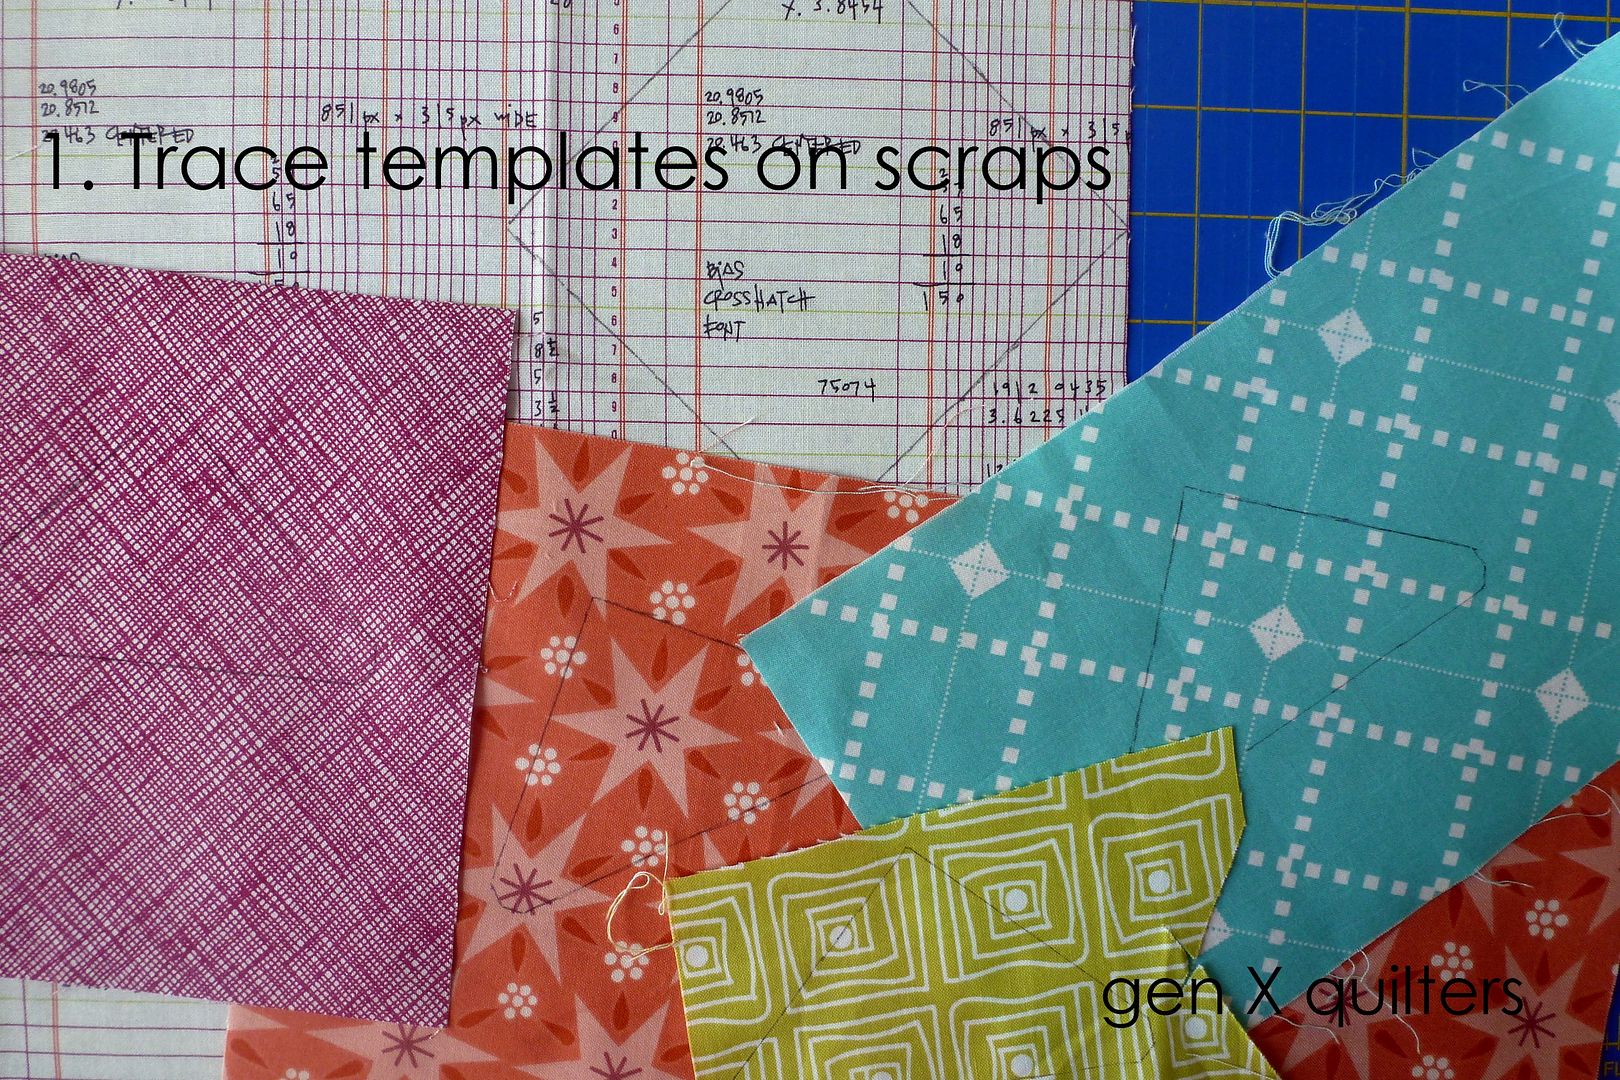
1. Begin by giving all your scraps a good press.  Mine always need extra pressing duty from being crumpled in the scrap bin.  Then print out the templates provided.  Cut out the triangle template and trace it's shape on each the (4) assorted color scraps.  Place the template in the middle of your scrap to be sure that you can place an embroidery hoop around the triangle to embroider the wording before cutting.  

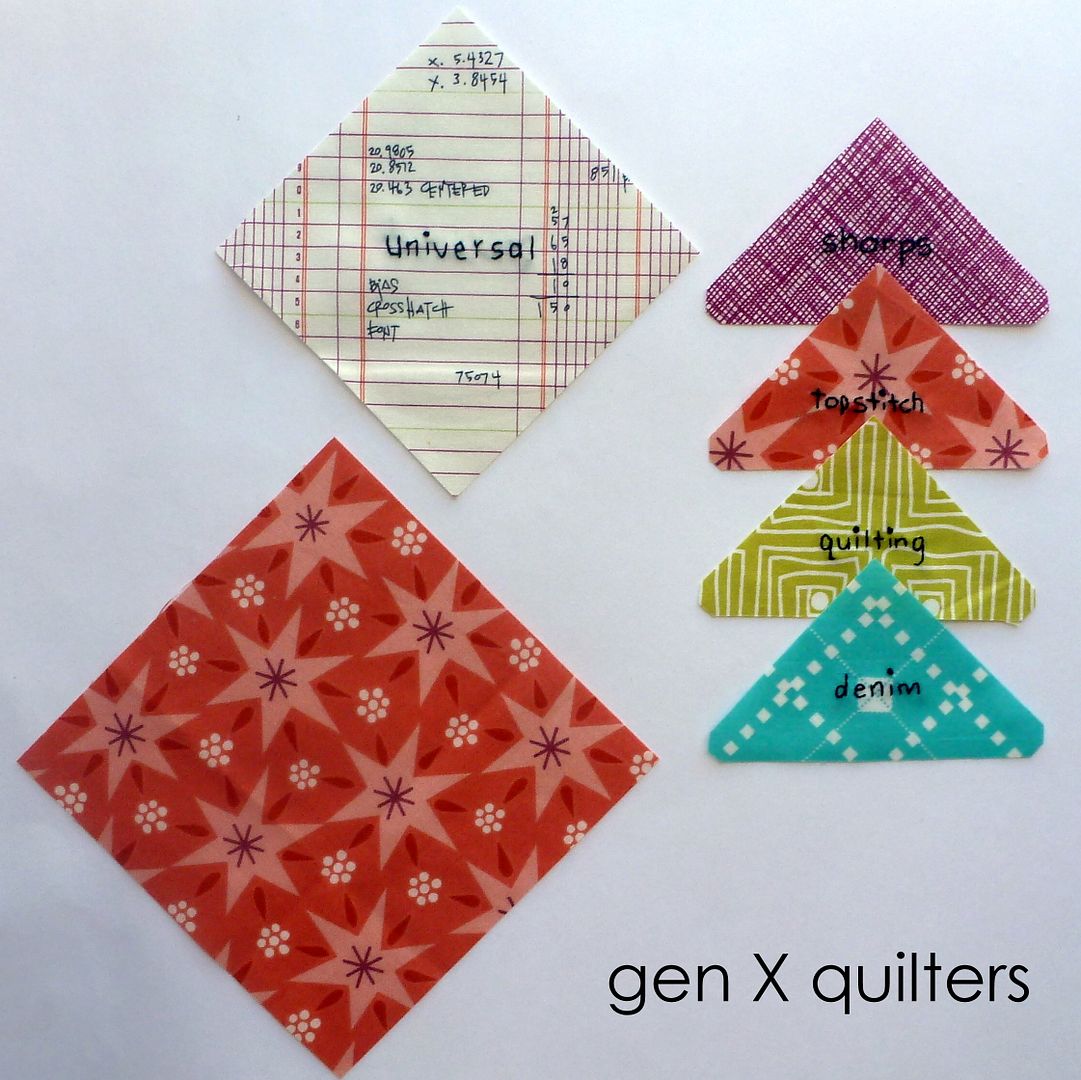
I have provided a template for the white 4" x 4" square also just in case you'd like to fussy cut your center square.  :)  I did!  I used a Frixion pen to trace the shapes.


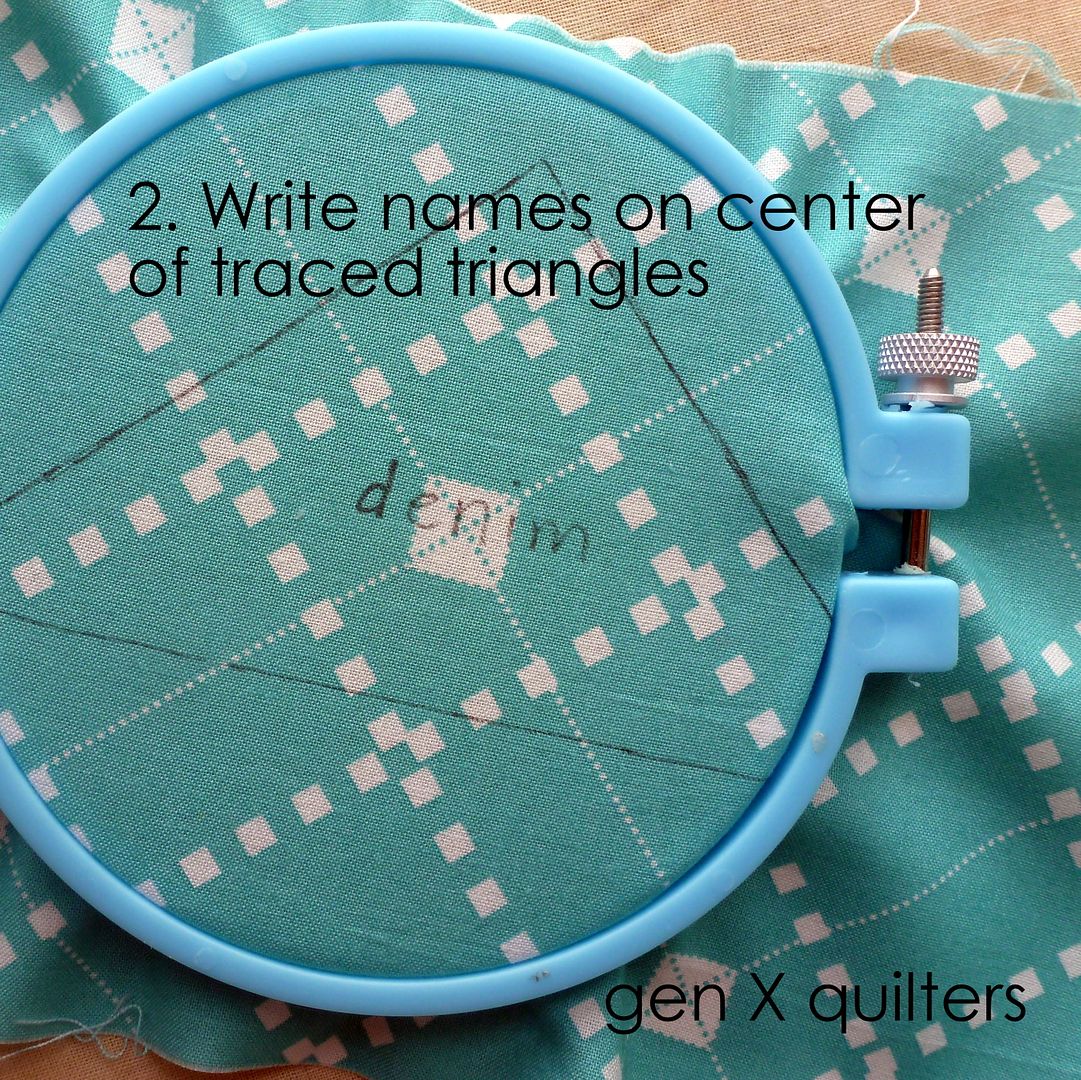
2.  Write the names of the needles you want to sort in the middle of the triangle.  If you are not too fond of your own handwriting, you could always print out the words in a pretty font and trace those on the fabric.  I am using "denim", "sharps", "topstitch", "quilting", and "universal".  It is up to you to choose which needles you use most.  I am color coordinating the colored dot on the needle to the scrap triangle color.  Denim needles have a blue dot marking them, so I am embroidering "denim" on the blue scrap.  

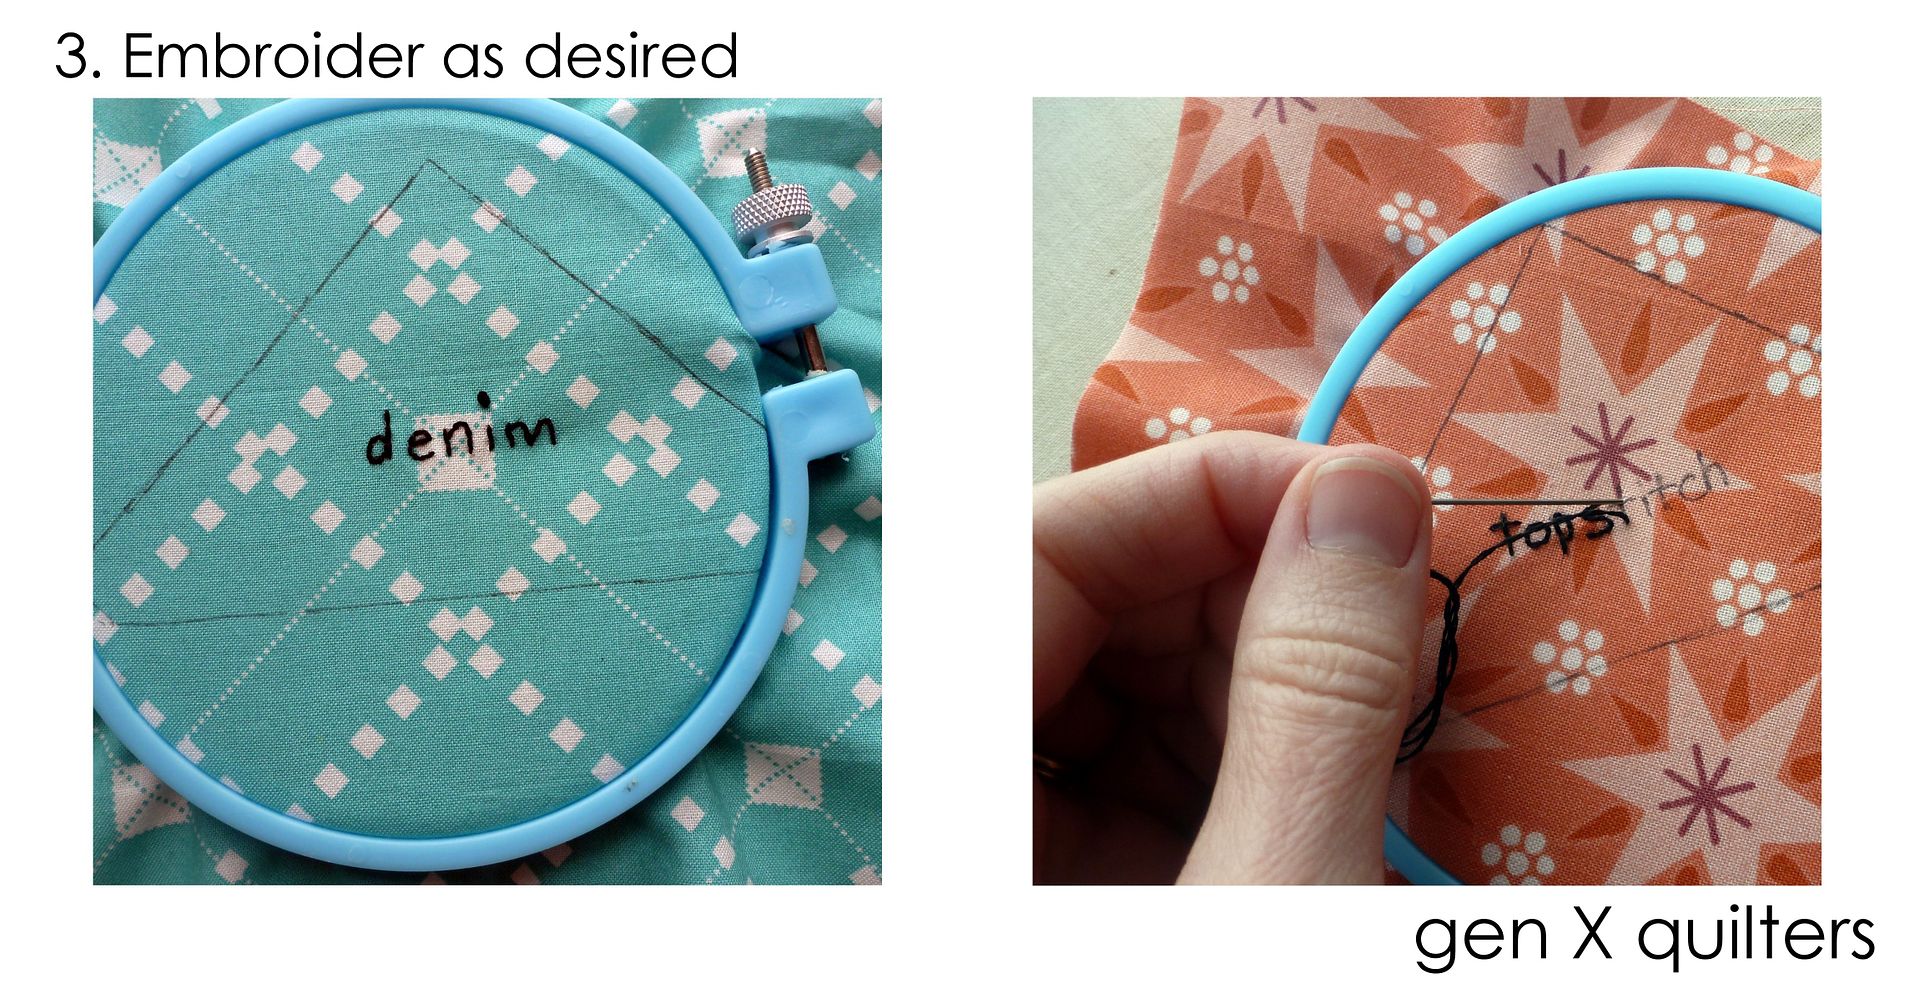
3.  Embroider the needle type name on each of the five fabrics (4 corner scraps and 1 white center square).  I used a simple back stitch to embroider.
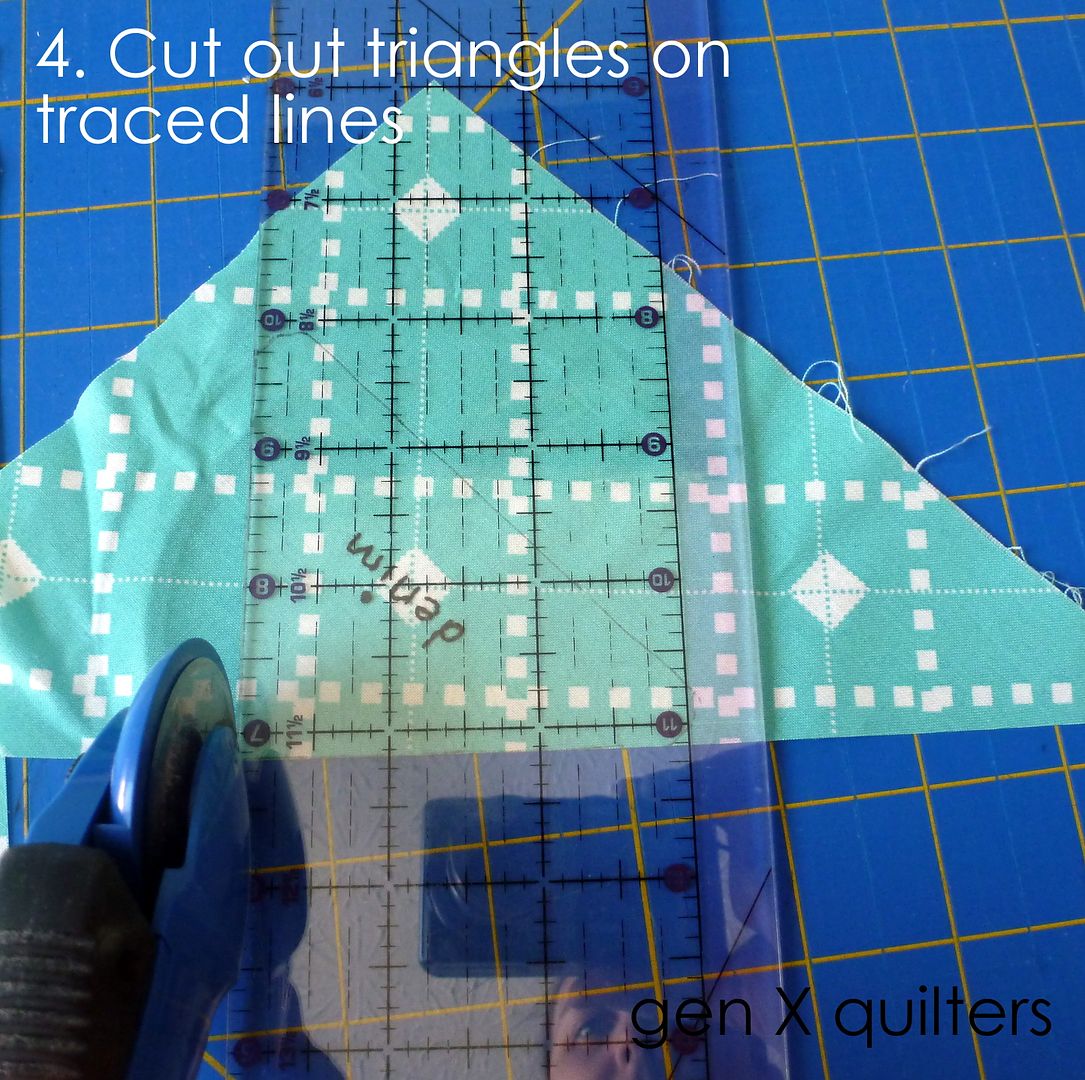
4.  Cut out the triangle shapes with your rotary cutter.  Do this before you press if you've used a Frixion pen or other ink that will disappear with heat!

5.  Press triangles on the back side after cutting each shape.


6.  Now we can layout the on-point square quilt block for the pincushion top.

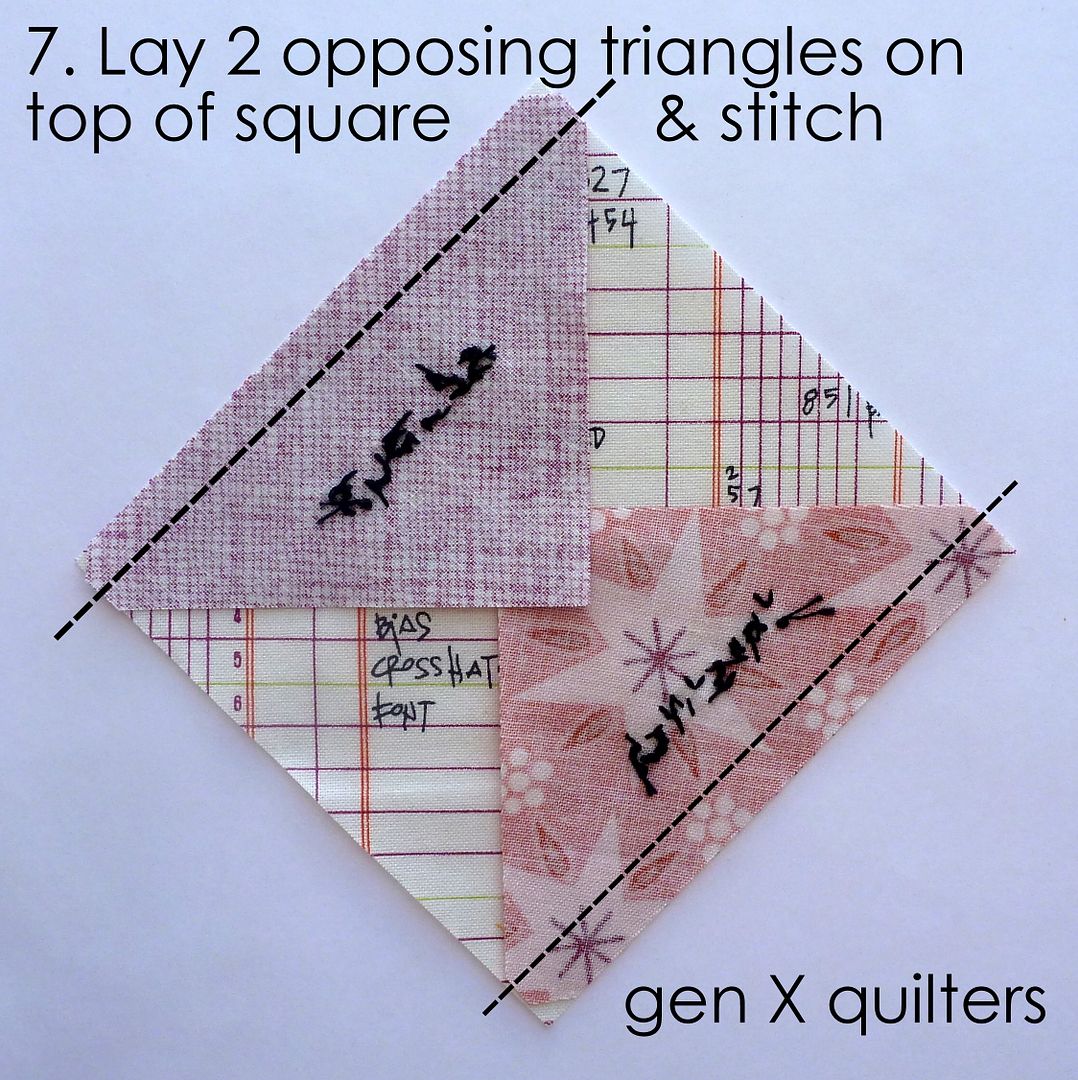
7.  Take two of the opposing triangles and lay them on top of the center square, right sides together.  Using the templates (i.e. the dogears are removed) allows you to center the triangle on the square easily. Stitch using a ¼” seam. Press toward the triangles.

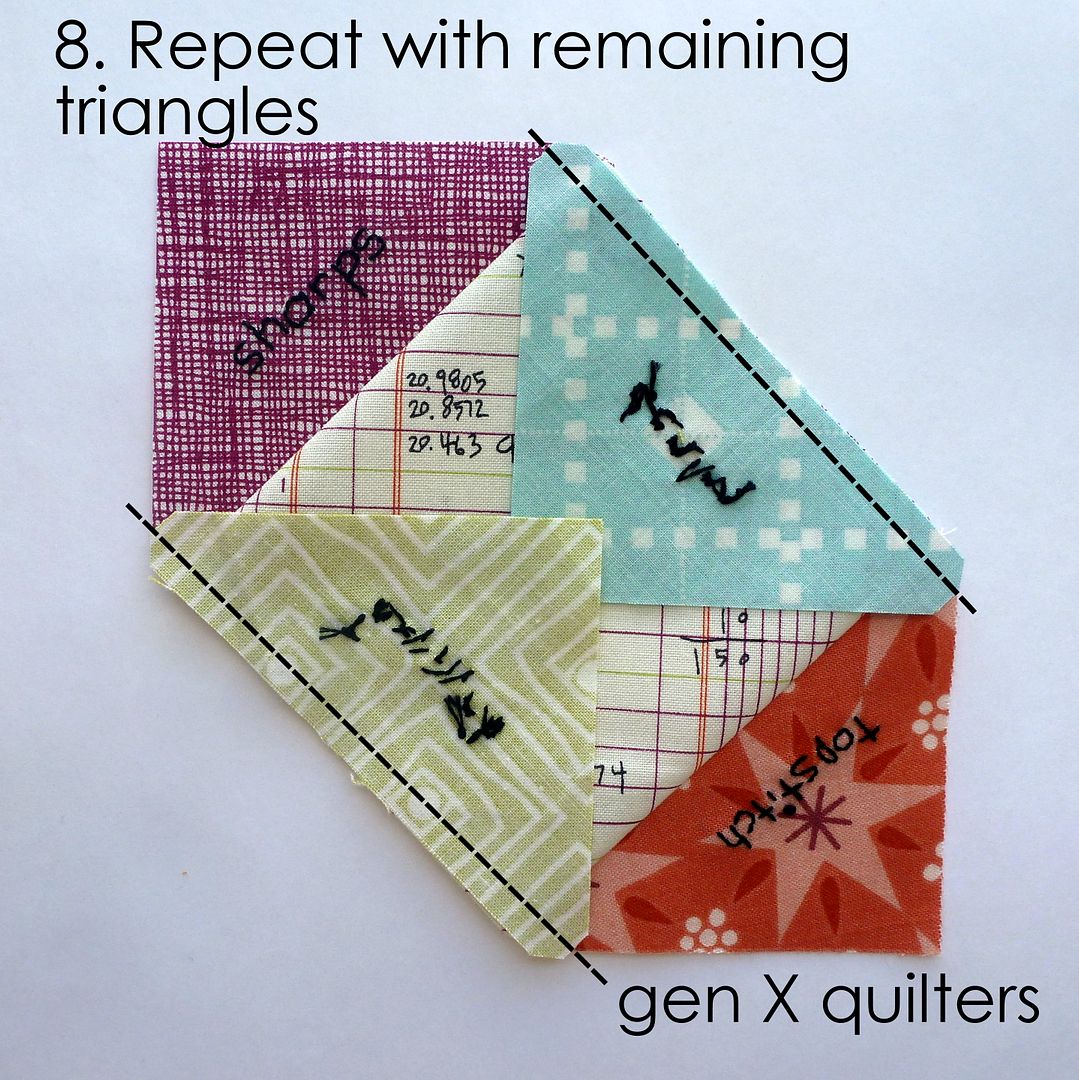
8.  Repeat step 7 using the remaining two triangles.

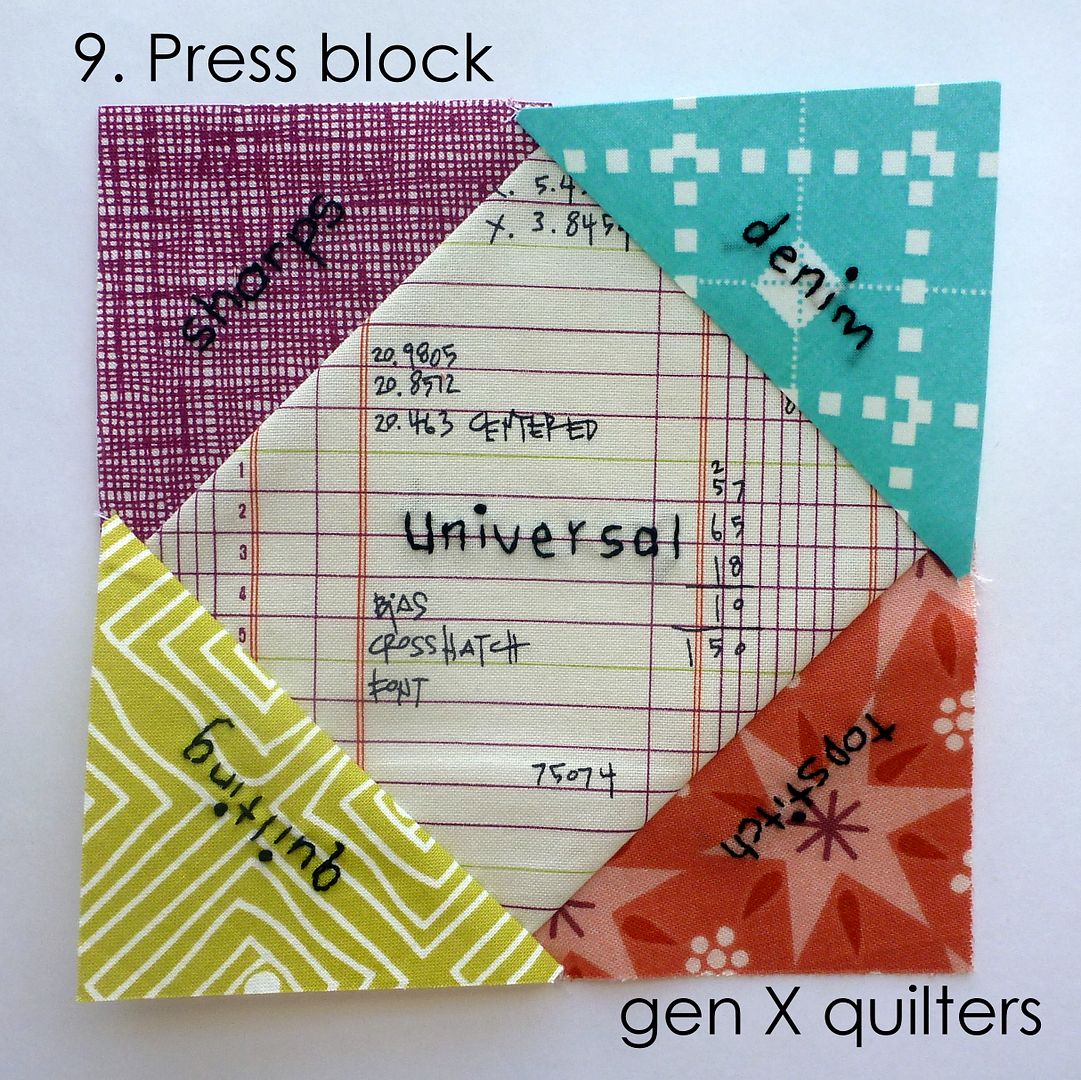
9.  Press your block and take this opportunity to square up your block if need be.  Nevermind that I took this shot before squaring up my block!  Sorry!

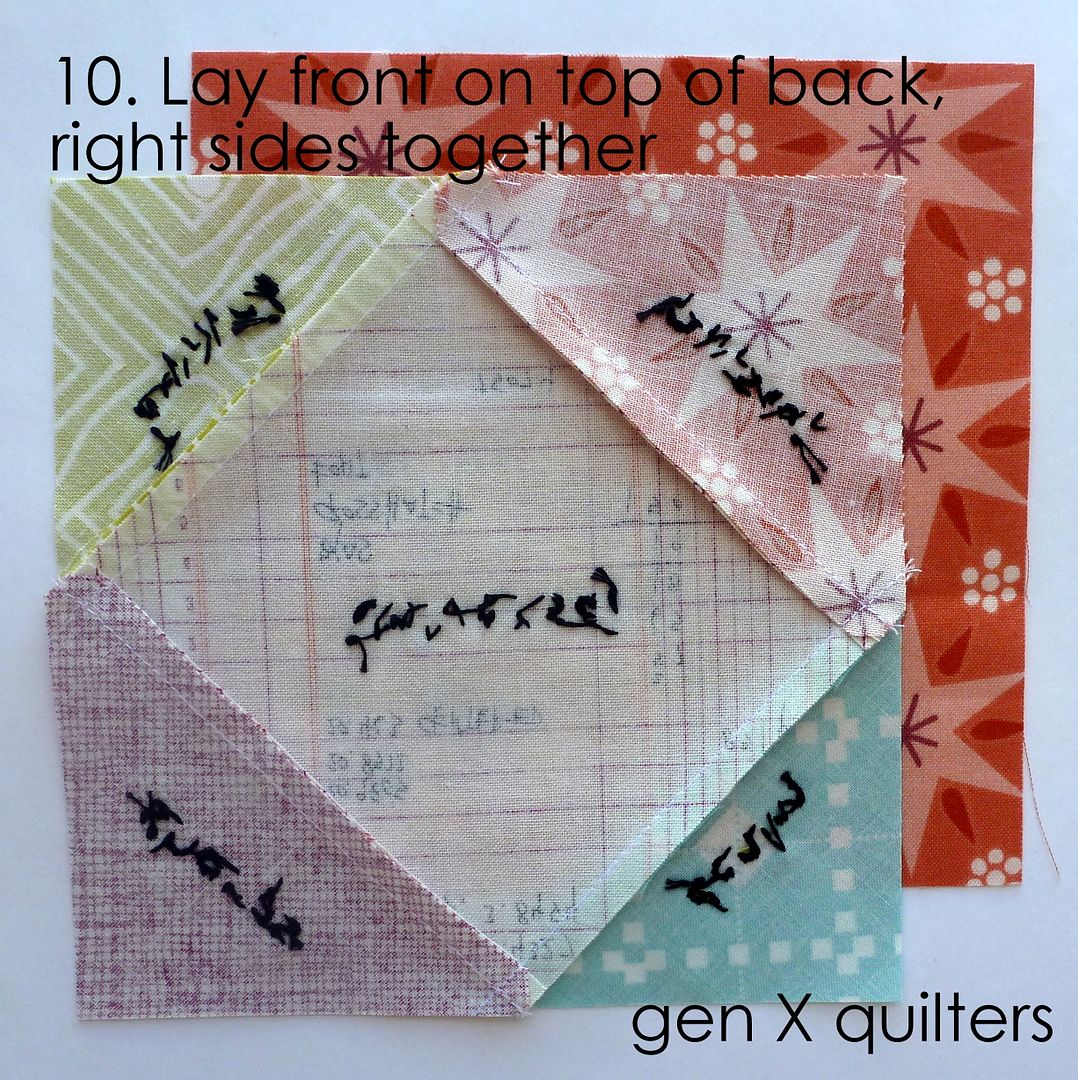
10.  Lay the pincushion front on top of the back fabric, right sides together, aligning all four edges.  Pin in place if necessary.

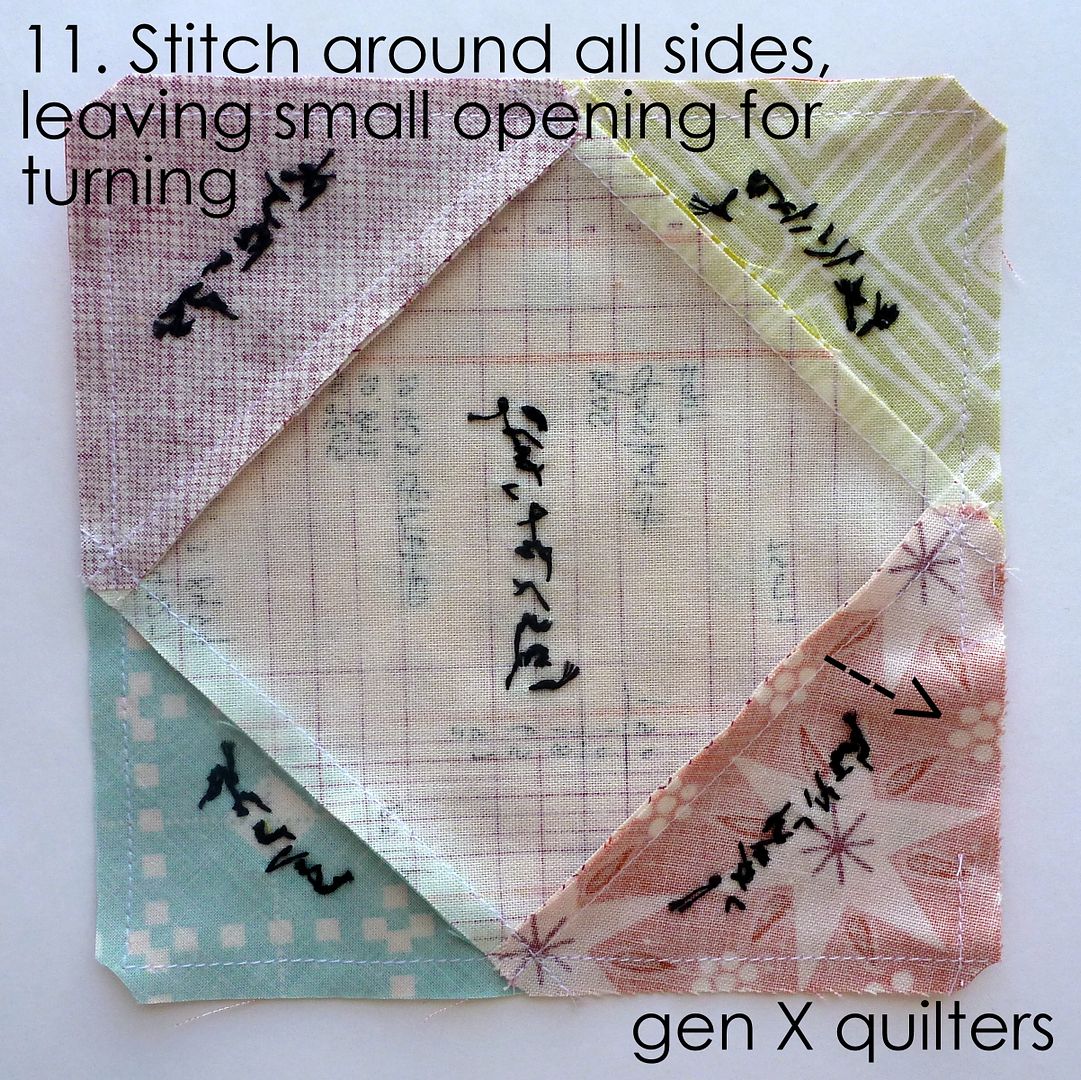
11.  Stitch around all 4 sides, leaving a small opening for turning right side out and stuffing.  Clip all 4 corners to reduce bulk in that area.

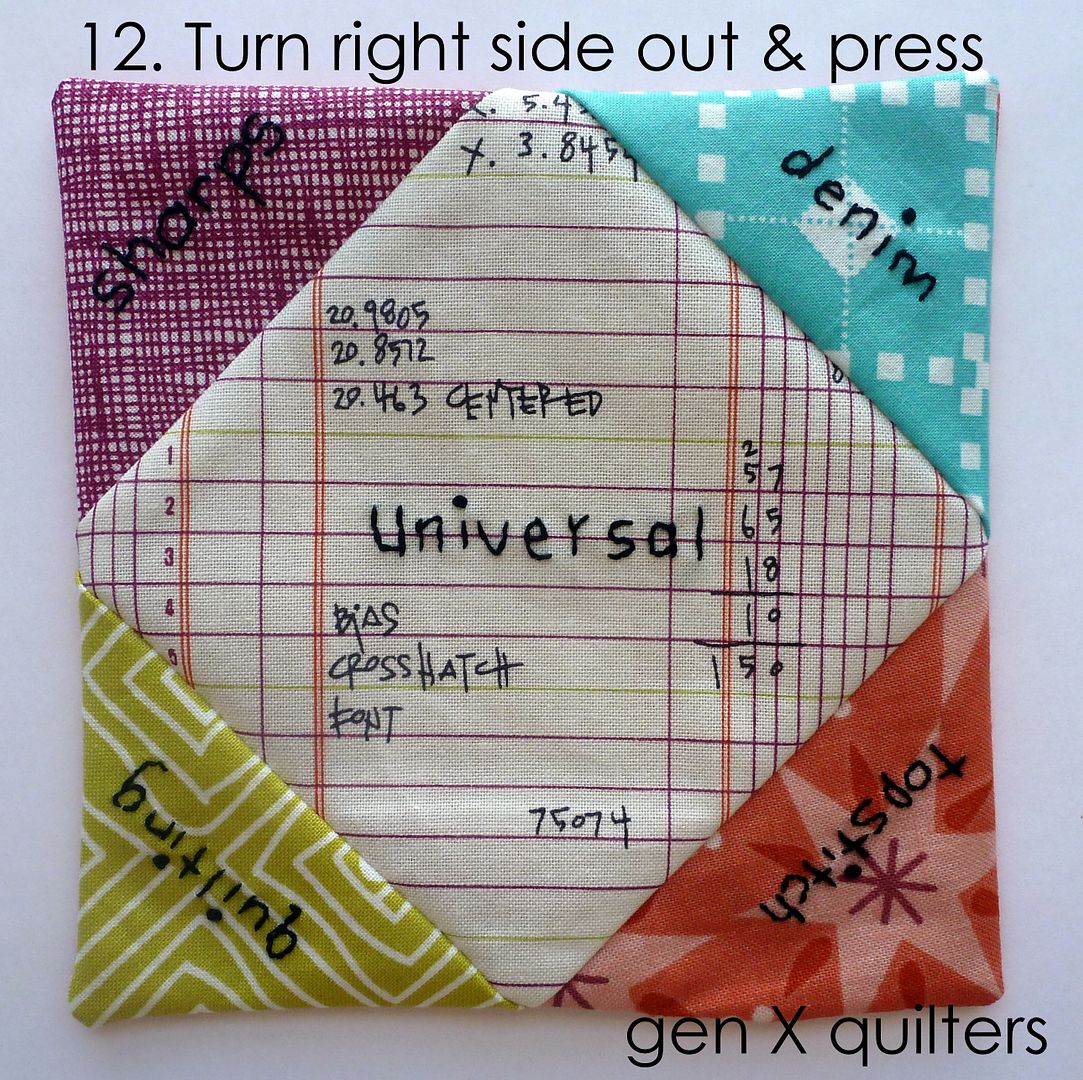
12.  Turn the pincushion right sides out through the small opening.  Give it a good press.

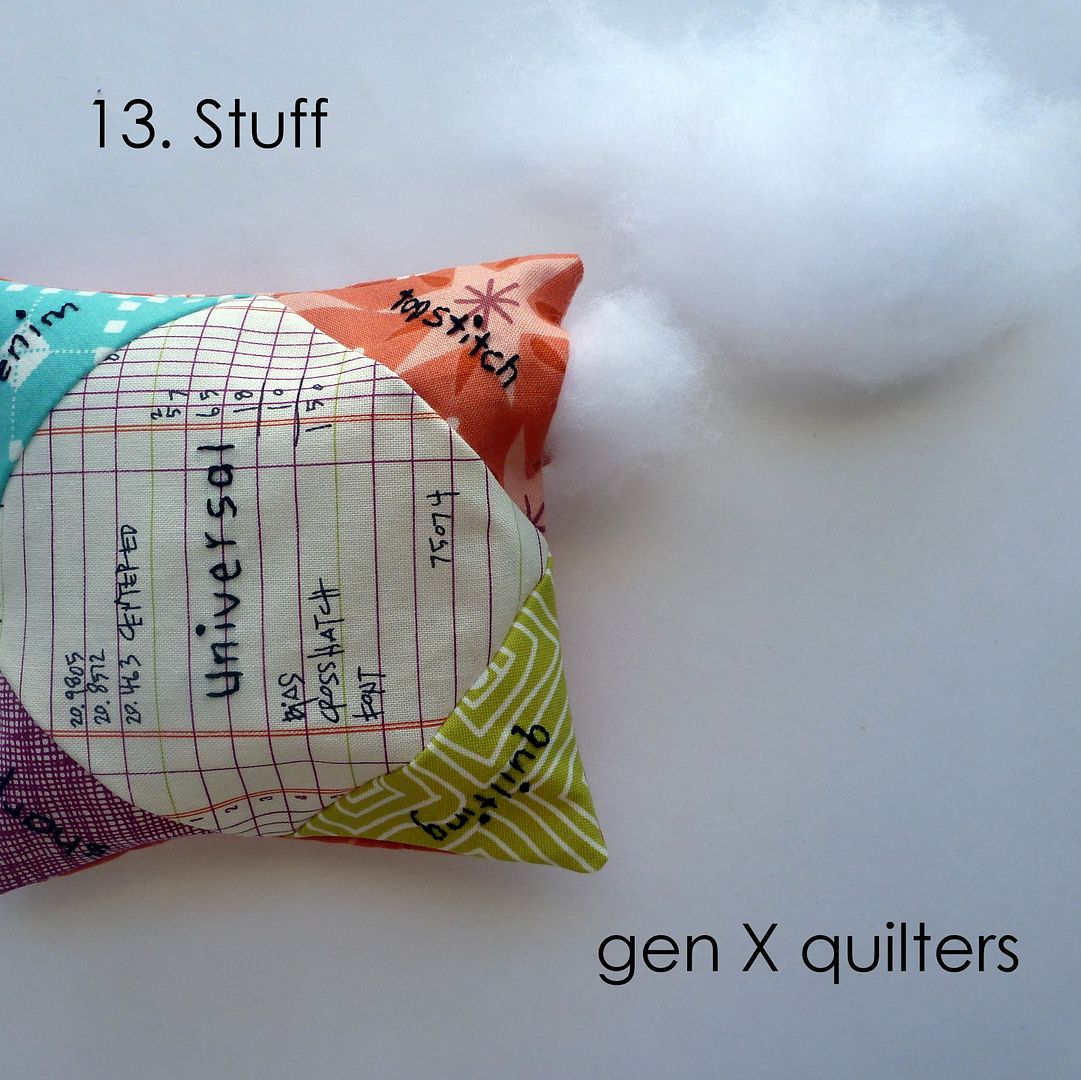
13.  Stuff and puff the cushion! (to your desired fullness of course)  Then hand sew the opening closed.

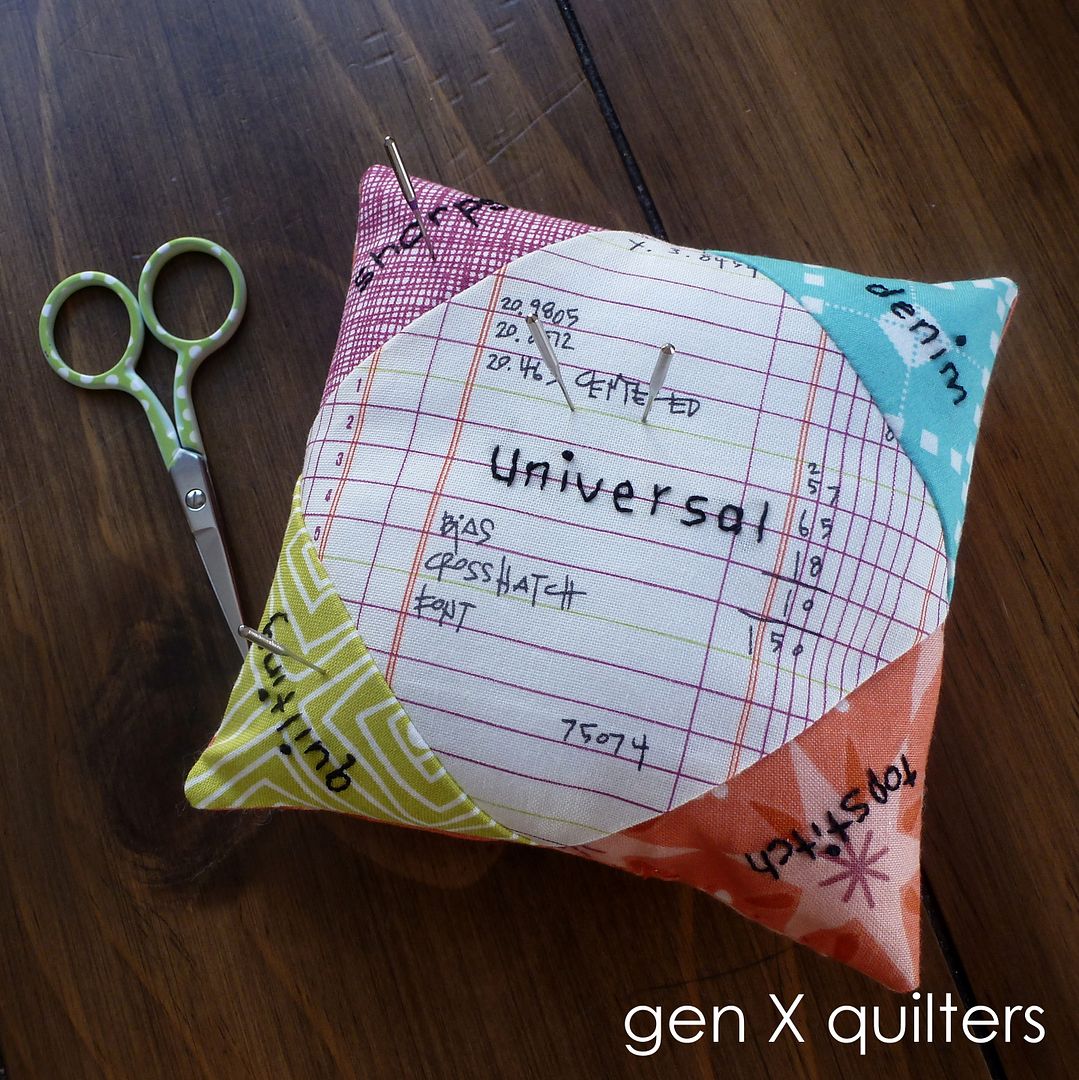
And there you have it!  I hope this helps you sort out and store your slightly used needles.  You can use a special pin as a marker to indicate which needle is currently in your machine.