10-Minute Sewing Project: How to Sew a Lanyard

Lanyard Tutorial cover

Who doesn't love a quick and easy project?  I sure do!  And since I needed to replace the lanyard I had, I thought I'd do a quick tutorial for you all.  You'll probably spend more time choosing what fabric to use than actually making this lanyard.

Materials.
  • 3 3/4" x width of fabric (wof) strip*
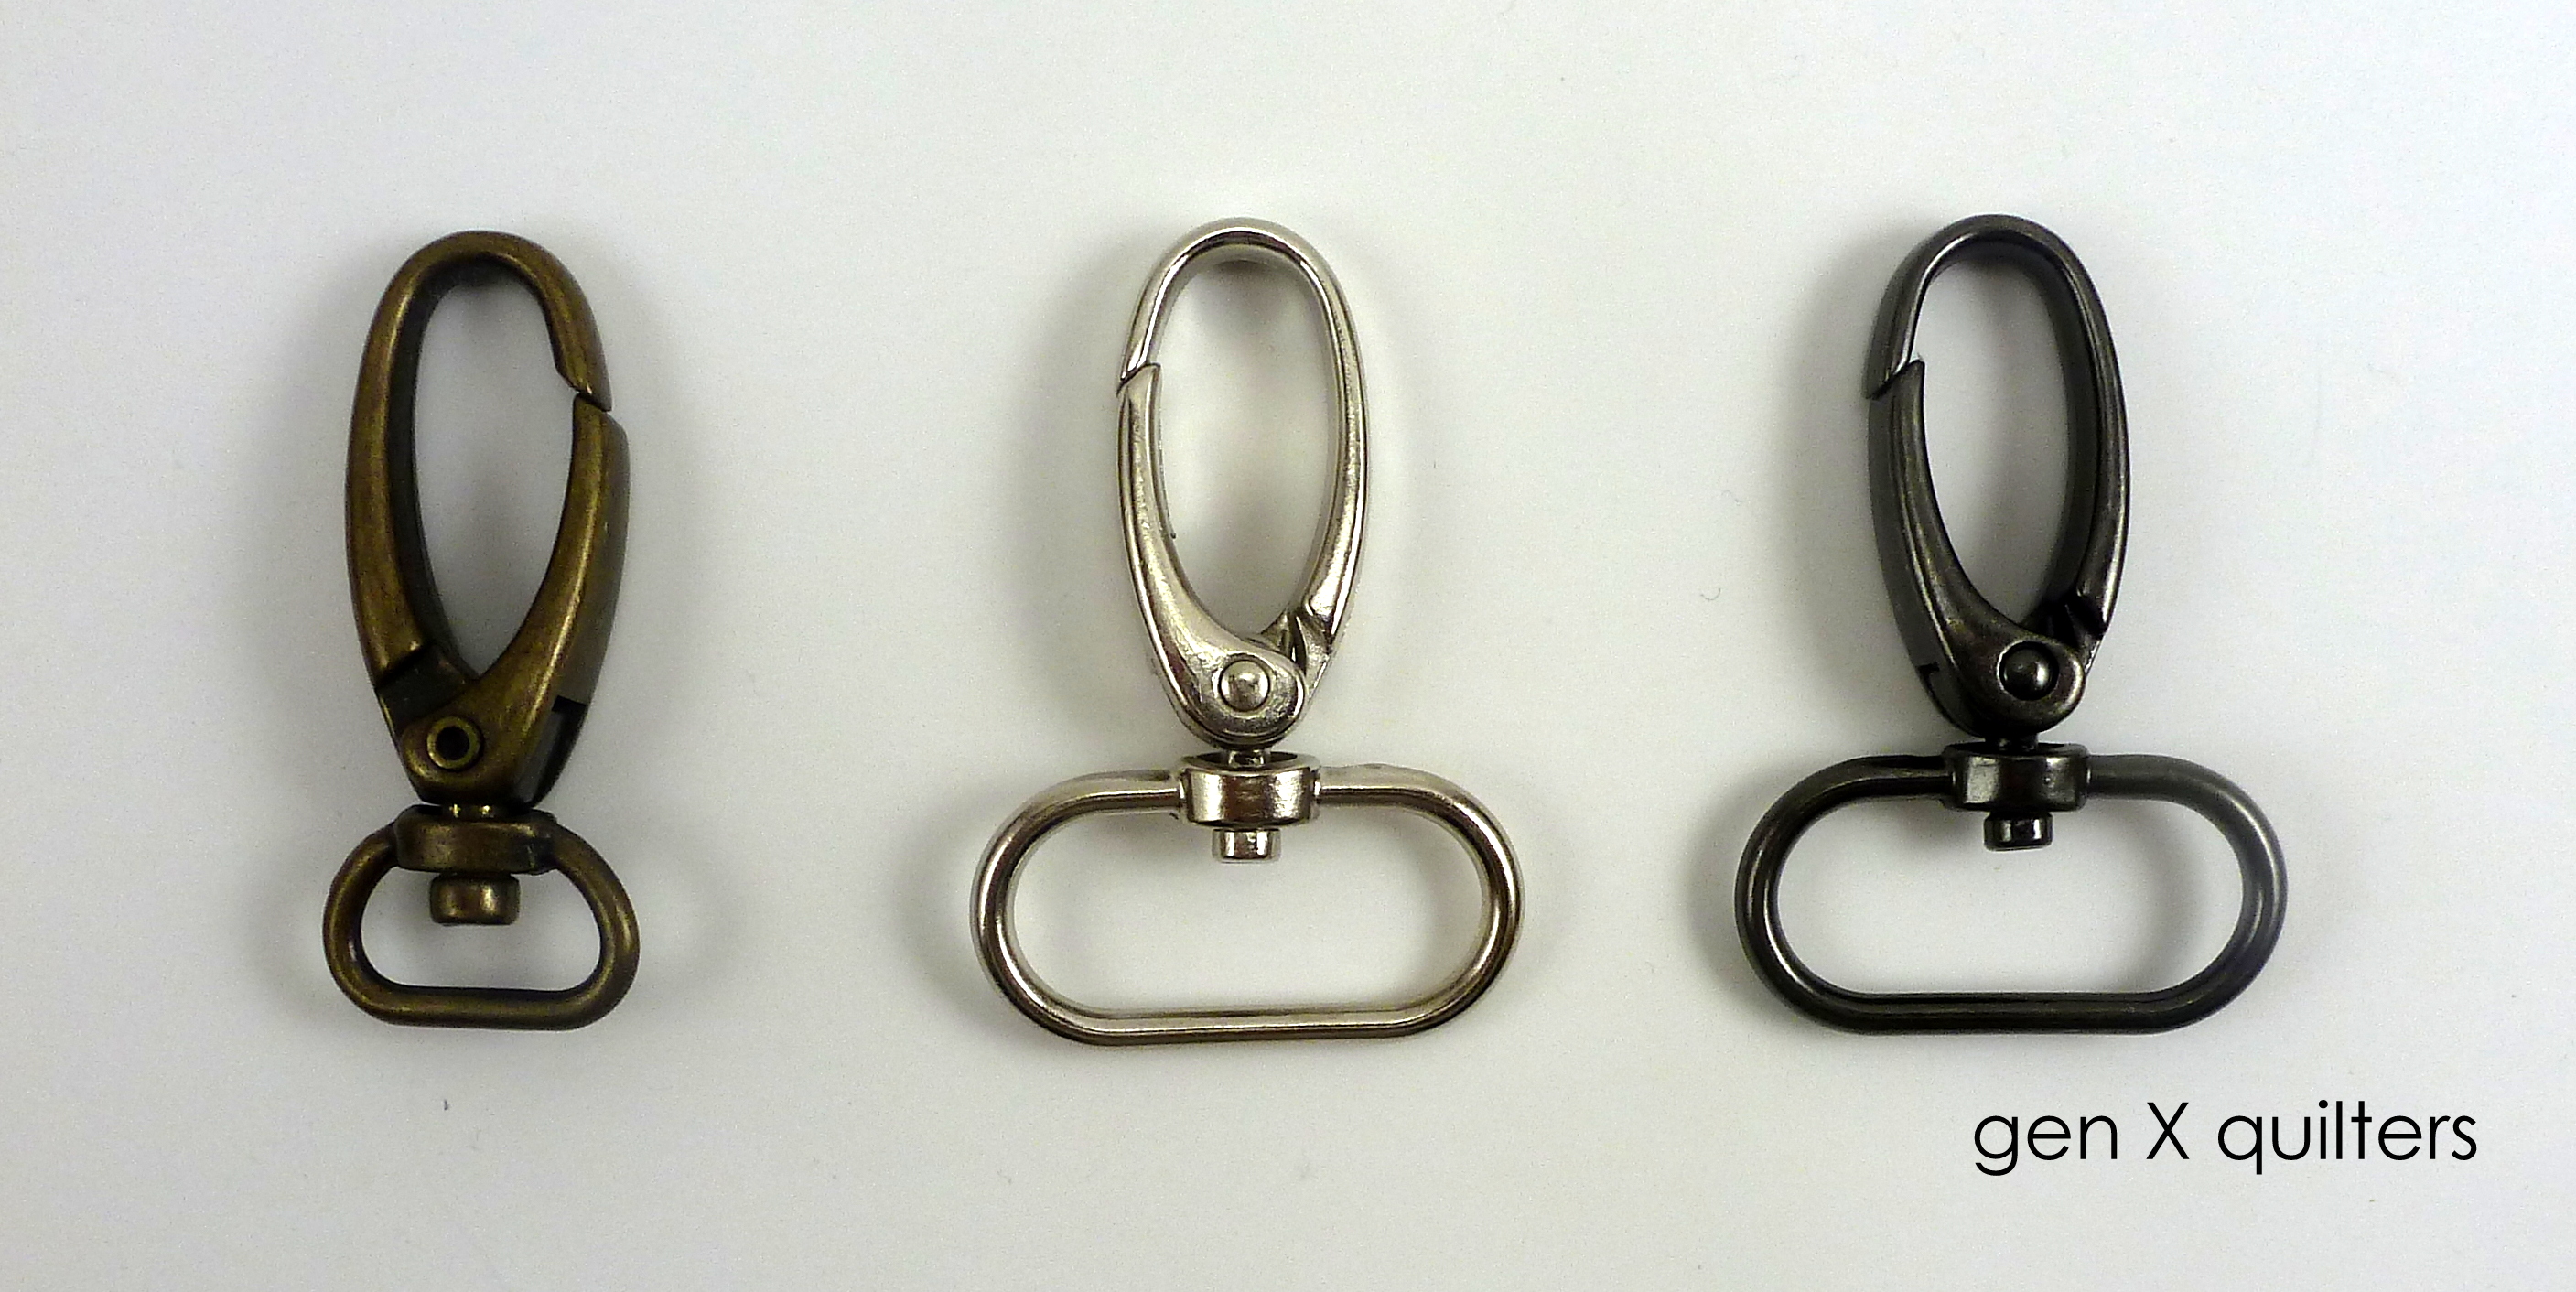
  • 1" swivel hook
  • coordinating thread
*The width of the fabric strip will depend upon the size of the swivel hook.  I am using a 1" hook, pictured on the right and middle below.  If you are using a smaller hook (pictured left), cut your fabric strip 1/4" less than 4 x the width of your hook.  (i.e. for the 1" inch hook, 4 * 1" - 1/4" is 3 3/4".  for a 1/2" hook, 4 * 1/2" - 1/4" is 1 3/4".)


lanyard tutorial hardware

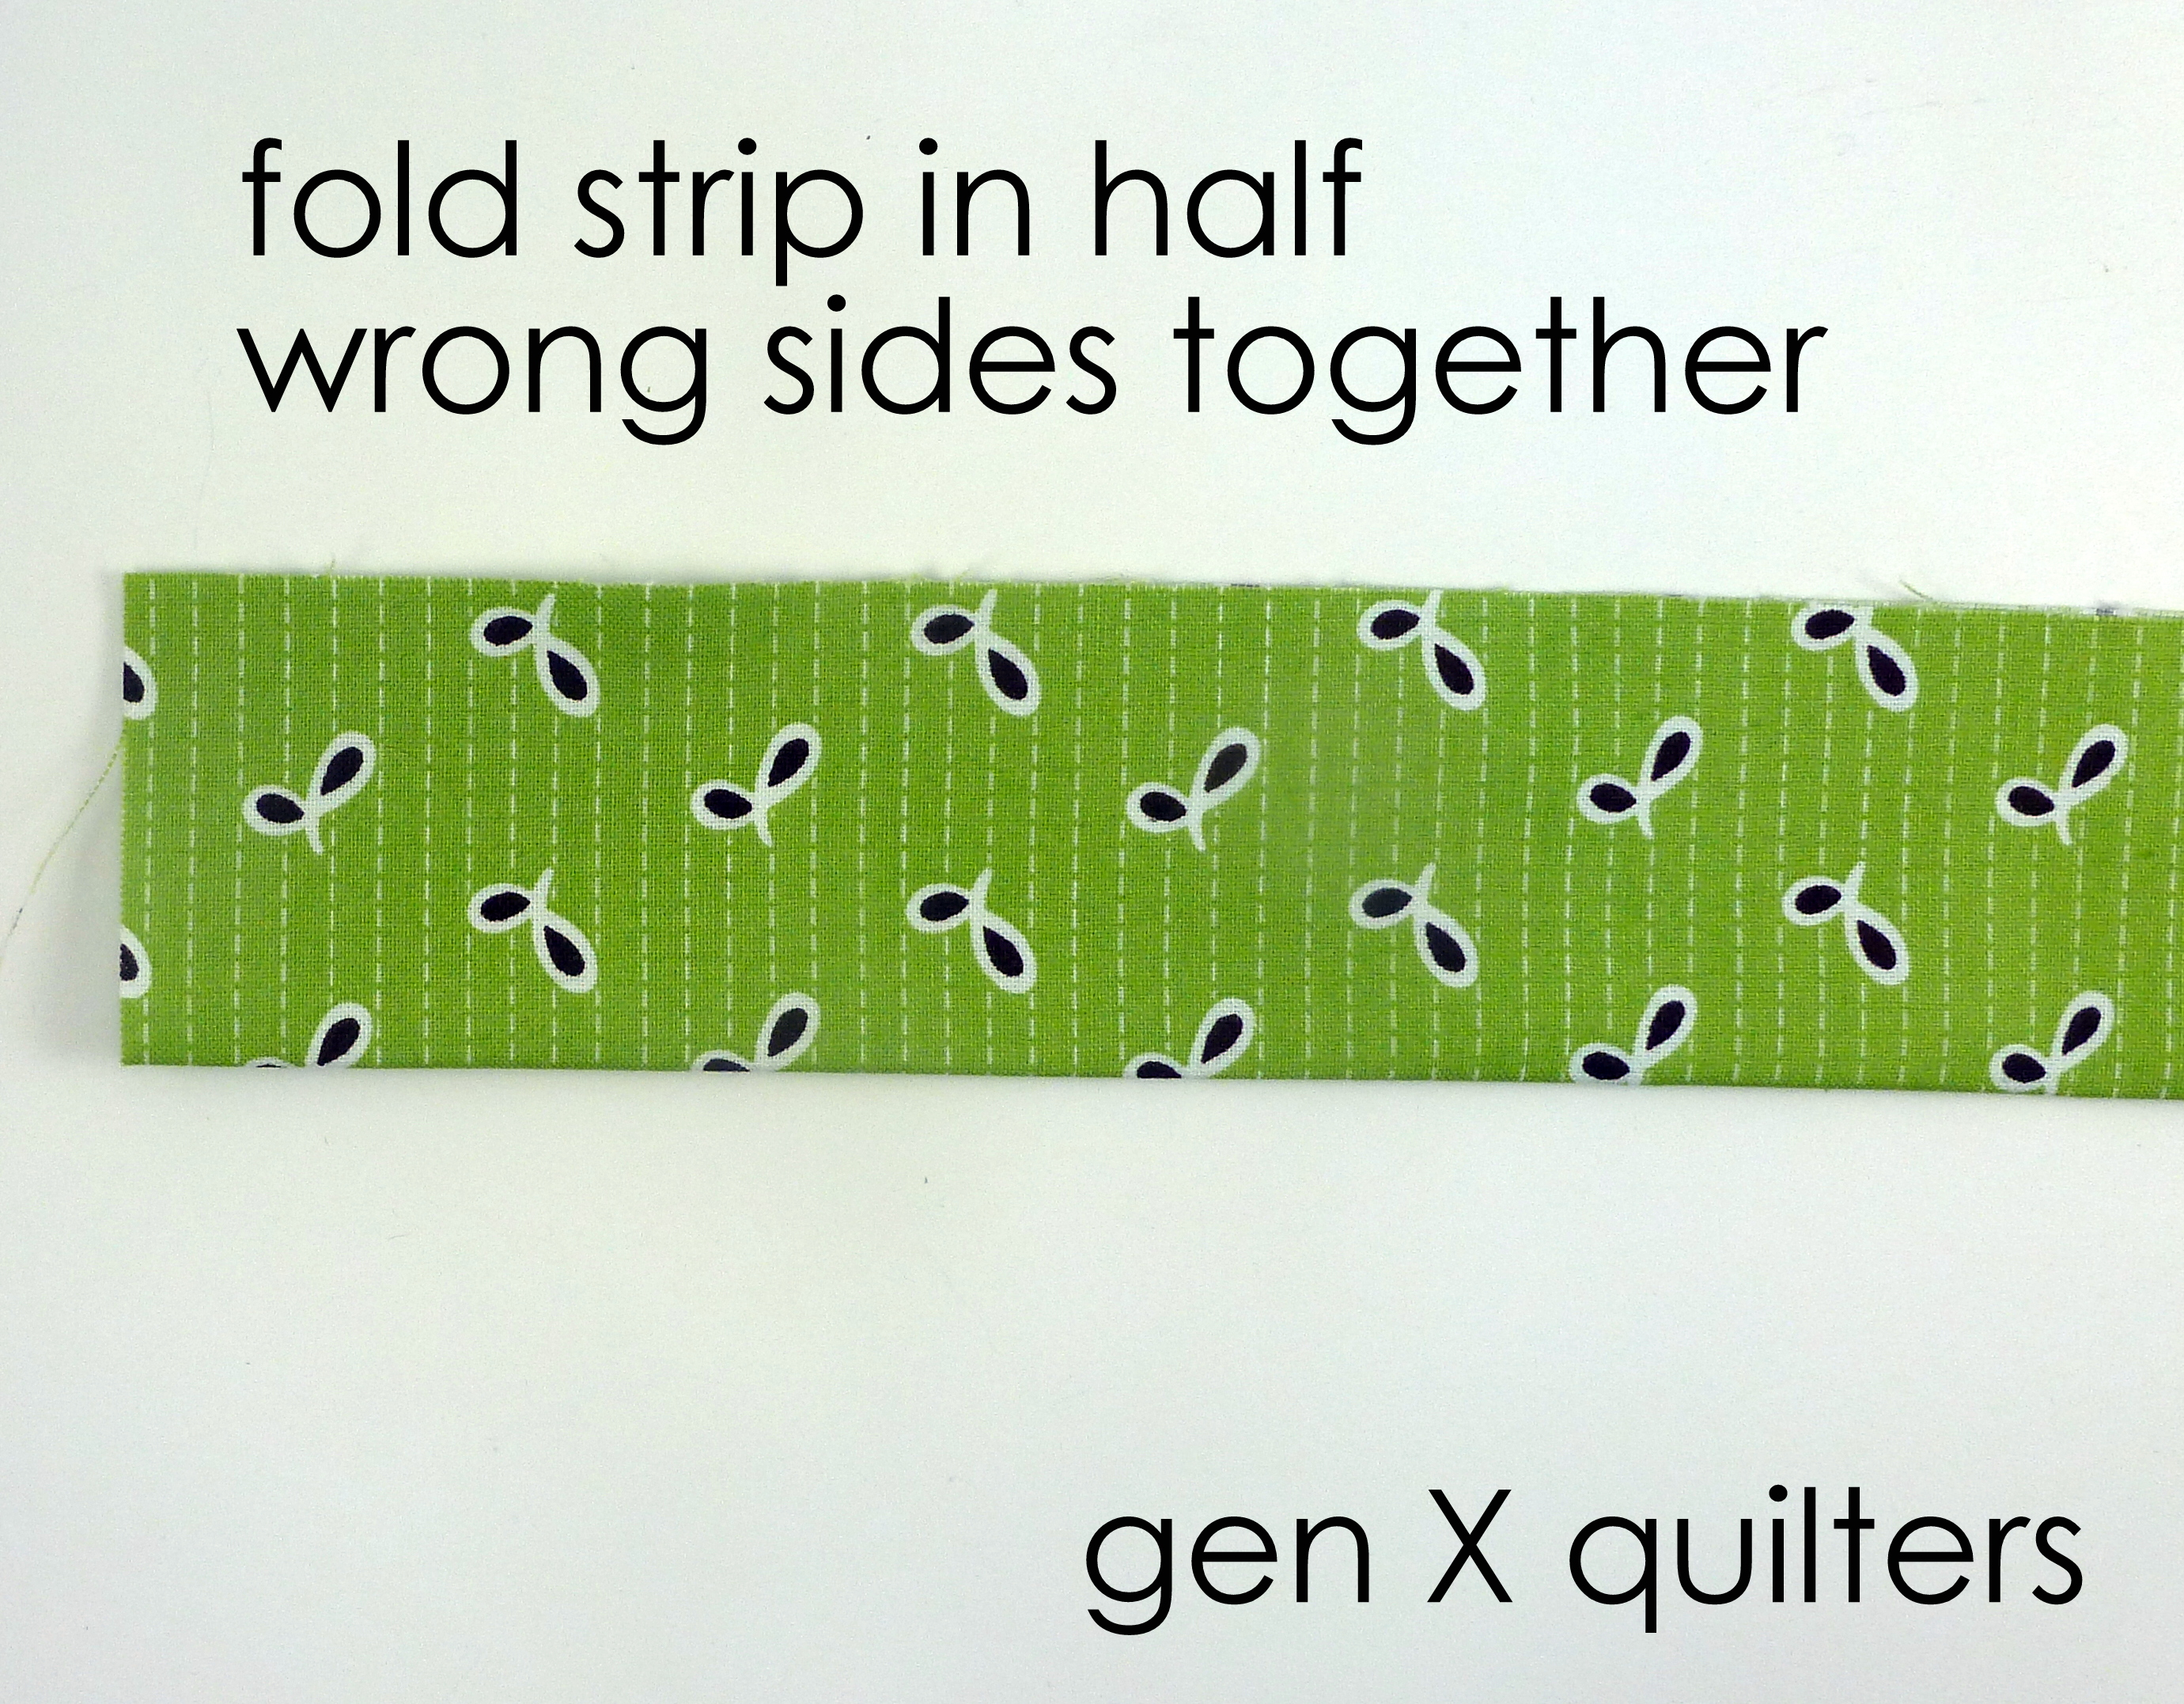
1.  Fold the fabric strip in half lengthwise and press to create a crease in the center of the strip.
lanyard tutorial step 1

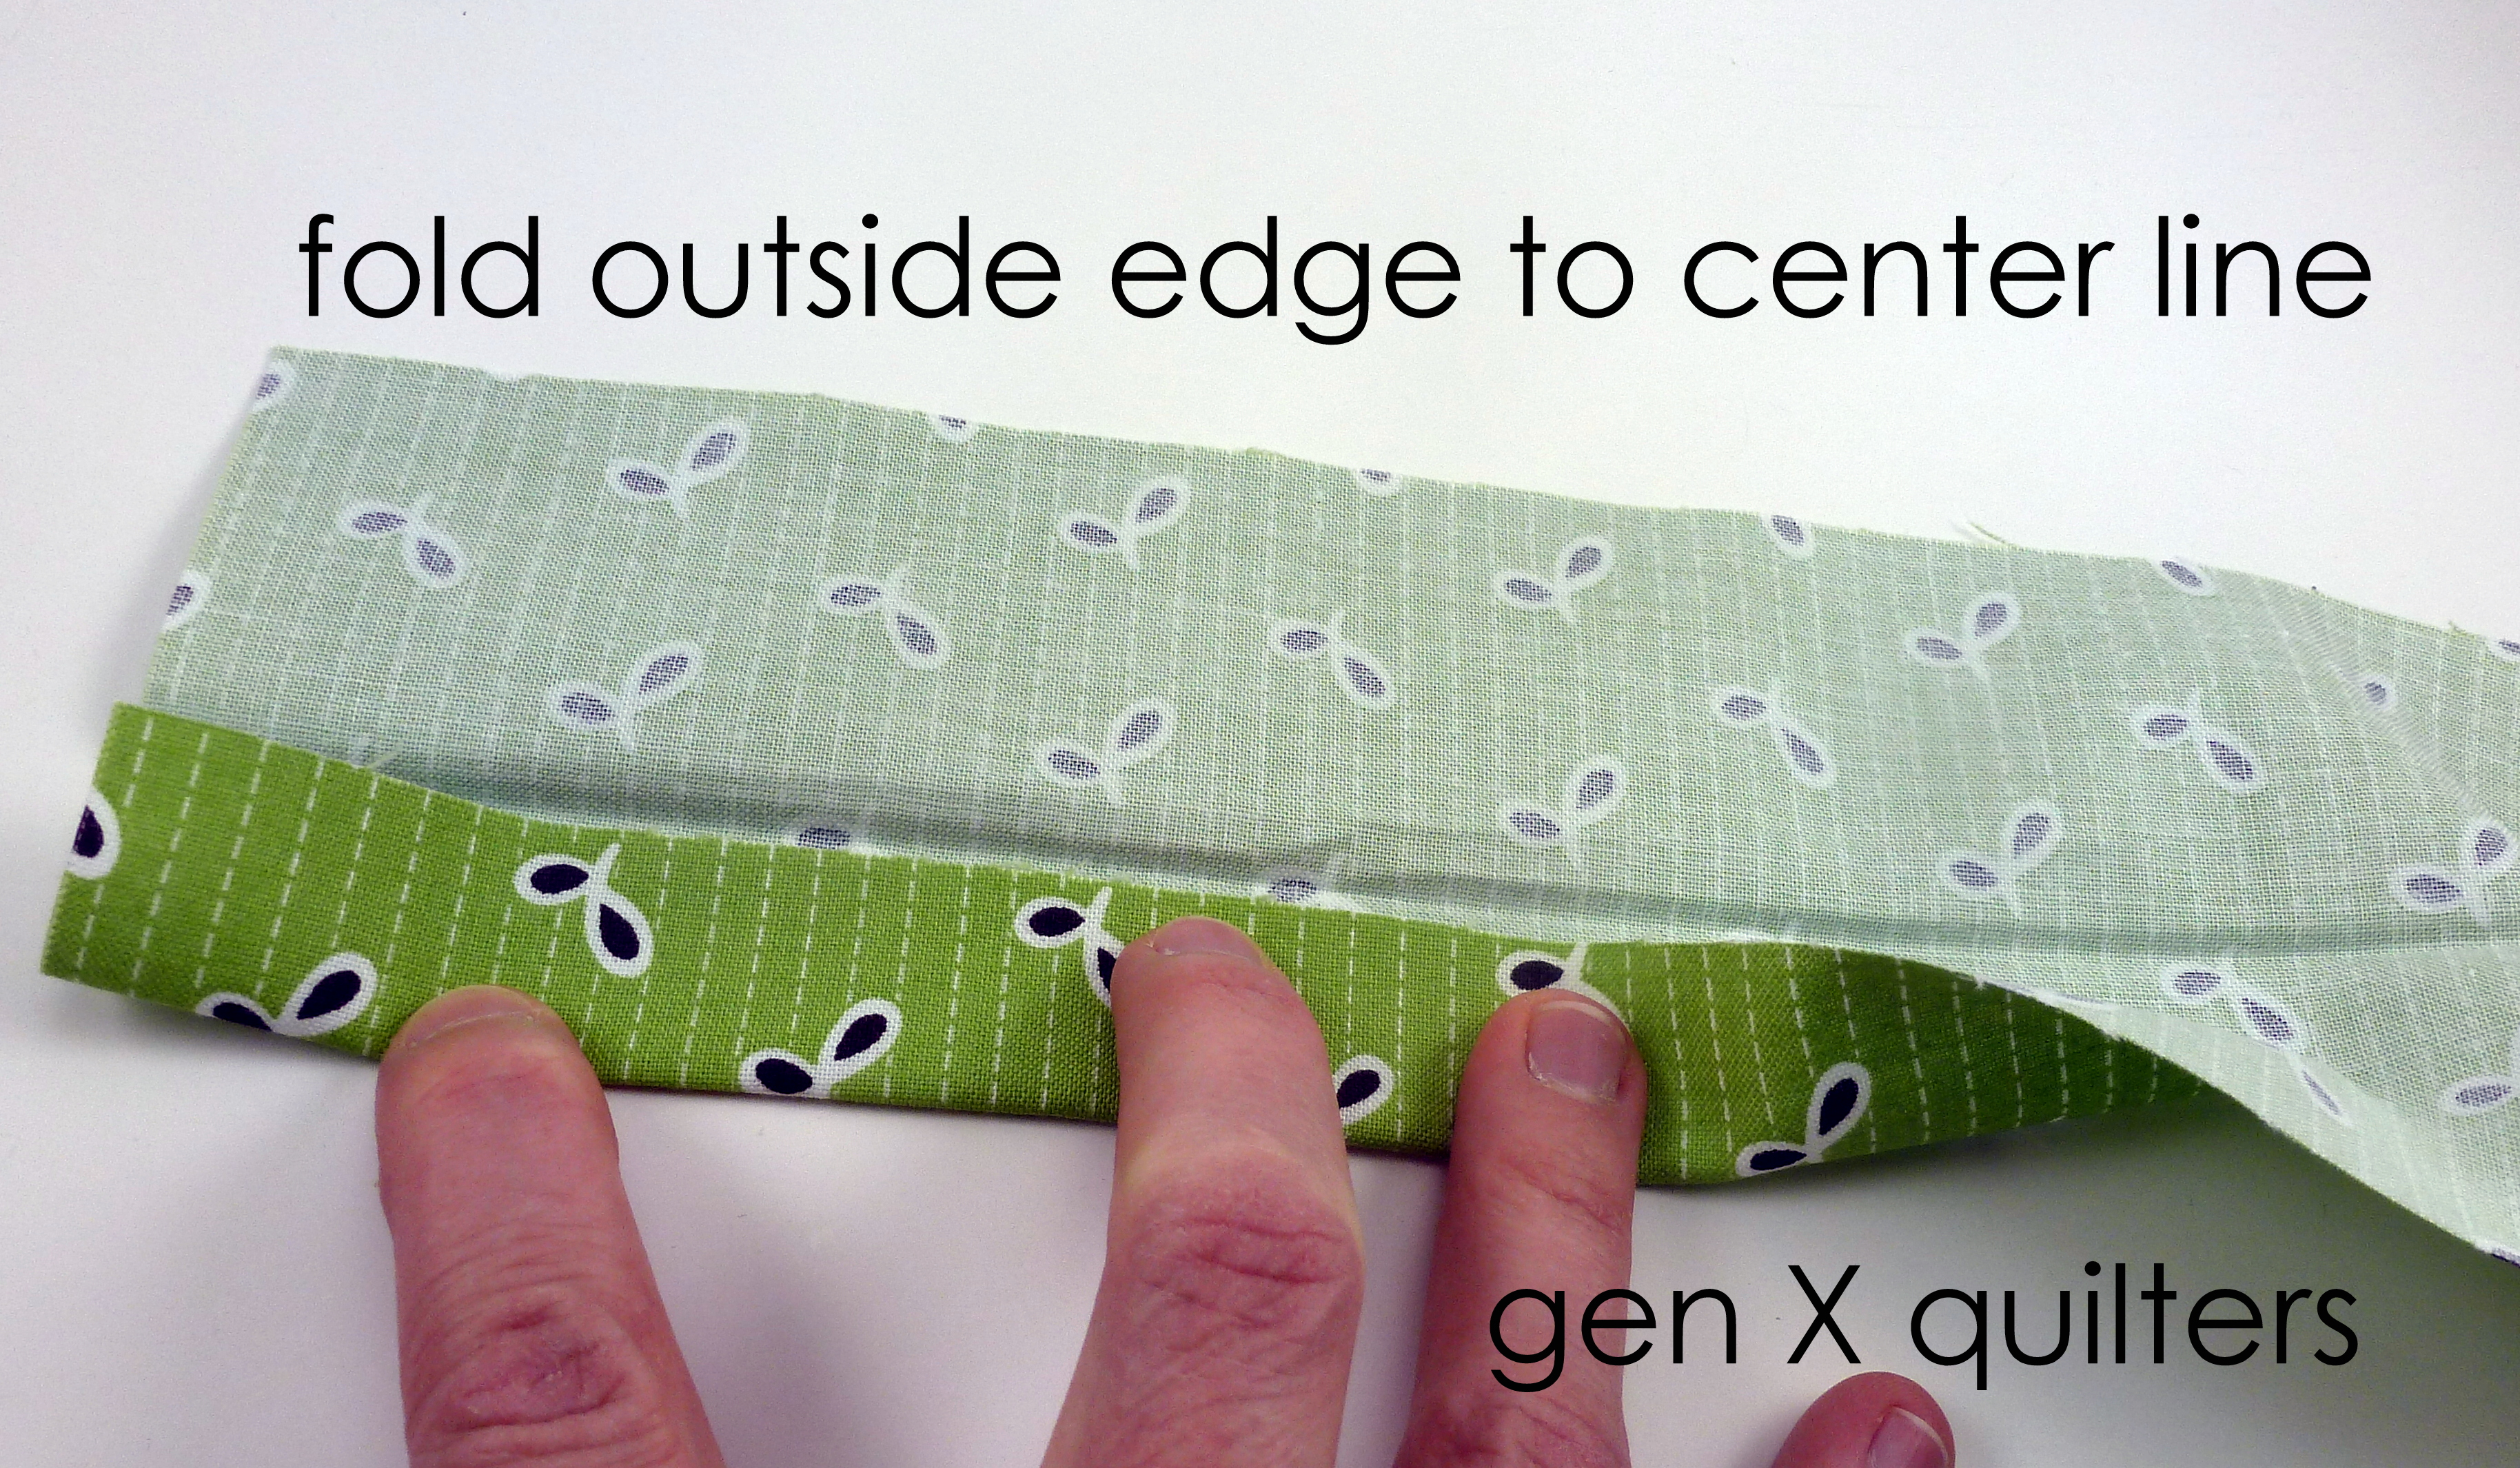
2.  Open the strip.  This time fold the outside edge to meet the pressed center line.  Press.
lanyard tutorial step 2

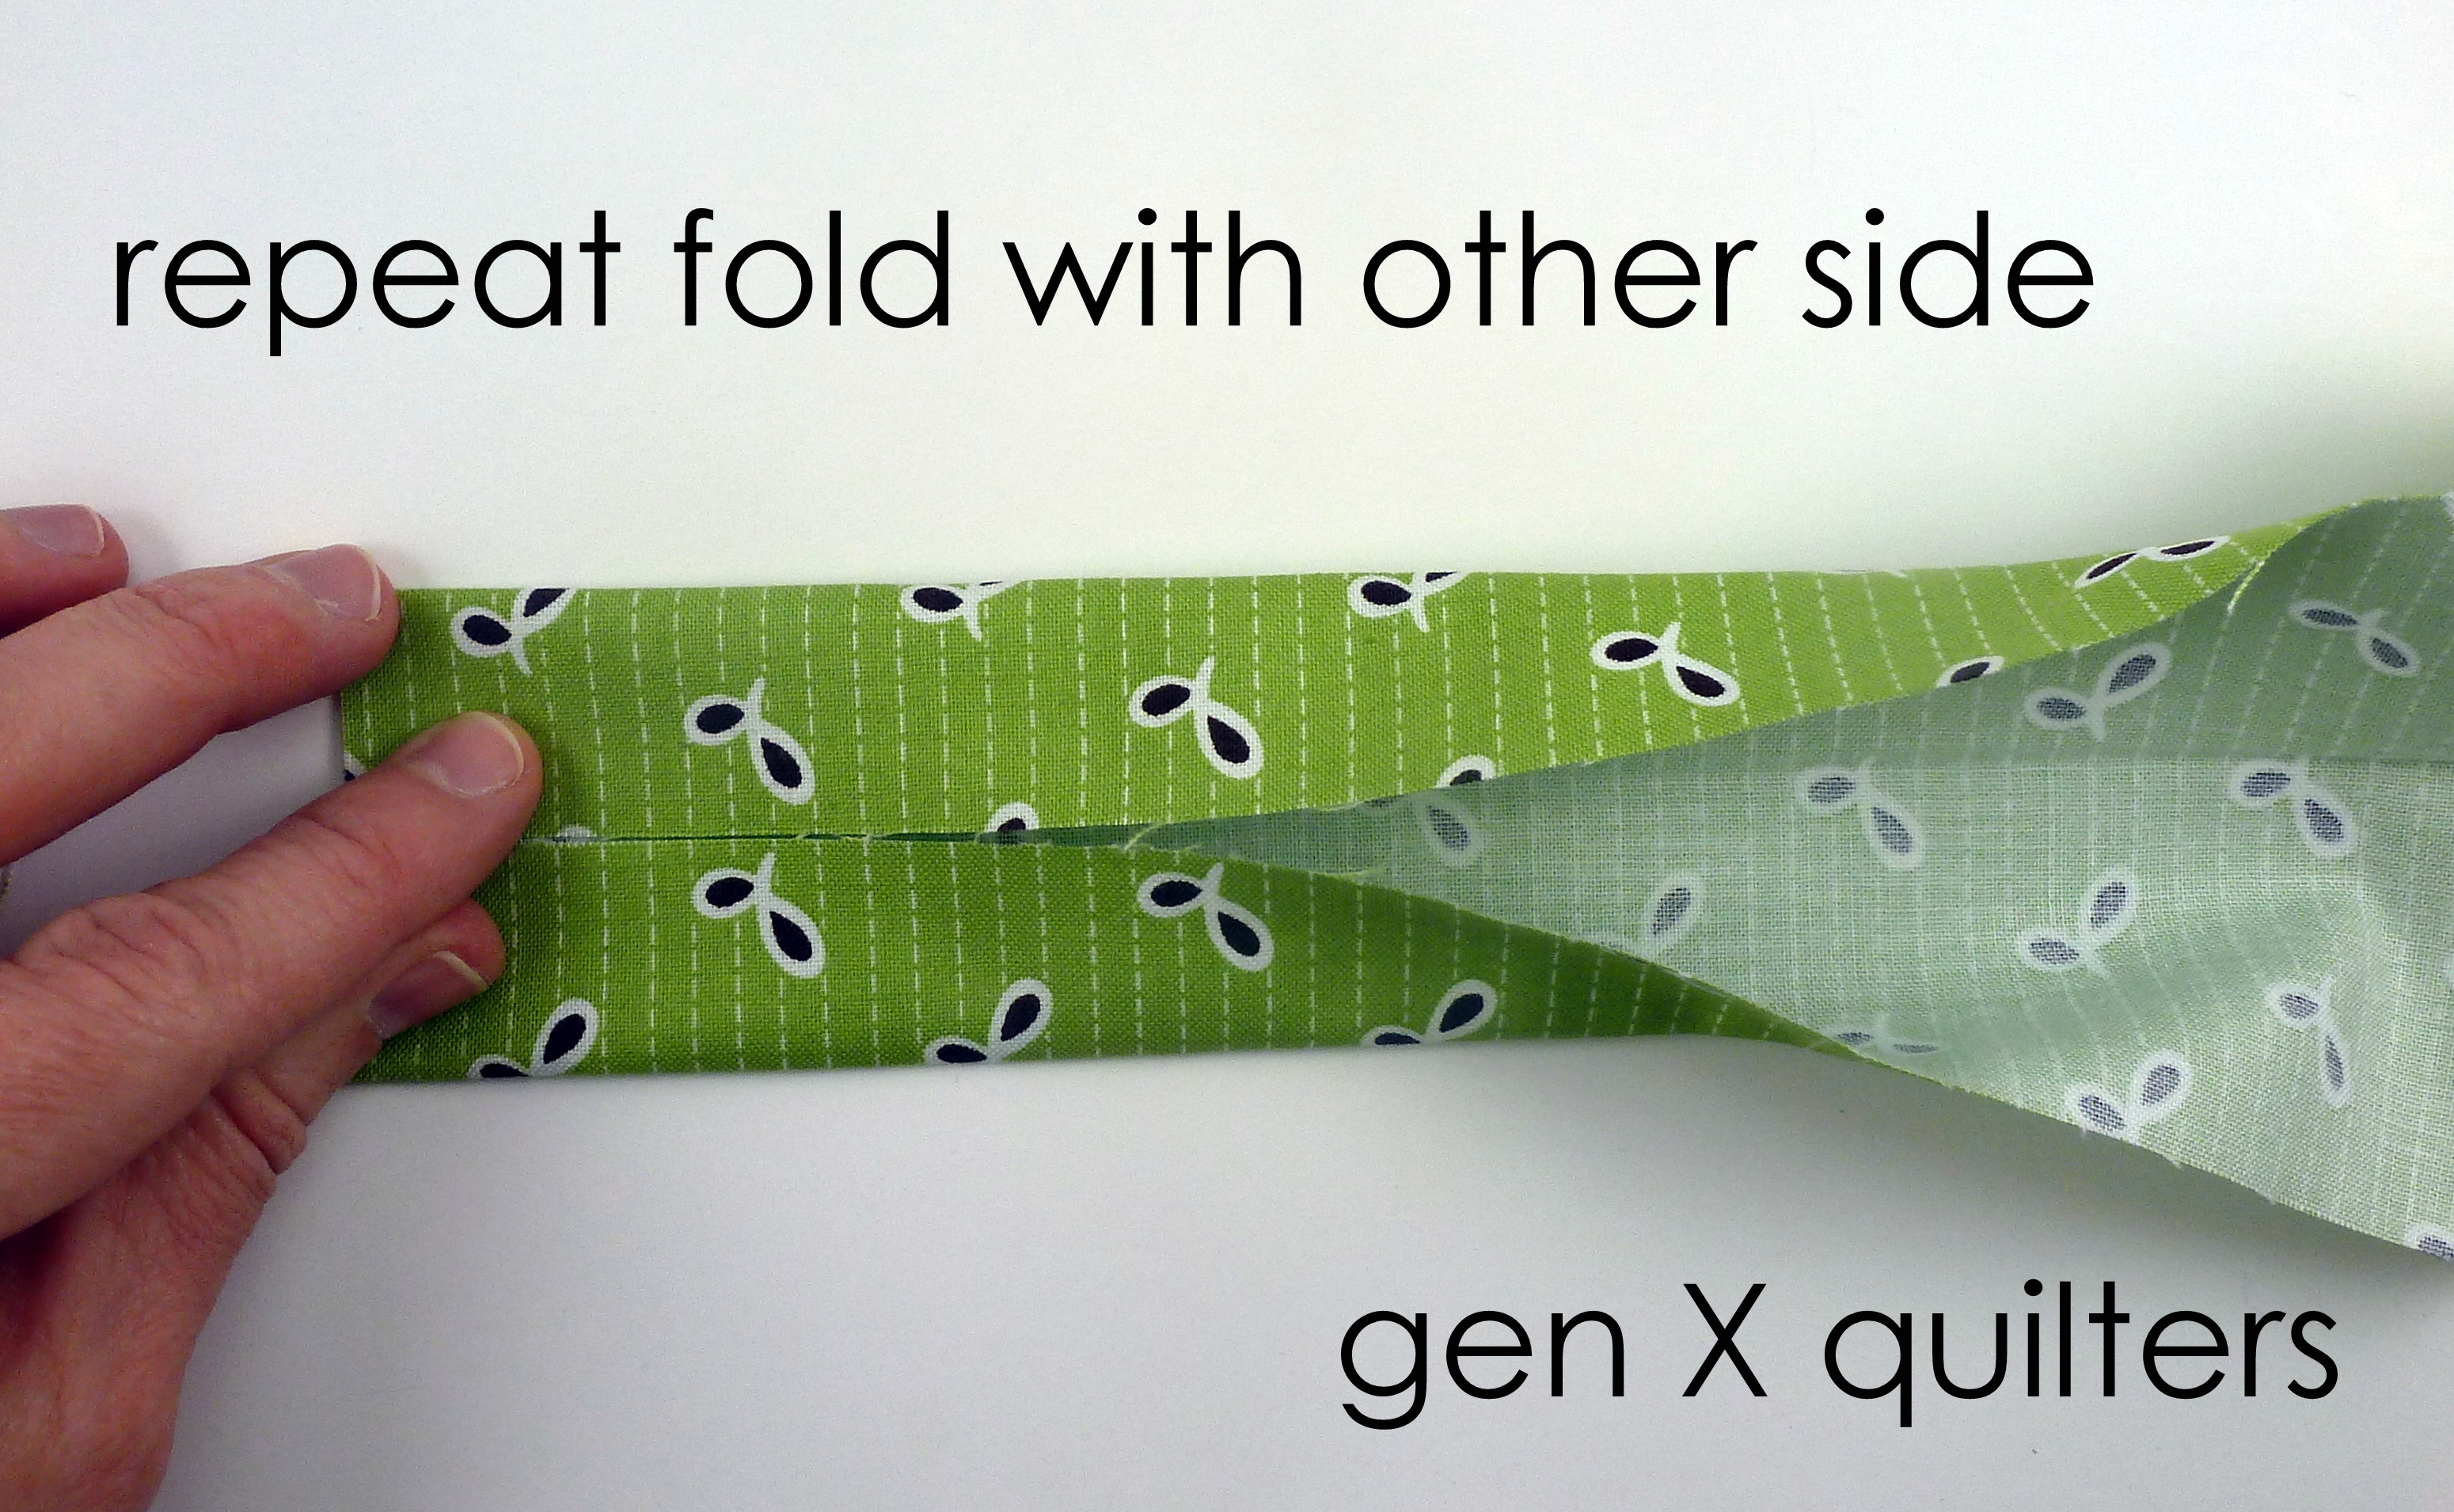
3.  Repeat this process of folding and pressing with the other side of the fabric strip.
lanyard tutorial step 3

4.  Fold the unit from step 3 in half again, tucking the unfinished edges inside the strip.  Press and pin in place.
lanyard tutorial step 4

5.  Topstitch 1/8" away from the edge on both sides of the strip.
lanyard tutorial step 5
This will give the strip a nice finished look.
lanyard tutorial step 6

6.  Fold the strip in half, bringing the two raw edges together.  Slip the swivel hook over the two raw ends.  Next, fold the ends over first 1/2" to tuck raw edges inside, then fold again 1 1/2".
landyard step 7 collage
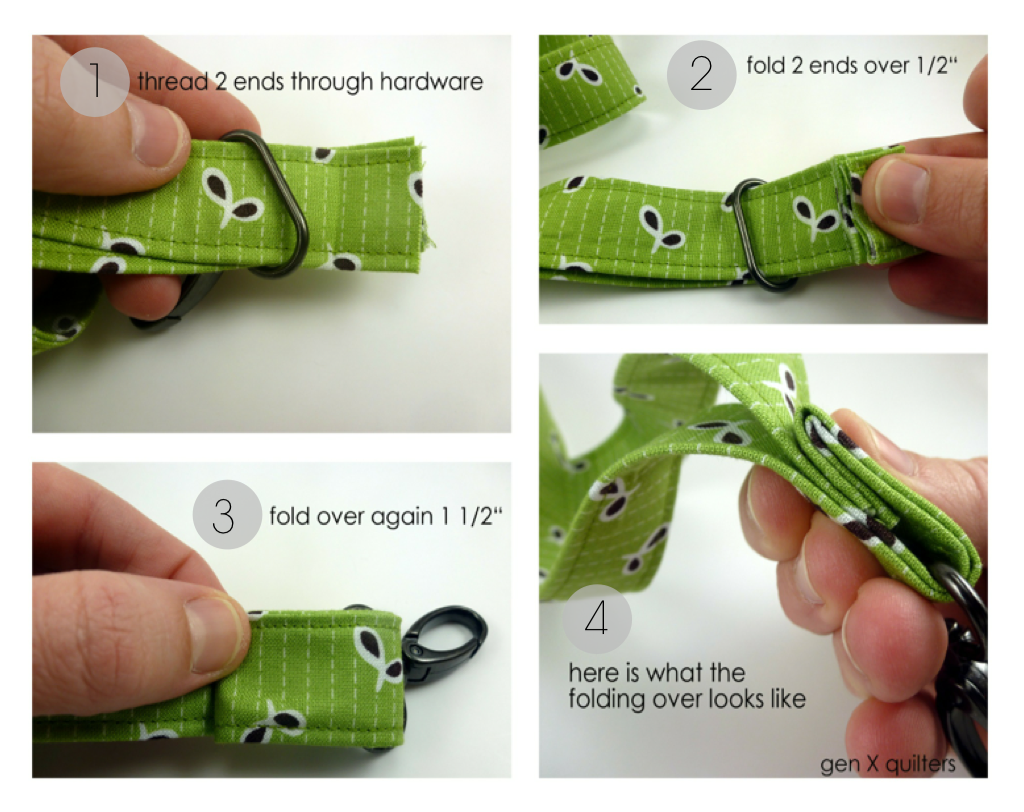
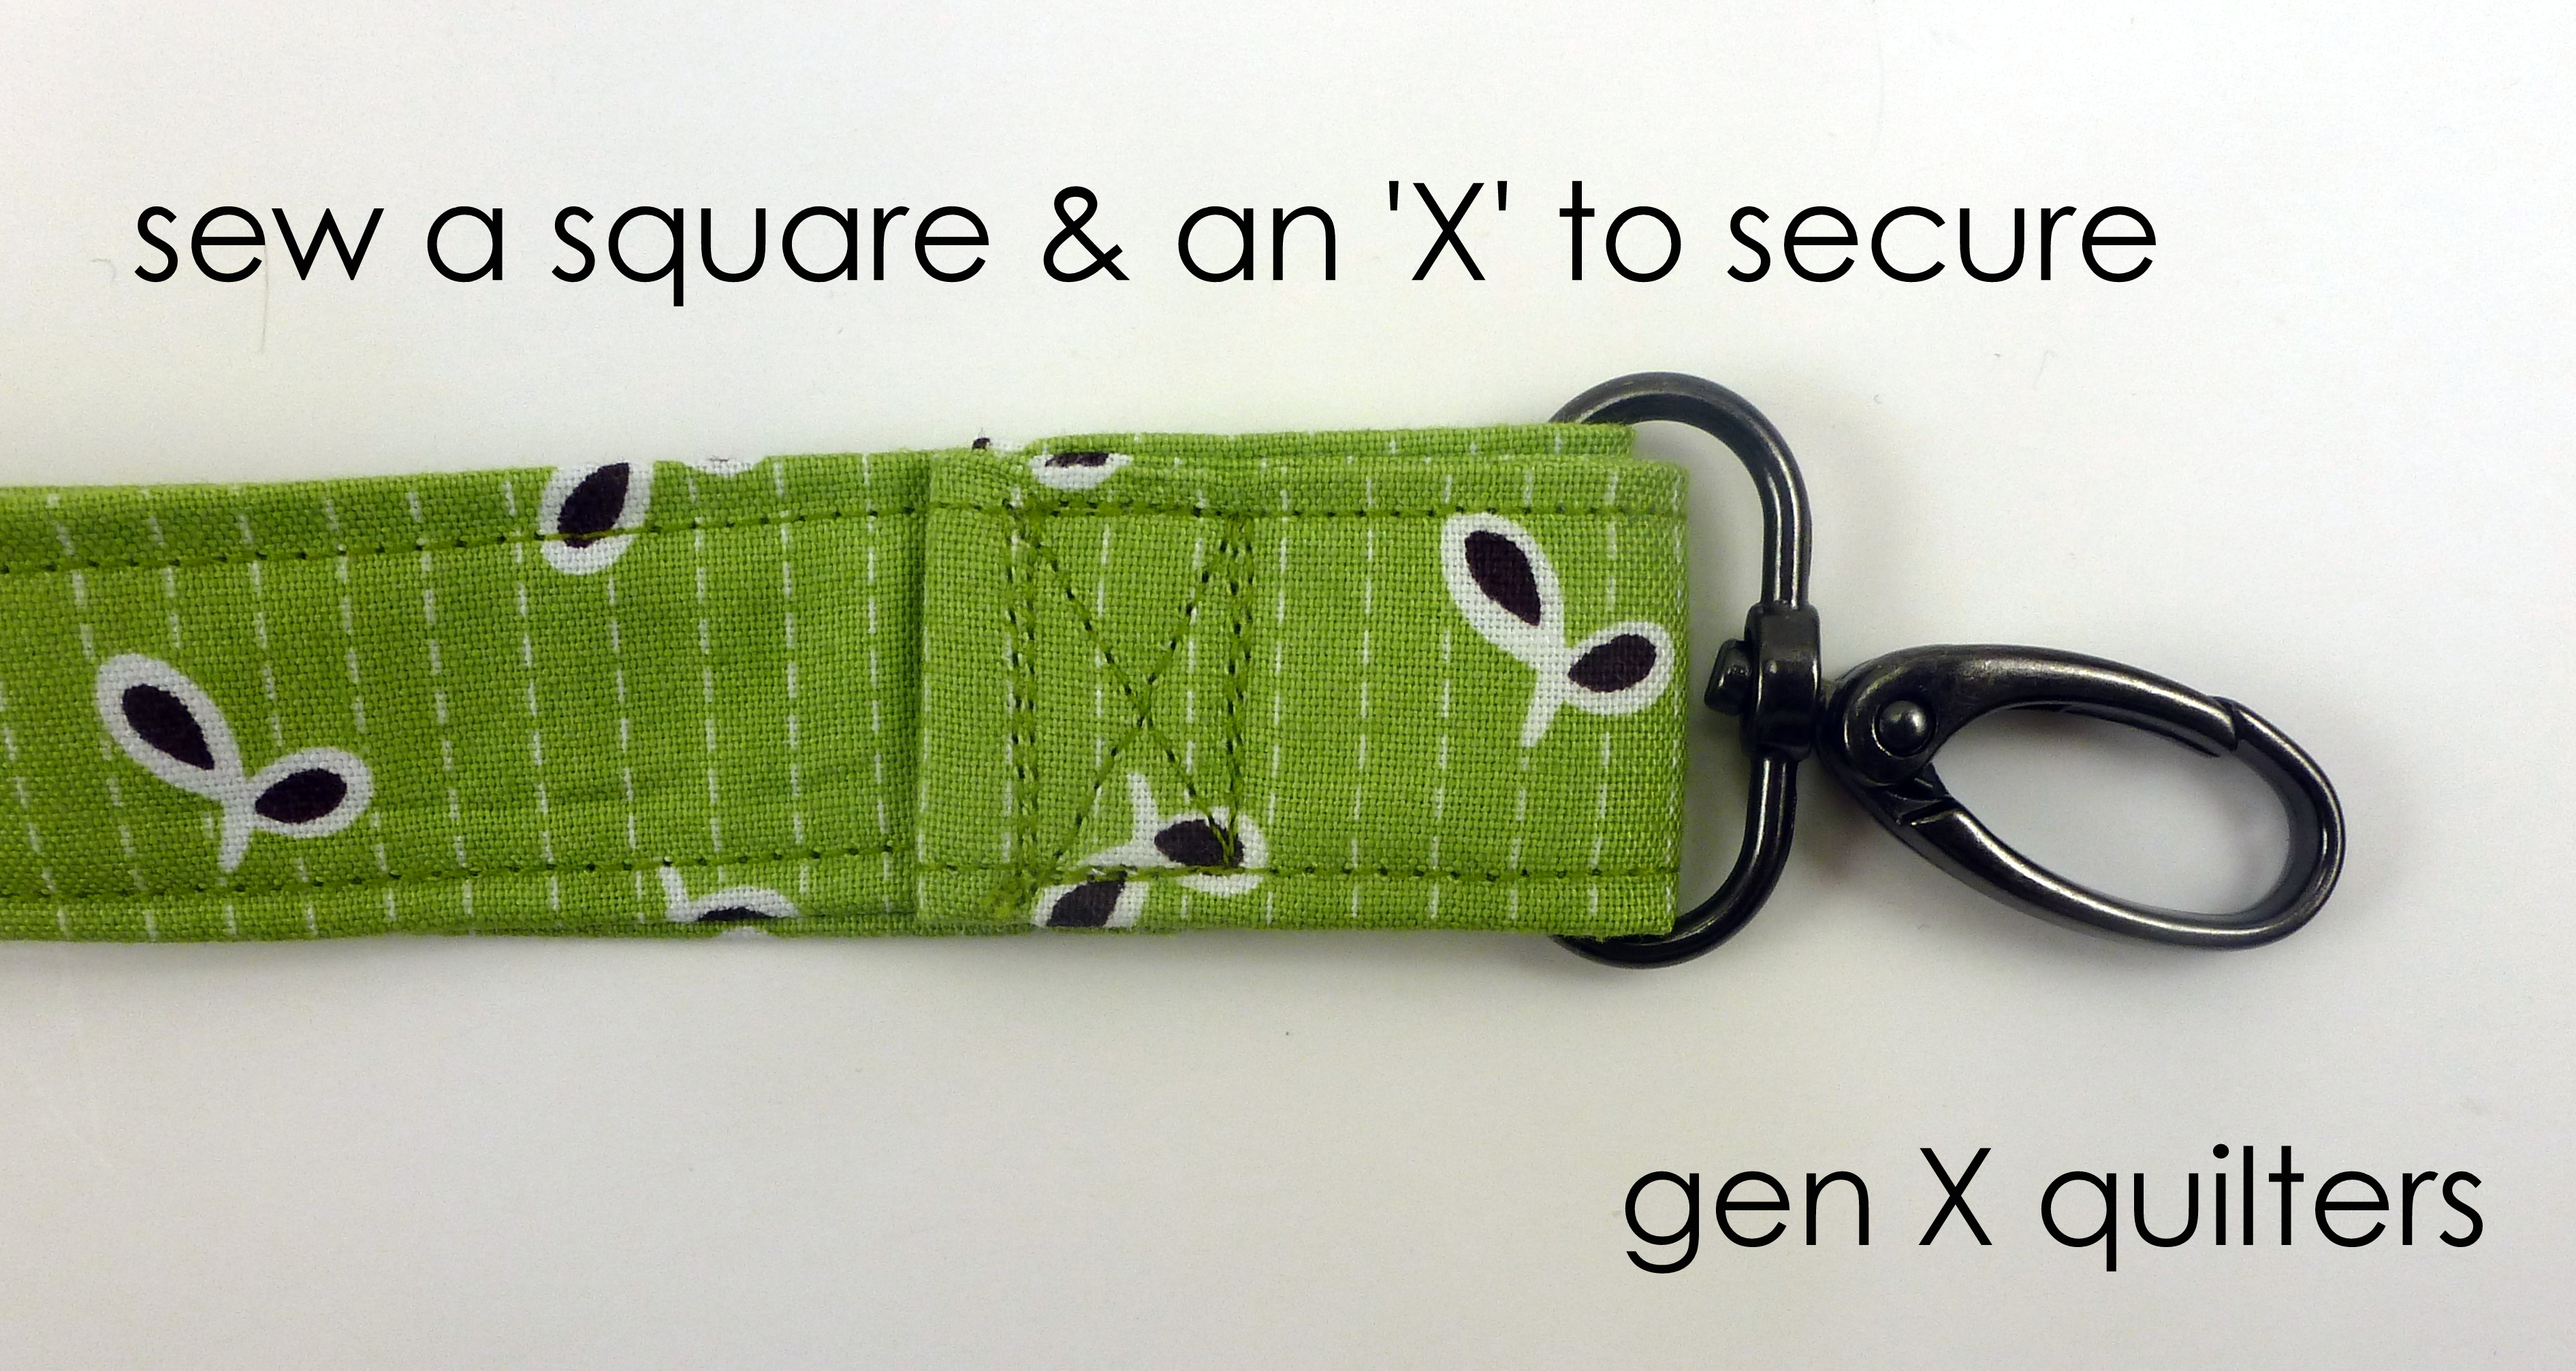
7.  Stitch a square with an X through it to secure.  **Hint** if you have a walking foot for your sewing machine, it really helps sew over all the layers.  I definitely recommend it for this step.
lanyard tutorial step 8

And here I am modeling my new lanyard...  I use one all the time for my keys.  It seems I am always carrying 8 things in the parking lot - a baby, grocery bags, holding a little hand, packages, our to-go order from Panera, etc. - and knowing exactly where my keys are and having them easily accessible makes life a little easier for me... :)
lanyard tutorial step 9

Hope you enjoy this quick project!

Sisters' Ten Block of the Month Background Fabric Cuts

Sisters Ten BOM 1
Before we cut too deep into our background fabric, I thought it best to make our large cuts for the negative space in the middle of the quilt.  And while we are at it, we should also set aside the sashing pieces.  This way we can be sure our large cuts are safe and make the best use of leftover pieces of background fabric in other blocks. Actually, we should have done this first, please forgive me.  I am learning too when it comes to running a BOM.  

Cutting Instructions for Sashing and Negative Space.

For 12" blocks.
  • Cut (5) 1 1/2" x 77 1/2" of Fabric A (background).
  • Cut (12) 1 1/2" x 12 1/2" of Fabric A (background).
  • Cut (2) 12 1/2" x 26 1/2" of Fabric A (background).
  • Cut (2) 12 1/2" x 39 1/2" of Fabric A (background).
  • Cut (2) 12 1/2" x 40 1/2" of Fabric A (background).

For 9" blocks.
  • Cut (5) 1 1/2" x 59 1/2" of Fabric A (background).
  • Cut (12) 1 1/2" x 9 1/2" of Fabric A (background).
  • Cut (2) 9 1/2" x 20 1/2" of Fabric A (background).
  • Cut (2) 9 1/2" x 30 1/2" of Fabric A (background).
  • Cut (2) 9 1/2" x 31 1/2" of Fabric A (background).
{This post is a part of the Sisters' Ten Modern Block of the Month Club.  Sisters' Ten BOM will post new blocks the first Friday of the month in 2013.  Feel free to join in the fun with us anytime throughout the year.}

Sisters' Ten Modern BOM March Block: School Girl's Puzzle

Sisters Ten BOM 1
And we're back with the March block for the Sisters' Ten Modern Block of the Month Club!  This is the block that is featured in the BOM button up there and it is called School Girl's Puzzle.
March - School Girl's Puzzle blog cover


Cutting Instructions.

For 12" blocks.
  • Cut (5) 4 1/8" x 4 1/8" squares of Fabric A (background).
  • Cut (2) 4 1/8" x 4 1/8" squares of Fabric B.
  • Cut (3) 4 1/8" x 4 1/8" squares of Fabric C.
  • Cut (2) 3 1/2" x 3 1/2" squares of Fabric C.
  • Cut (4) 3 1/2" x 3 1/2" square of Fabric D.  
March sisters' ten fabrics

For 9" blocks.
  • Cut (5) 3 3/8" x 3 3/8" squares of Fabric A (background).
  • Cut (2) 3 3/8" x 3 3/8" squares of Fabric B.
  • Cut (3) 3 3/8" x 3 3/8" squares of Fabric C.
  • Cut (2) 2 3/4" x 2 3/4" squares of Fabric C.
  • Cut (4) 2 3/4" x 2 3/4" square of Fabric D.  


Piecing Instructions.
*Use a scant 1/4" on all seam allowances. See the Scant Rant series for details.

1.  Make Half-Square Triangle (HST) units with Fabric A and Fabric B.  Use (2) Fabric A squares and the (2) Fabric B squares to make (4) total Half-Square Triangle units using the method in this tutorial.  The HSTs should be trimmed down to:
                      12" blocks:  3 1/2" (unfinished size).
                        9" blocks:  2 3/4" (unfinished size).

2.  Make Half-Square Triangle (HST) units with Fabric A and Fabric C.  Use the remaining (3) Fabric A squares and the (3) larger Fabric C squares to make (6) total Half-Square Triangle units using the method in this tutorial.  The HSTs should be trimmed down to: 

                      12" blocks:  3 1/2" (unfinished size).
                        9" blocks: 2 3/4" (unfinished size).

3.  Layout the Half-Square Triangle Units, remaining Fabric C squares and Fabric D squares as shown below.
 
school girls puzzle 1

4.  Sew each of the four rows together, alternating the direction the seams are pressed.
Sisters' Ten BOM March School girls puzzle 2


5.   Sew the rows together and you're done!

Sisters' Ten BOM  MarchSchool girls puzzle 3

6.   Make (2) blocks.  They may be identical blocks or made from differing fabrics for a scrappier look.  This month try to think a little more about value when selecting your block fabrics.  As you can see when the blocks are side by side, I chose to give each block a different feel.  Block 1 on the left has a more subtle and understated feel.  Block 2 on the right is loud and pulls your attention.  I also substituted another fabric in the brown center blocks for visual interest in Block 2.  Play with the color a bit.  Sampler quilts often have a lot going on - so sometimes finding a place for the eye to rest can be tricky.  It will be fun to play with the block arrangement later if you have blocks with differing values in them.

sisters' ten March block 1Sisters Ten March Block 2
Fabric is Alison Glass for Andover, Lucky Penny with background Quilter's Linen in Straw by Robert Kaufman.