Tutorial: How To Add Piping to a Pillow


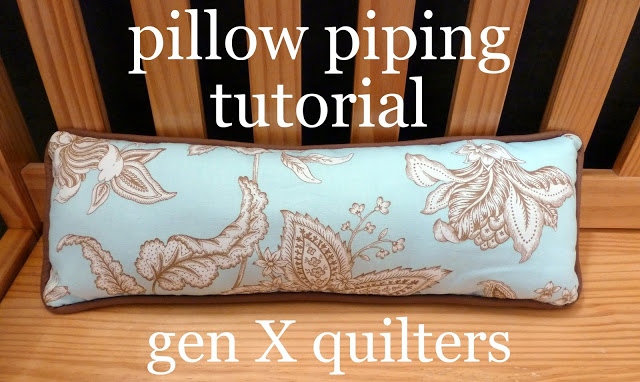
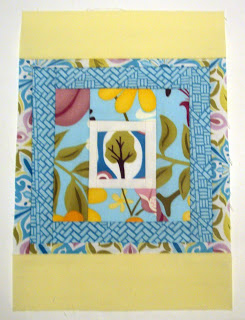
I've piped a couple pillows now and the tutorials I've referenced before didn't explain things how my mind works.  So of course, I thought I'd write my own!  Hopefully, this will help you add the piping with less frustration.  Because in the end, it adds such a professional touch and is worth it!


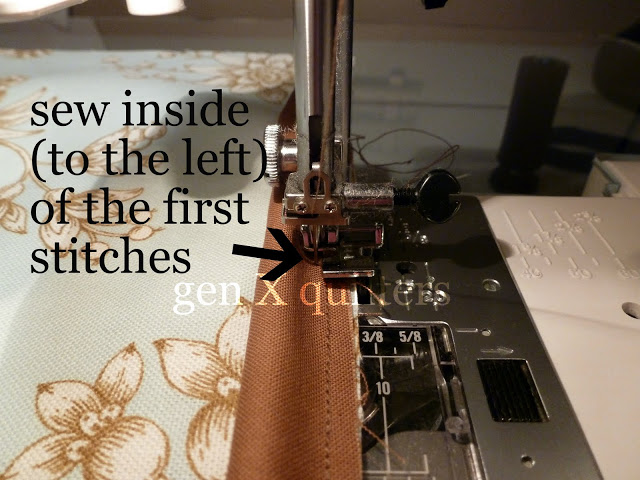
Now, the important thing to realize BEFORE you even begin sewing is that you will end up sewing around the cording three times before your pillow is finished.  In order not to see the previous stitching line, it is important that each consecutive stitch line gets closer to the cording.

So the first line you sew is basically a basting line just to secure the cording inside your fabric strip.  It should be loose, with room to sew 2 more stitching lines inside the original baste.

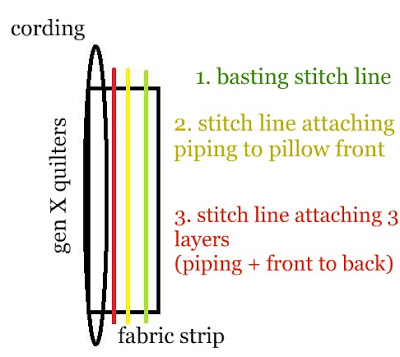
The second stitching line attaches the cording wrapped in fabric to the pillow top.  This stitching line should be inside or to the left of the baste.

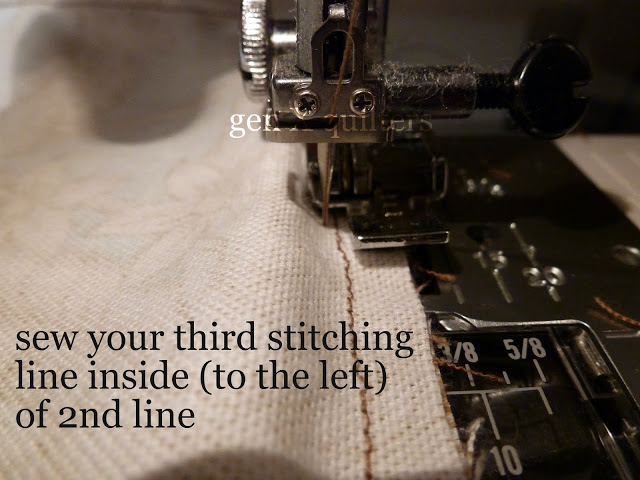
The third stitching line is the last one (!) and attaches the back of the pillow to the front plus piping combo from the previous step.  Again, this third stitching line should be inside or to the left of the other stitching line.

Clear as mud?  Let me show you with a little more detail and photos.  Just remember, each consecutive stitch line should be closer and closer to the cording to prevent seeing any unwanted stitches.


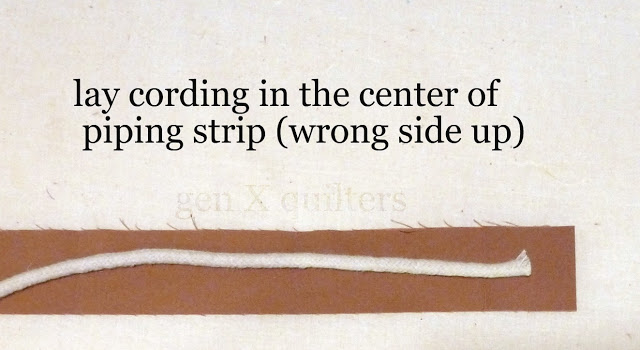
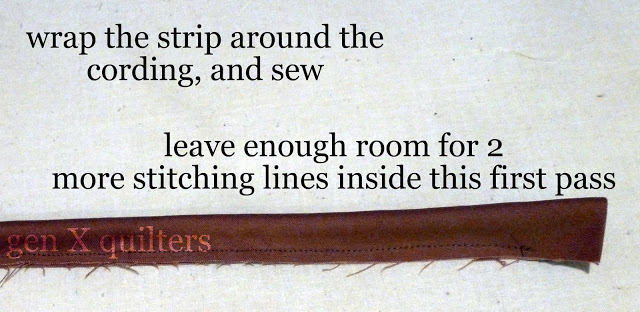
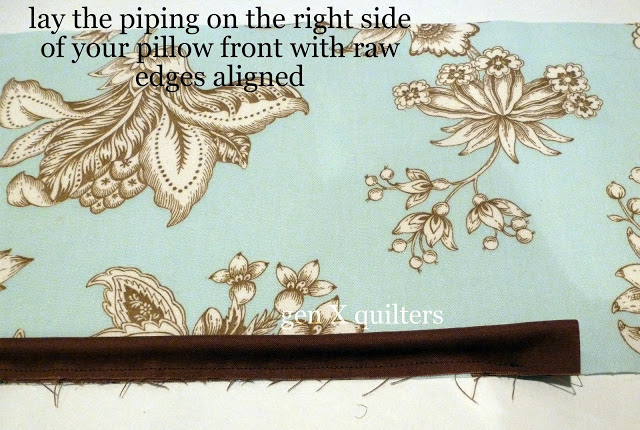
      Sew stitch line #1, the basting line.  I like to use my zipper foot for piping.


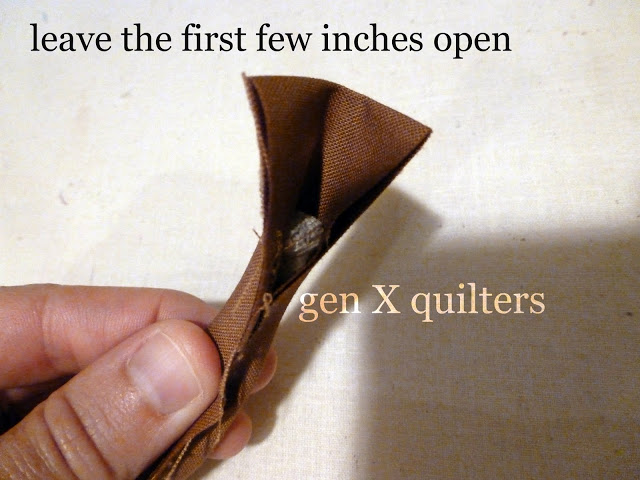
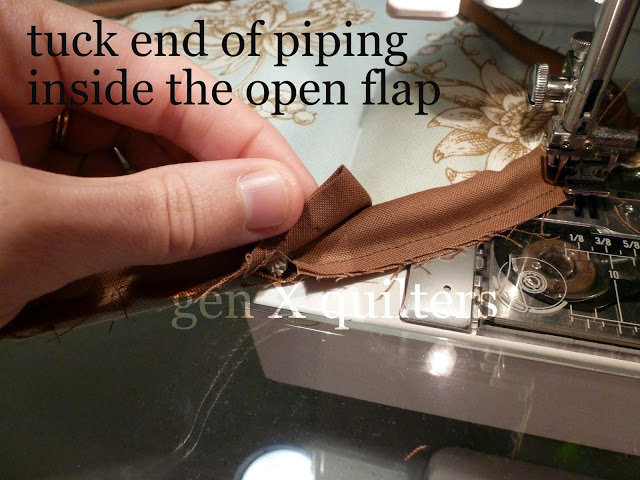
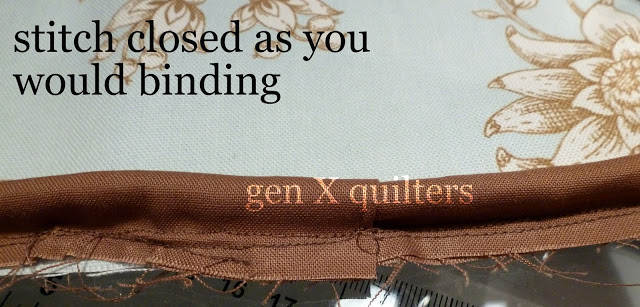
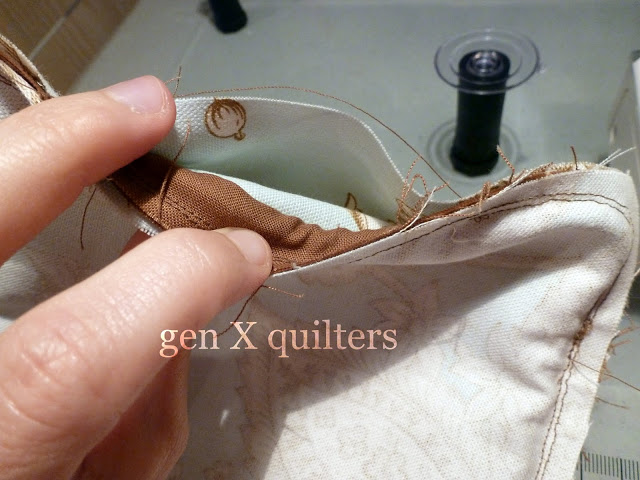
      Make the piping similar to how you would binding in terms of finishing.  Leave 2 inches or so open so   you can tuck the opposite end inside for a finished look.


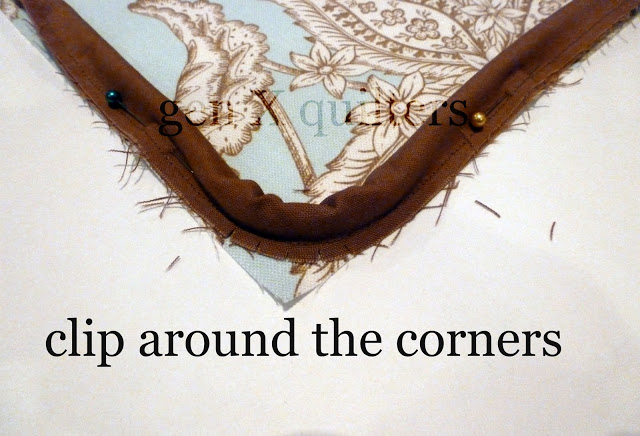
      Pin all the way around and clip at the corners for ease of turning.


      Sew stitch line #2 to attach the piping to the pillow front.


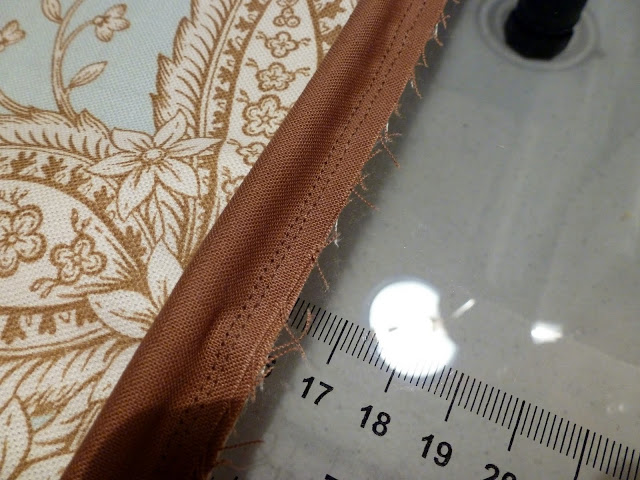
      See the 2 stitching lines?  The right is #1 basting line and the left is #2, attaching the piping to the pillow front.


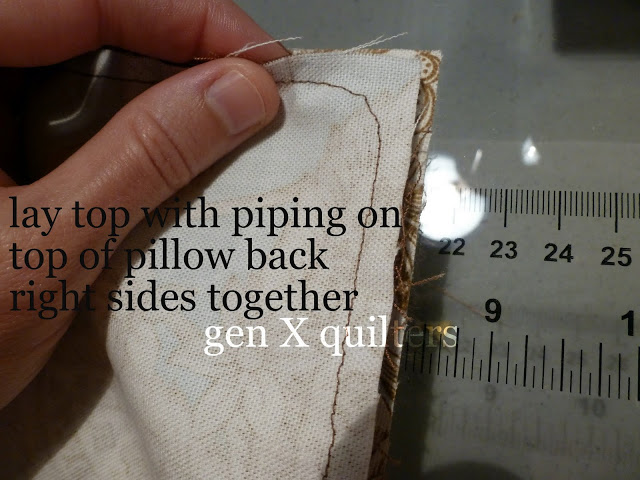
      Place your pillow front on top of the pillow back, right sides together.  The stitch line you see in the picture is stitch line #2.

      Sew stitch line #3 to attach the pillow front and back together.  Again, sew to the left of #2!


      Leave an opening for turning the pillow right side out.


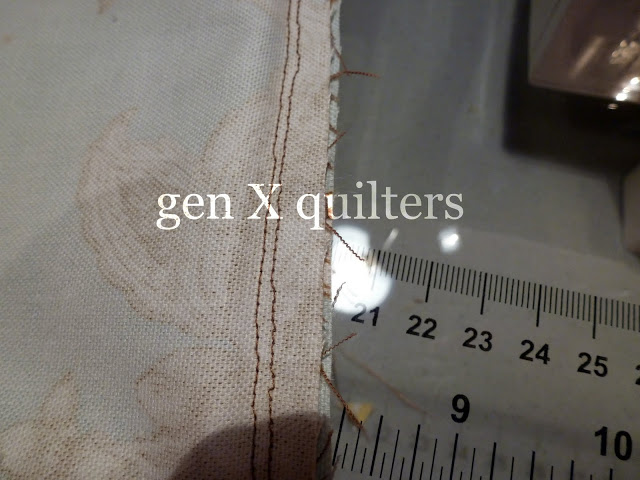
      Here you can see stitch line #2 on the right and stitch line #3 on the left.  When you turn it right side out, stitch line #3 will conceal all the other stitching.


      Right side out....


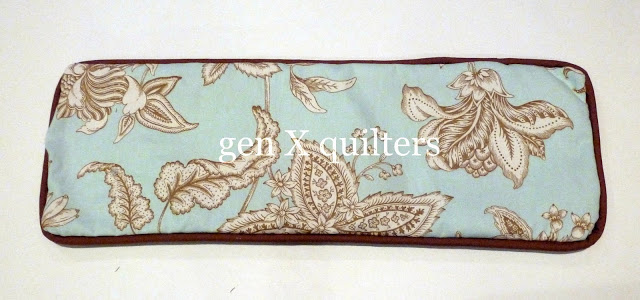
      Stuff..... and hand sew the opening closed.


      That's all!  Hope this helps you make perfect piping next time!

Rockin' Robin Quilt Along: Square-in-A-Square Block Tutorial


Hi there!  It’s my turn to dish up the block tutorial for the Rockin’ Robin Blog Hop Quilt Along this week.   What fun!  It's never too late to join in.  

Here is this week's block:
My row and favorite block....


Let’s get started….
Square-in-a-Square Block Tutorial

I started out thinking this block would go log cabin style, but instead I ended up doing framed square-in-squares.  They are only slightly different (log cabins you work your frame around each side from top-right-bottom-left; frames are done sewing logs to the top and bottom, then to each side), but achieve the same look in the end.  ….The framed blocks suit my need to streamline the cutting and pressing processes.  So!  Without further ado…  Let’s begin.


Fabric Selections:  I am using a layer cake for this quilt along and I separated it based on the predominant color in each 10” fabric square.  Each block for my quilt will consist of fabrics of only one of the 5 dominant colors.  For this block, I chose to use the blue layer cake squares, plus solids white and yellow to calm down some of the busy prints.  You will need 6 fabrics in all.  You may do as you like – I just thought I’d tell you a little about how I selected what went where.


Cutting Requirements:
(1)   2.5” square for center (fussy cut if you like)
1st Frame - From 1” strips:  (2) 1” x 2.5” and (2) 1” x 3.5”
2nd Frame - From 2” strips:  (2) 2” x 3.5” and (2) 2” x 6.5”
3rd Frame - From 1.5” strips:  (2) 1.5” x 6.5” and (2) 1.5” x 8.5”
4th Frame - From 1” strips:  (2) 1” x 8.5” and (2) 1” x 9.5”
5th Frame - From 2.5-3” strips:  (2) 10.5” x 2.5” and (2) 2.5” x 13.5”  **generous width to allow for wonkiness**
**Note:  For ease of instruction, none of the frames in this block contain any additional prints which add scrappiness to the block.  Other blocks in my row of framed squares for this quilt DO contain other bits and pieces of coordinating scraps.  You may make this block as scrappy as you want by improvising to add scraps here and there to your strips.  Just make sure your logs are the correct dimension in length as called out above before sewing onto the block.


Block Layout:


1.       Start with the 2.5” square.  Sew a short log of the 1st frame set (1” x 2.5” strip) to the top and bottom of the 2.5” square.  Press seams out toward the frame.


2.       Next sew a long log of the 1st frame set (1” x 3.5” strip) to the left and right sides of the unit from step 1.  Press seams out toward the frame.  Square up the block if there is any fabric overlap (here you can see excess fabric as the side logs are longer than the unit from step 1).  You may also add wonkiness to each frame layer at this point if desired.


 3.   Sew a short log of the 2nd frame set (2” x 3.5” strip) to the top and bottom of the unit from step 2.  Press seams out toward the frame.

 4.  Next sew a long log of the 2nd frame set (2” x 6.5” strip) to the left and right sides of the unit from step 3.  Press seams out toward the frame.  Square up or add wonkiness as desired.


 5.  Sew a short log of the 3rd frame set (1.5” x 6.5” strip) to the top and bottom of the unit from step 4.  Press seams out toward the frame.

 6.  Next sew a long log of the 3rd frame set (1.5” x 8.5” strip) to the left and right sides of the unit from step 5.  Press seams out toward the frame.  Square up or add wonkiness as desired.


7.  Sew a short log of the 4th frame set (1” x 8.5” strip) to the top and bottom of the unit from step 6.  Press seams out toward the frame.

8.  Next sew a long log of the 4th frame set (1” x 9.5” strip) to the left and right sides of the unit from step 7.  Press seams out toward the frame.  Square up or add wonkiness as desired.


 9.  Sew a short log of the 5th frame set (2.5” x 10.5” strip) to the top and bottom of the unit from step 8.  Press seams out toward the frame.


10.  Next sew a long log of the 5th frame set (2.5” x 13.5” strip) to the left and right sides of the unit from step 9.  Press seams out toward the frame.  Square up or add wonkiness as desired.  Remember the 5th frame was cut generously to allow for extra wonkiness or for people like me whose blocks always end up a tad short.  Make sure to square up your unfinished blocks to 12.5” when done!  Have Fun!


Vintage Table Linens make Beautiful Quilts

Are you smitten with those lovely vintage sheets finding new life in a quilt?  I certainly am!  It's fascinating that we can make old new again, and absolutely beautiful.

So when I happened along this booth at the National Quilting Associations' Annual Show here in Columbus, my interest was piqued.....


This is Dusty's Vintage Linens and Buttons.  Selling solely at shows, these ladies' booth was amazing!  They collect vintage linen table cloths from the 1940s and 1950s and a rainbow of vintage buttons.


Some of the linens are new and unused with the original labels.  They look fabulous quilted!


After seeing all this, I could not resist.  This is the table cloth I wanted, but couldn't afford.


So while I was lingering in the booth forever, I heard that the vintage dish cloths make great table runners.  Ding!  Ding!  Now that's something my wallet could cover.  Here's the one I picked out...


And here it is finished and sitting pretty on my table....


I love it!  I added a gingham binding and that was it.  Who would have thought a dish towel of all things could be so beautiful!

(email dustysvintage@aol.com for a show schedule or more information)