

Hi there! It’s my turn to dish up the block tutorial for the Rockin’ Robin Blog Hop Quilt Along this week. What fun! It's never too late to join in.
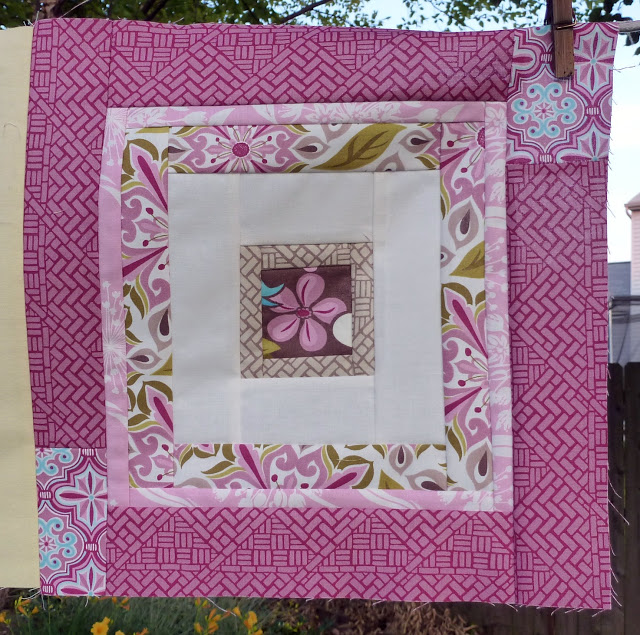
Here is this week's block:
Here is this week's block:
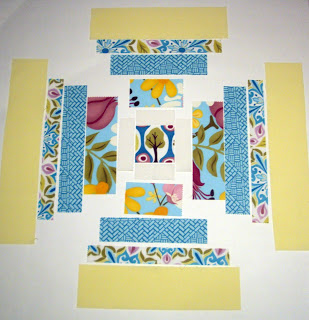
My row and favorite block....

Let’s get started….
Square-in-a-Square Block Tutorial

I started out thinking this block would go log cabin style, but instead I ended up doing framed square-in-squares. They are only slightly different (log cabins you work your frame around each side from top-right-bottom-left; frames are done sewing logs to the top and bottom, then to each side), but achieve the same look in the end. ….The framed blocks suit my need to streamline the cutting and pressing processes. So! Without further ado… Let’s begin.
Fabric Selections: I am using a layer cake for this quilt along and I separated it based on the predominant color in each 10” fabric square. Each block for my quilt will consist of fabrics of only one of the 5 dominant colors. For this block, I chose to use the blue layer cake squares, plus solids white and yellow to calm down some of the busy prints. You will need 6 fabrics in all. You may do as you like – I just thought I’d tell you a little about how I selected what went where.

Cutting Requirements:
(1) 2.5” square for center (fussy cut if you like)
1st Frame - From 1” strips: (2) 1” x 2.5” and (2) 1” x 3.5”
2nd Frame - From 2” strips: (2) 2” x 3.5” and (2) 2” x 6.5”
3rd Frame - From 1.5” strips: (2) 1.5” x 6.5” and (2) 1.5” x 8.5”
4th Frame - From 1” strips: (2) 1” x 8.5” and (2) 1” x 9.5”
5th Frame - From 2.5-3” strips: (2) 10.5” x 2.5” and (2) 2.5” x 13.5” **generous width to allow for wonkiness**
**Note: For ease of instruction, none of the frames in this block contain any additional prints which add scrappiness to the block. Other blocks in my row of framed squares for this quilt DO contain other bits and pieces of coordinating scraps. You may make this block as scrappy as you want by improvising to add scraps here and there to your strips. Just make sure your logs are the correct dimension in length as called out above before sewing onto the block.

Block Layout:
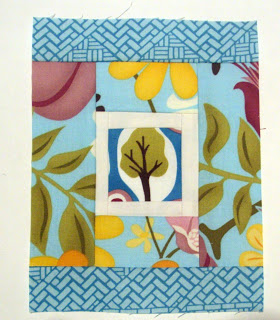
1. Start with the 2.5” square. Sew a short log of the 1st frame set (1” x 2.5” strip) to the top and bottom of the 2.5” square. Press seams out toward the frame.

2. Next sew a long log of the 1st frame set (1” x 3.5” strip) to the left and right sides of the unit from step 1. Press seams out toward the frame. Square up the block if there is any fabric overlap (here you can see excess fabric as the side logs are longer than the unit from step 1). You may also add wonkiness to each frame layer at this point if desired.


7. Sew a short log of the 4th frame set (1” x 8.5” strip) to the top and bottom of the unit from step 6. Press seams out toward the frame.

8. Next sew a long log of the 4th frame set (1” x 9.5” strip) to the left and right sides of the unit from step 7. Press seams out toward the frame. Square up or add wonkiness as desired.

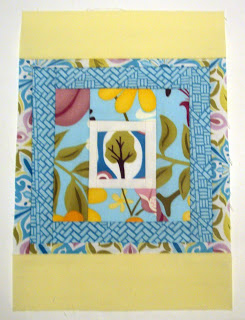
10. Next sew a long log of the 5th frame set (2.5” x 13.5” strip) to the left and right sides of the unit from step 9. Press seams out toward the frame. Square up or add wonkiness as desired. Remember the 5th frame was cut generously to allow for extra wonkiness or for people like me whose blocks always end up a tad short. Make sure to square up your unfinished blocks to 12.5” when done! Have Fun!
