

Since writing the original Scant Rant: 1/4" Seam Tutorial post, it was brought to my attention that not all sewing machines have adjustable needle positions. Of course! My first sewing machine, a basic Janome, was a great beginners machine with only one needle position. I brought it out to find the scant 1/4" seam for those with this type of sewing machine.
Spending just a few minutes to find the scant 1/4" will save you many headaches in the future. The term scant means just a thread shy of a 1/4". If you never test it, you don't realize that your thread and the pressed fold take up some space in the measurement, usually resulting in blocks being short of their required finished dimension.
Video Tutorial here.

Placing a Piece of Tape as a Guide.
If the needle on your sewing machine is in a fixed position (i.e. you cannot shift it right or left), an easy way to find your scant 1/4" is to find the sweet spot and place a small piece of tape on the throat plate to serve as your guide.
--------------------------------------------------------------------------------------------------------------------------------
The Test.
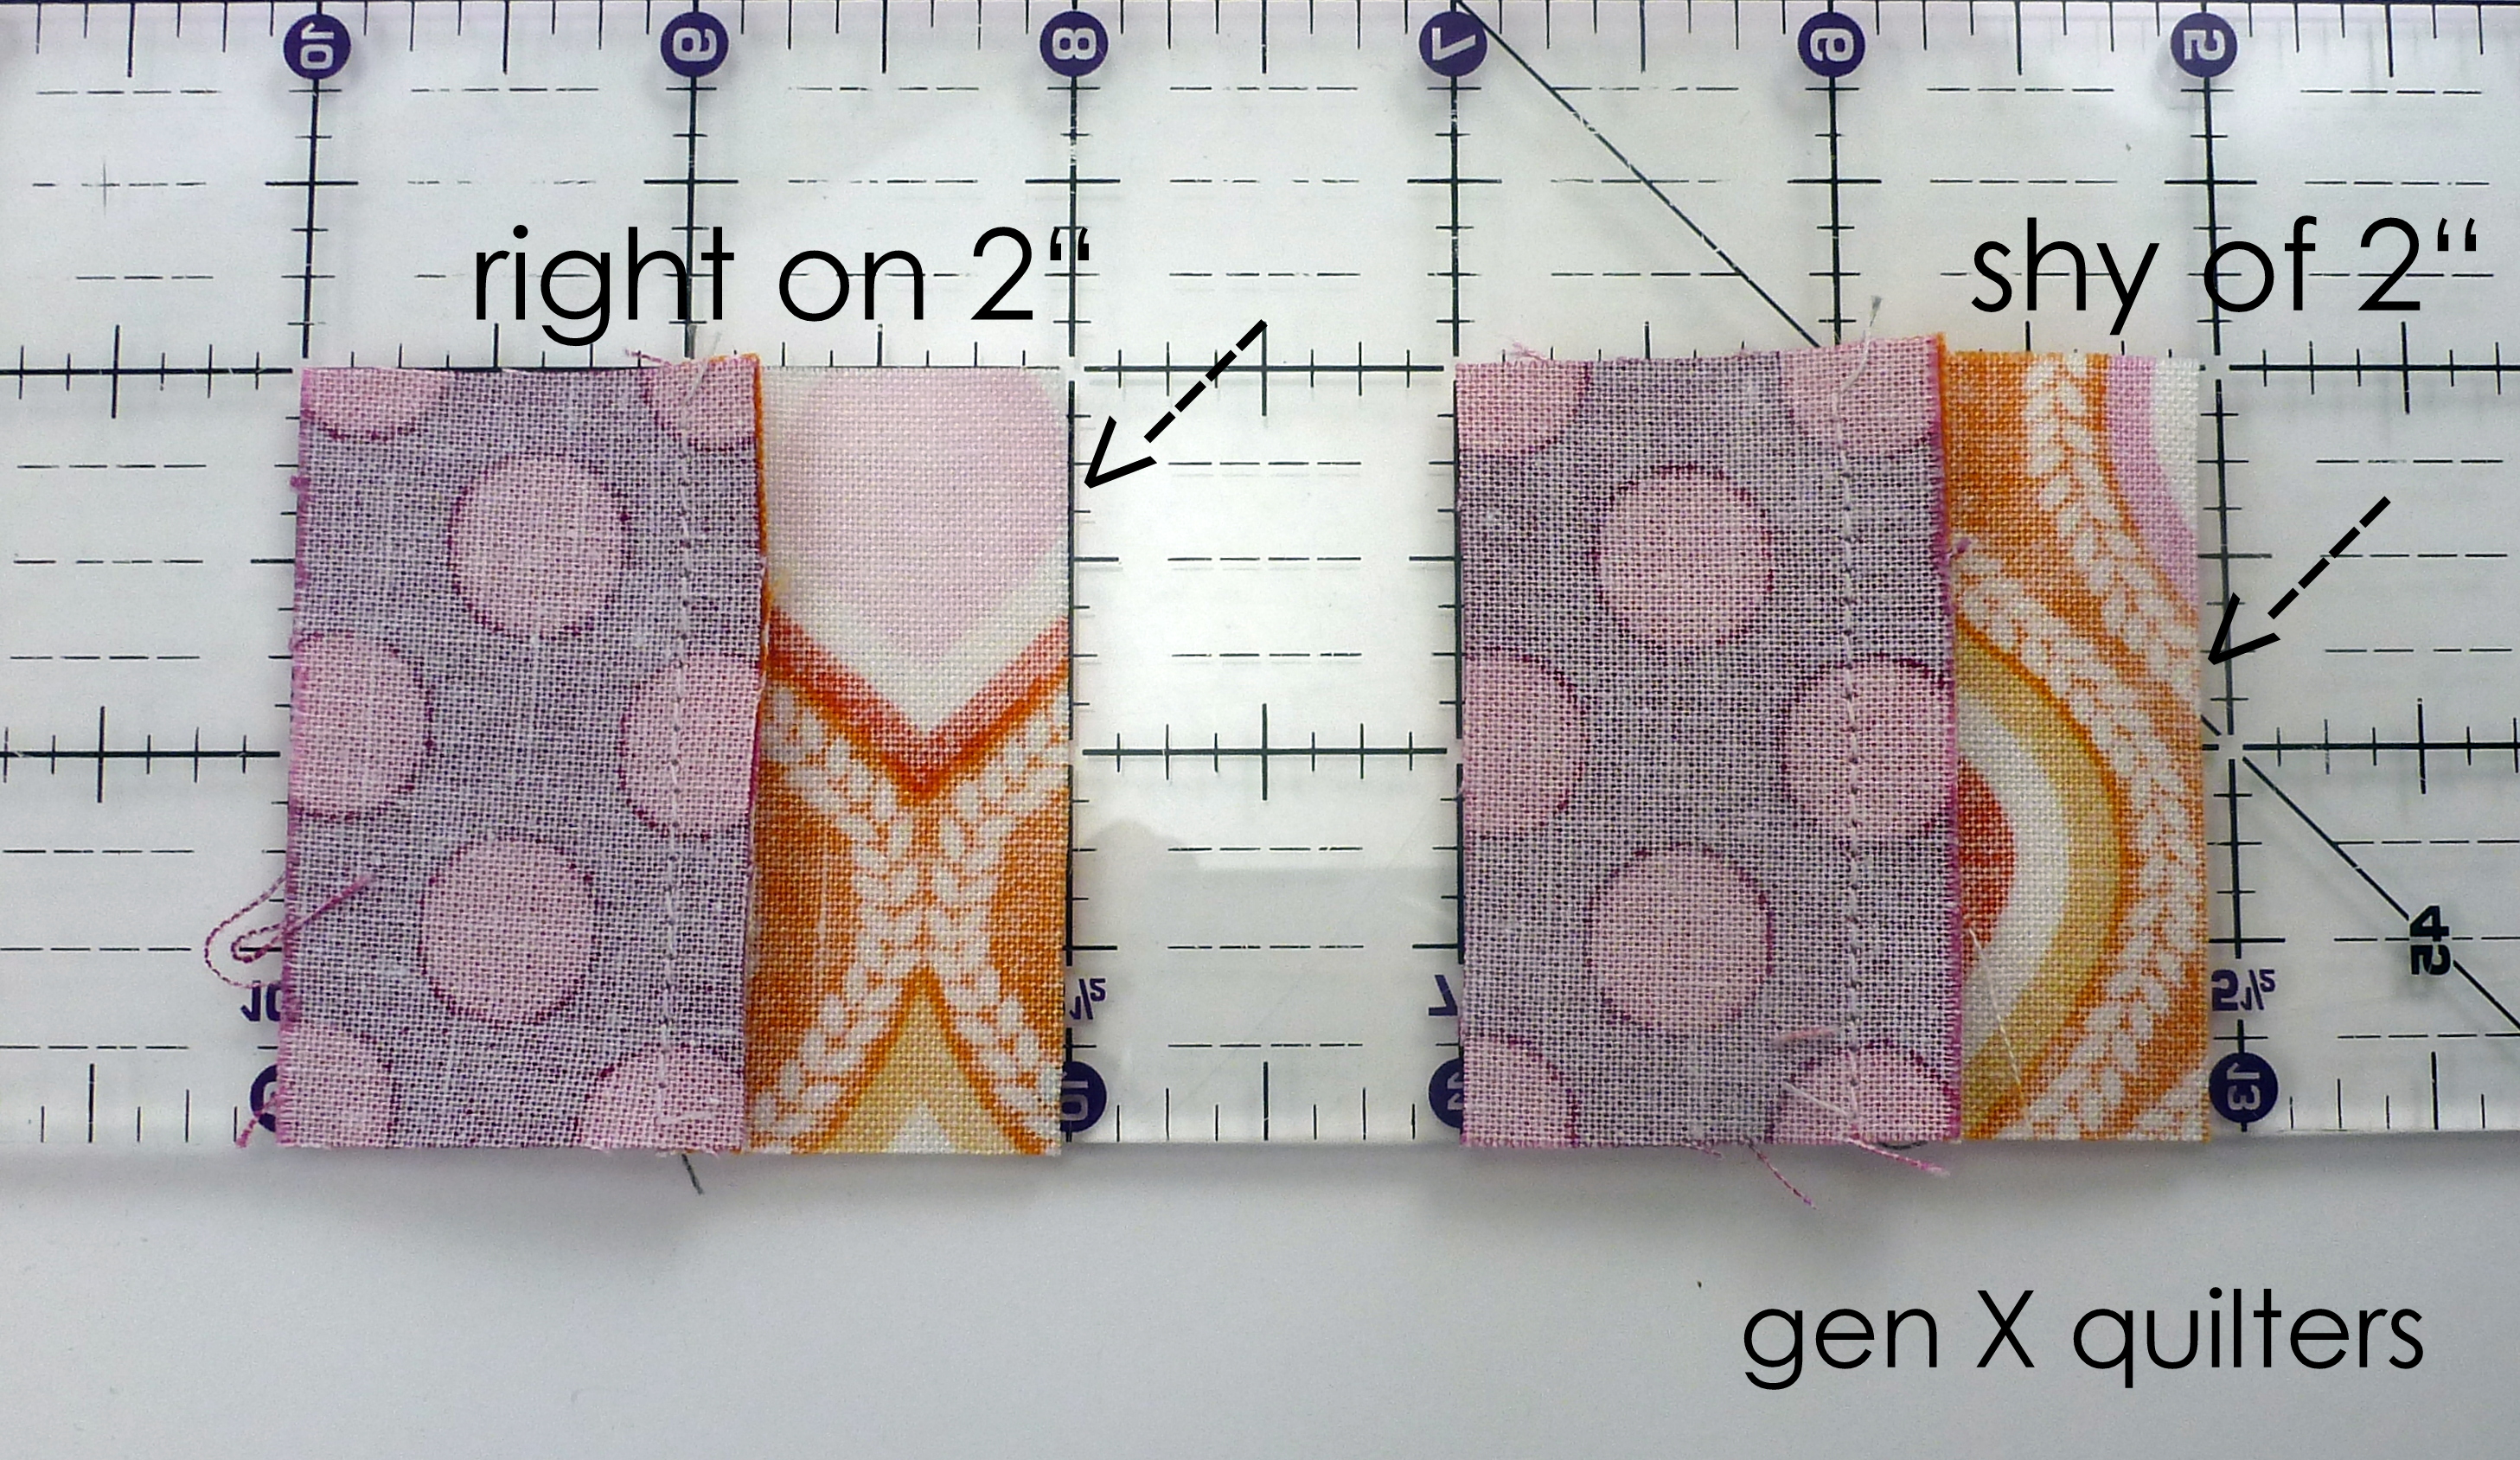
- Cut (2) 1 1/4" x 2" rectangles. Sew along the 2" length with right sides together (RST), using the edge of your presser foot as your guide. Press seam in one direction or open. [Use your preferred pressing method - more details about how pressing method affects scant seams here.]
- Measure the block to see if it is a 2" x 2" square.
- If the block is short, you will need to place a piece of tape slightly to the left of the presser foot edge.
- If the block is too long, you will need to place a piece of tape slightly to the right of the presser foot edge.
- Continue shifting the tape a little at a time until you find the sweet spot where the block measures 2" x 2".
--------------------------------------------------------------------------------------------------------------------------------

In the photo above, you can see how much I needed to move the tape to the left in order to achieve the scant 1/4". This measurement may be just a few millimeters, but that dimension will add up to a larger amount with each seam you sew in the quilt.

After finding the correct location for the tape, line up your squares and/or rectangles to be sewn with the tape and (not the edge of the presser foot) each time you need a scant 1/4". And keep the kiddos fingers from peeling it off!