
This week in the Charmed Prints Quilt Along, we have made all our feature blocks and are ready to assemble the quilt top.


Can't wait to see your lovely tops!
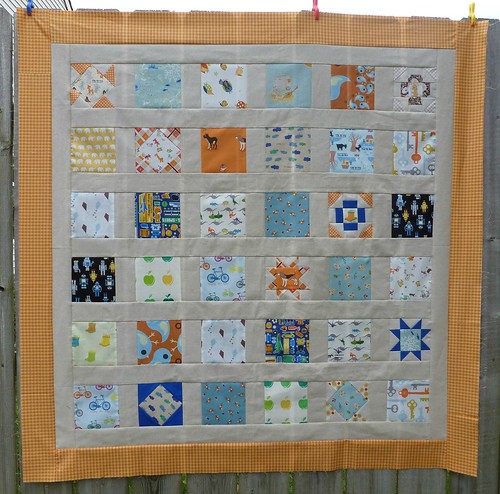
Have you arranged, rearranged, and moved all the squares a bunch? Well, if you're like me, you've played with the layout quite a bit. Here is a photo of my final selections. I've moved positions on many and even completely swapped out some of the charms I had initially chosen.
This is my final answer.
Once you're comfortable with your layout, let's get moving on the sashing.
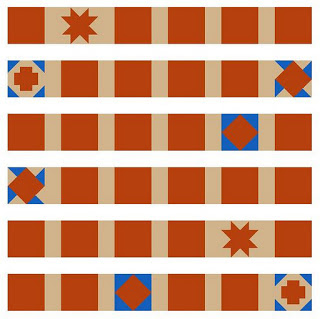
1. For each row, sew a 2 1/2" x 5" sashing strip in between each charm as shown in Figure 1 below.
Start by stacking your charms, with the left most charm on top and the right most charm on the bottom, keeping your preferred order. Make sure to keep them oriented correctly, if any of your fabrics are directional. And keep the rows separated.
Place one sashing strip, right sides together, on the right edge of your charm and sew a scant 1/4" seam.
Repeat all the way down the row stack until you reach the last charm. Chain piecing really helps keep your rows in order at this step. Do not add a 2 1/2" x 5" sashing strip to the last charm in your row.
Clip your chain piecing threads, making sure you keep your rows in the correct order. Press seams.
Continue chain piecing and pressing until your row is complete. Repeat the above process for all of the rows.
 |
| Figure 1: Sashing in between Charms in rows |
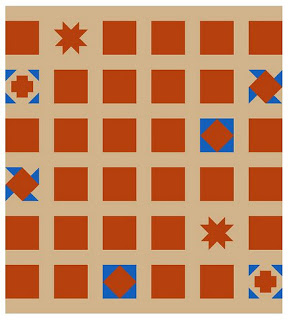
2. Now add a widthwise sashing strip to the bottom of each row (with the exception of the top row). You should have cut 7 strips 2 ½” x 37 ½ “ for the child size quilt or 10 strips 2 1/2" x 57" for the lap quilt. Sew the strips to the bottom of each row unit from step 1 using a scant 1/4" seam. Press toward the sashing.
 |
| Figure 2: Adding sashing to bottom of rows |
3. For the top row, add a sashing strip to the bottom AND top of that row.
 |
| Figure 3: Add sashing strip to bottom AND top of TOP row |
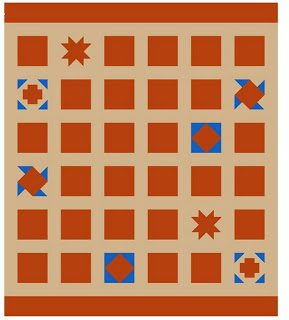
4. Piece all rows together using a scant 1/4" seam. At this point, your quilt top will look like Figure 4.
 |
| Figure 4: Piece all rows together |
5. Add the last 2 remaining sashing strips vertically to the unit from step 4. Sew using a scant 1/4" seam and press.
 |
| Figure 5: Add 2 vertical sashing strips |
6. Add Borders: Sew the two 3 ½” x 41 ½ ” (3 ½” x 61" lap) horizontal strips first as in Figure 6. Press toward the border.
 |
| Figure 6: Sew horizontal border strips |
7. Sew the two remaining vertical strips to finish the quilt top. Press toward the border.
 |
| Figure 7: Sew vertical border strips |
Can't wait to see your lovely tops!