Patchwork Auditions - Layout

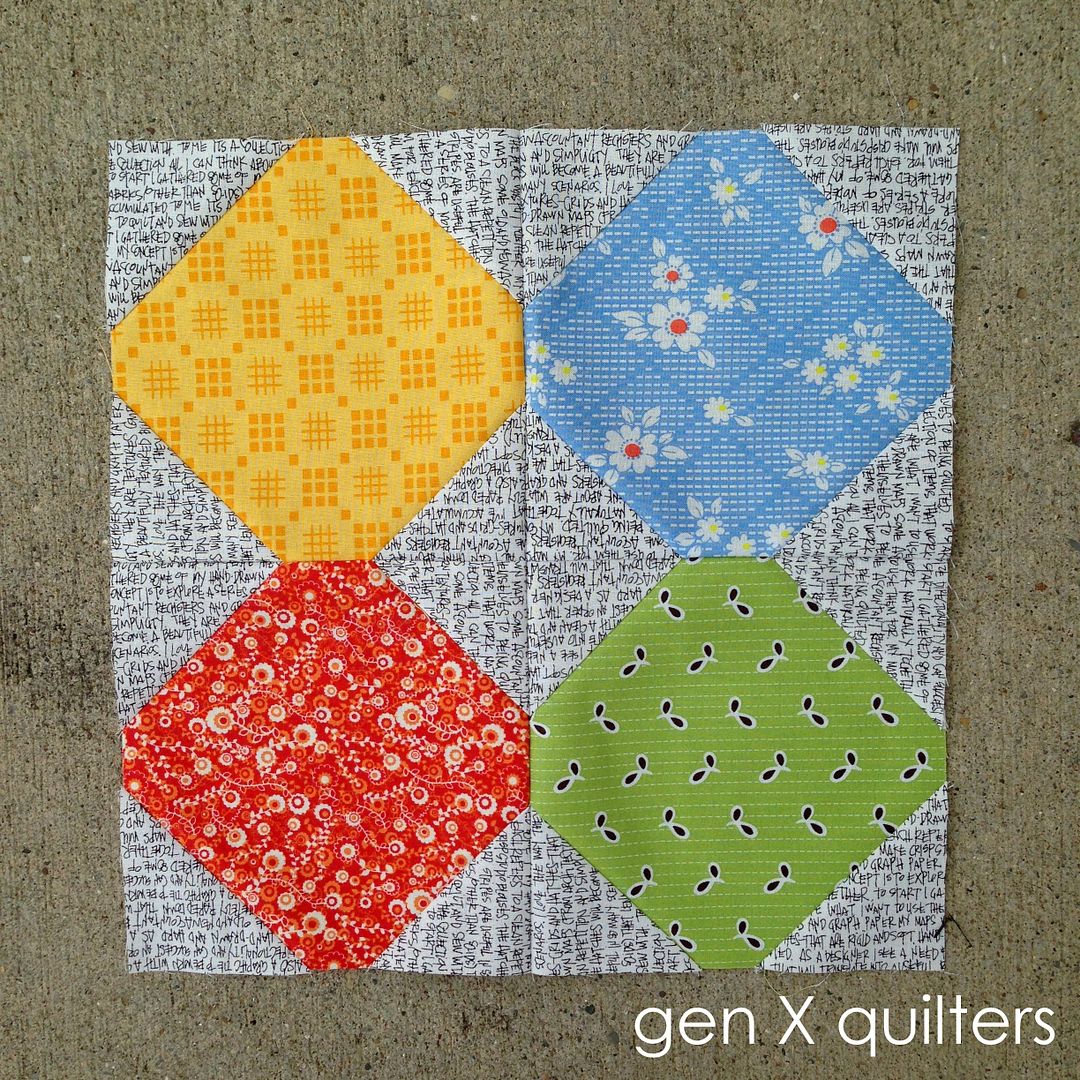
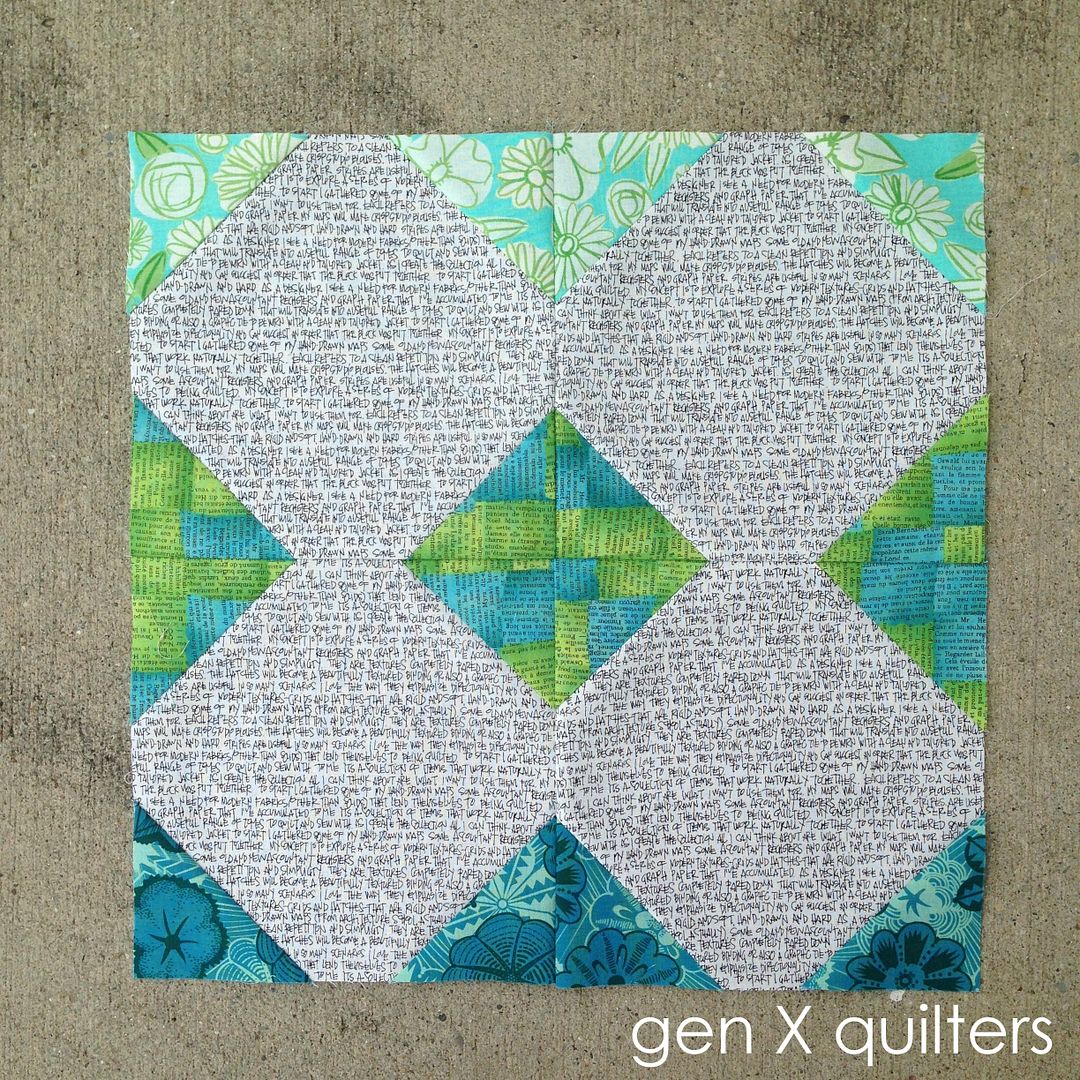
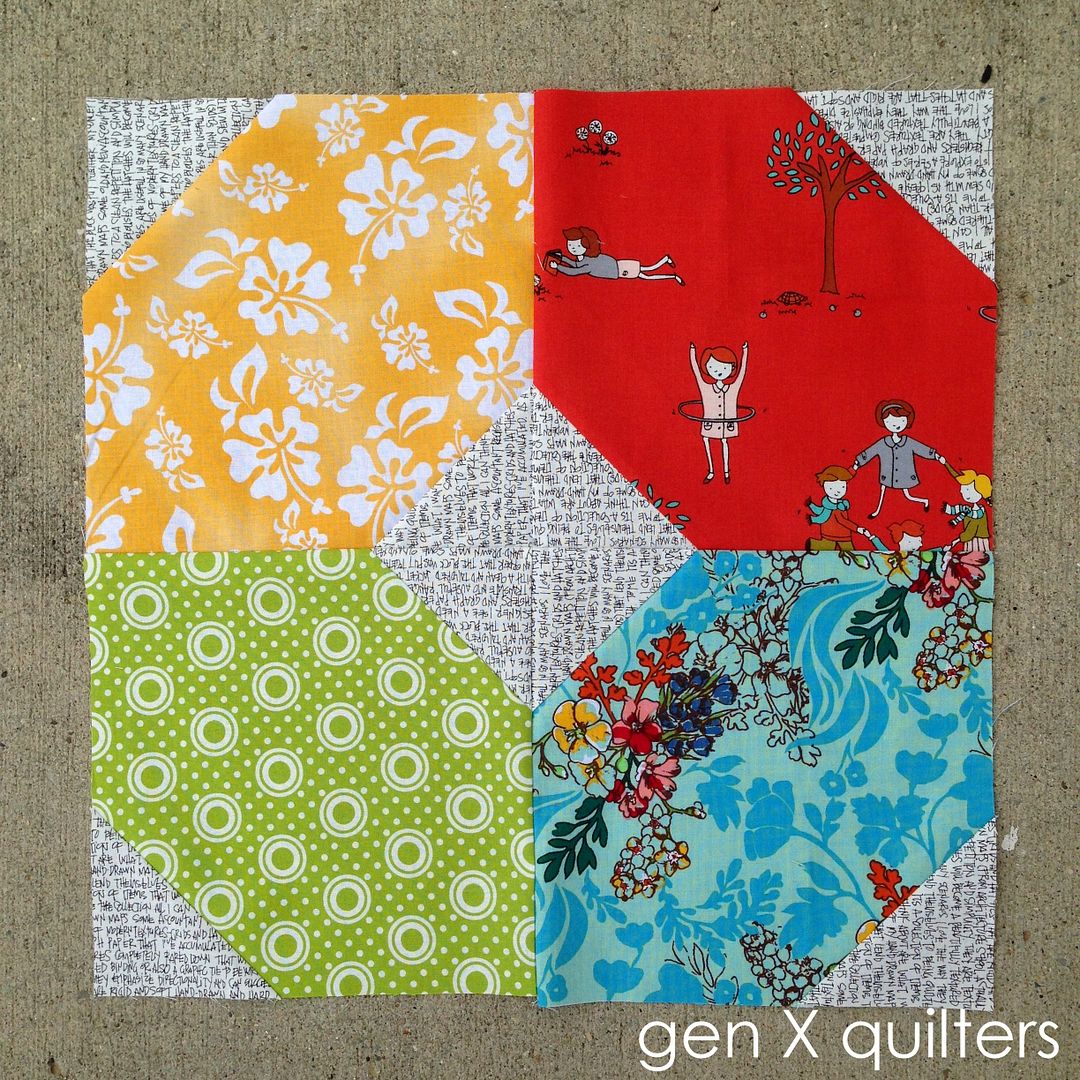
Earlier this month, I posted the last of the Patchwork Auditions blocks.  Now, I'm so excited to start putting this scrappy quilt top together!  The goal of the series was to look at some classic blocks and think outside the box.  There are many ways to color a quilt block - and I thought I'd start recoloring things by looking at some classics.  

Here's how I plan to piece my quilt top together.
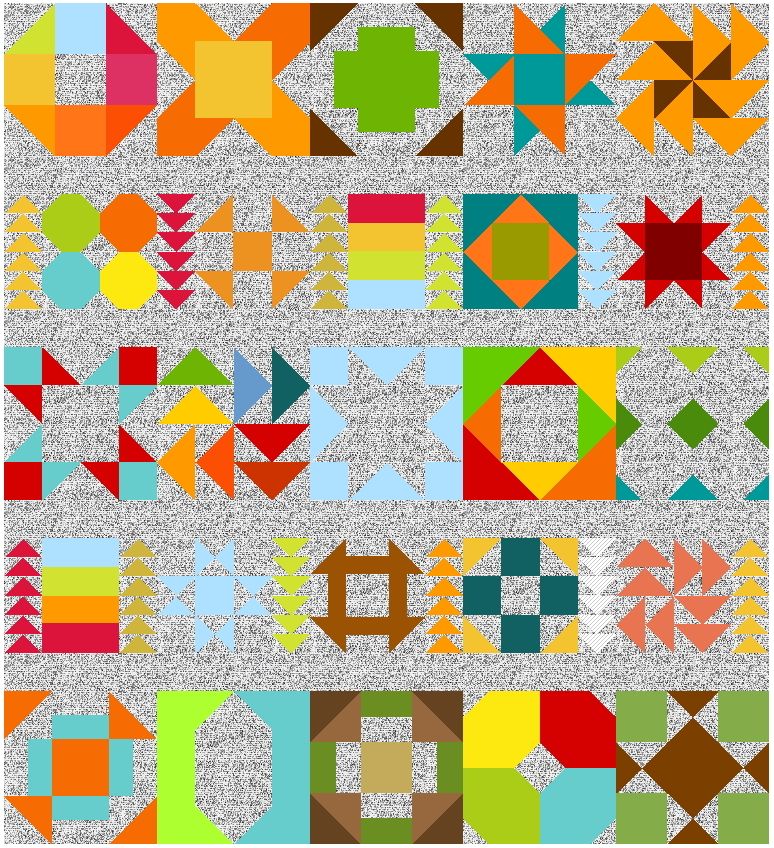
80" x 88"
For this layout, you will need:
  • (15) 16" finished blocks
  • (8)   12" finished blocks
  • (2)   8" x 12" rainbow strip blocks
  • (12) Flying Geese rows
For the rainbow strip blocks:
Each color rectangle is 3 1/2" x 8 1/2" unfinished.  (4) different color rectangles are sewn together to make one rainbow strip block (8 1/2" x 12 1/2" unfinished).

For the Flying Geese rows:
Each row is made up of (6) 2" x 4" finished Flying Geese units.
Cut (1) 2 1/2" x 4 1/2" rectangle of a color and (2) 2 1/2" x 2 1/2" squares of background to make (1) Flying Geese unit.
             So.... we need (144) 2 1/2" x 2 1/2" background squares
                      and (72) 2 1/2" x 4 1/2" rectangles of color. 

I am making all 6 Flying Geese in each row the same color, but you may make them as you like.

For sashing:
Cut (4) 4 1/2" x 80 1/2" strips of background.

I'm off to work on this quilt top.  It's going to be a big one!

My Book - Sister Sampler Quilts

I've been sitting here staring at this blank screen and a book cover for 20 minutes.  No... not just a book cover... The book cover.  My book cover.  There is so much to say, and yet, I'm speechless.

Today is finally the day when I can share with you what I've been up to behind the scenes for the past year.  I wrote a book!  I keep pinching myself, but it's not really helping.  It's a lifetime dream to write a book, and until I can hold a copy in my hands, I don't think I will believe it's true.

I'll share more about the book with you later - from the title you can tell it centers around my love of samplers and BOMs.  I worked with a great team at Fons & Porter Books (F&W Media) to bring you Sister Sampler Quilts, and it will arrive in December 2015.

For now, you can pre-order a copy on Amazon if you like.
Or if a signed copy piques your interest, pre-order that here.

I hope you like it!!!

Patchwork Auditions #7: Snowball


The Patchwork Auditions blocks are so much fun.  Have you tried this little game I'm playing?  Today I show you the final block in the series.  The series looks at some classic blocks and exposes alternate colorings.  My goal is to simply think about other ways to color a quilt block I have looked at hundreds of times.  I've been making 3 of each block - 1 traditional coloring and 2 alternates.  It's fun to see how different they look!  Take a look at all the blocks I've explored here.

With each block, I've been providing a cutting list for the basic blocks in 12" and 16" finished blocks, but not a tutorial.  Use the coloring sheet to generate your own ideas.  I hope that you have been enjoying this series as much as I am.  Soon, I'll show you how I plan to lay all these blocks out in a mega-quilt. 
-------------------------------------------------------------------------------------------------------------------

Snowball (Traditional)
The snowball block is a stitch-n-flip favorite.  The layout shown below actually shows 4 snowball blocks sewn together.  This is a common layout throughout history.  I found this basic block construction listed under many names - which is why I decided to break this block down to it's fundamental unit.  The snowball.  You can make an entire quilt just of individual snowballs, or group them together like I have in the block below. 


Snowball Coloring Sheet  Download the PDF here.

Block Structure
This block is constructed with (4) equal "snowballs".  Each "snowball" consists of a center portion "A" that begins as a square.  The "B" triangles are formed from squares that are stitched on the diagonal, and then pressed open (trimming the excess).  See tutorial here.

Cutting List.  I have listed cuts for both 12" and 16" blocks. 
For 12" blocks.
  • Cut (4) 6 1/2" x 6 1/2" squares.  (A) 
  • Cut (16) 2 7/8" x 2 7/8" squares. (B)
See Snowball Stitch-n-flip block tutorial here.
For 16" blocks.
  • Cut (4) 8 1/2" x 8 1/2" squares.  (A) 
  • Cut (16) 3 1/2" x 3 1/2" squares. (B)
See Snowball Stitch-n-flip block tutorial here.
Alternate Coloring Options
This is a fun and simple block to recolor.  There are several ways to change it's look, and still the cutting stays pretty simple.  These are just a few of the options I found.  

                             G                                                   H                                                    I

My Sample Blocks

traditional Snowball(12" block)

letter E in the table above (16" block)

letter D in the table above (16" block)

Feel free to share any past or present Snowball blocks you've made with us to show how you colored it using #patchworkauditions #snowballblock.  Enjoy!