Well, here we are. It's hard for me to believe we've all been steadily working on the Sisters' Ten quilt for a year. What a wonderful journey this has been! Thank you to all of you who have participated. It has been such fun to see your projects evolve month by month along with my own version of the quilt. I've enjoyed it so much, we're about to
do it all again!
But first, I know many of you have your quilt tops ready to graduate into real, usable, cuddle-able quilts. Let's talk about finishing your quilt, and then I'll show you my Sisters' Ten finale.
The 3 B's: Batting, Backing and Binding.
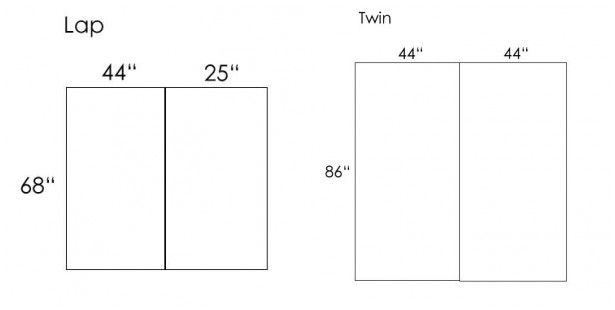
9" Blocks / 60" x 60" Quilt
- Backing Fabric 3 3/4 yards
- Batting 68" x 68"
- Binding Fabric 1/2 yard, cut (6) 2 1/2" wide strips for double fold continuous binding
12" Blocks / 78" x 78" Quilt
- Backing Fabric 4 3/4" yards
- Batting 86" x 86"
- Binding Fabric 5/8 yard, cut (8) 2 1/2" wide strips for double fold continuous binding
I like to have at least an extra 4" on all four sides of a quilt for the batting and backing. This ensures that there is enough overlap if you are sending your quilt out to a longarm quilter or are longarm quilting the quilt yourself. If you are quilting your own quilt on your home machine, you may not need as much overlap.
To make the quilt back, you will need to remove the selvages from the fabric and cut your total yardage approximately in half lengthwise. Sew the two large pieces together, creating a vertical seam. For the twin quilt, I would definitely leave the backing at 86" x 88". Just remove those selvages and sew the 2 pieces together along the 86" side. For the lap quilt, you will need to cut down one of your large sections. Your two sections will be (1) 44" x 68" and (1) 25" x 68". First, remove the selvages from both pieces. Cut one section to 25" x 68". Then sew the two sections together along the 68" side. These instructions are for making a quilt back with only one fabric. Feel free to use several and make it scrappy - use these measurements as a guide for the finished dimensions of your back.
Make your quilt sandwich, and you are ready to begin quilting.
Quilting Suggestions.
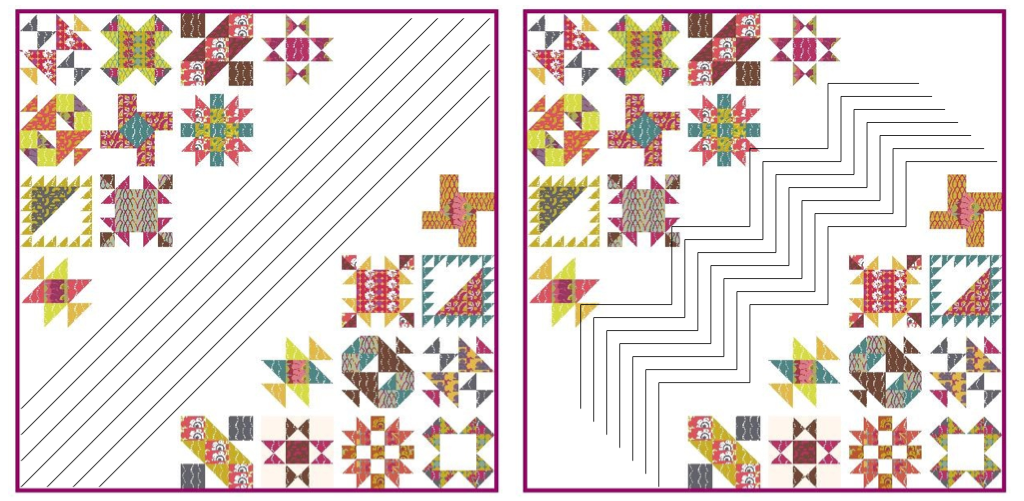
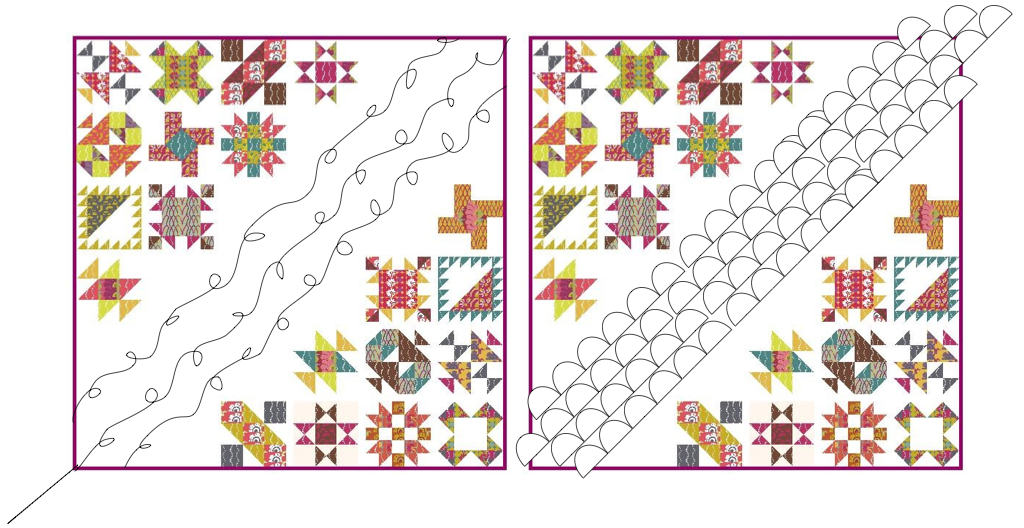
Quilting a quilt such as Sisters' Ten can be a little daunting for some. There is large negative space on the diagonal in the center - which I think should be addressed first. Once you know how you'd like to quilt that space, the rest will fall into place.
Straight-line: Don't feel like you have to get super fancy pants to make this quilt look great. Here are a couple simple straight-line quilting options for the negative space diagonal. You could choose to continue this pattern quilting the same in the blocks - or switch it up in the blocks. Some outline quilting and framing all with straight lines within the blocks would look great.
Also, taking the pattern on the left and adding more straight lines on the opposite diagonal to make a grid always looks sharp. Albeit, I rarely have the patience for that! :)
Free-Motion: Depending on your confidence and skill level, there are TONS of fun things you can do with free-motion on this quilt. The sky is the limit! However, if you're like me, and you're a little shy about your free motion, here are a few simple ideas of things to try. On the left, I have taken the very basic cursive letter "L" quilting style and stretched it across the diagonal. On the right, I've tried to imitate a clamshell type pattern.
(Please excuse these examples - I'm doing my best to show the idea through
Touchdraw (which I love) without a stylus. I'm not used to quilting on my ipad!)
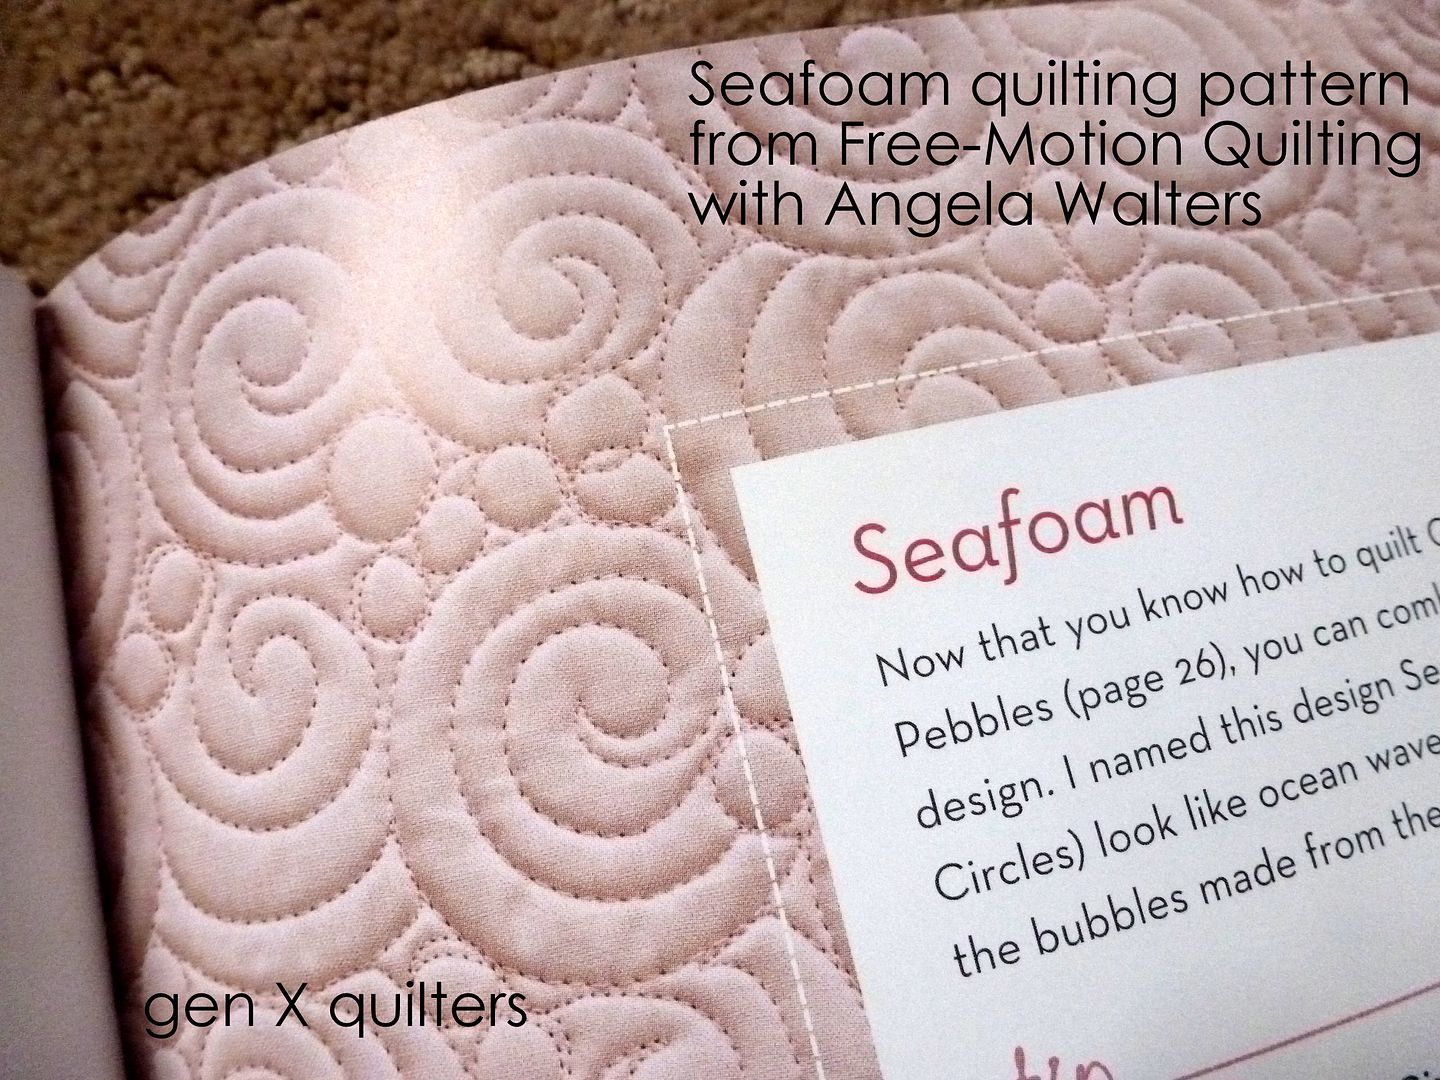
If any of you have
Free-Motion Quilting with Angela Walters
, this is a fantastic book to give you ideas for quilting your quilts with step by step instructions on how to achieve the look. I think the above Seafoam pattern would be so beautiful on Sisters' Ten negative space.
Binding. The yardage callout above is for double fold continuous binding. I am not going to go over the specifics of binding here, but if you need a good tutorial,
this is how I bind my quilts.
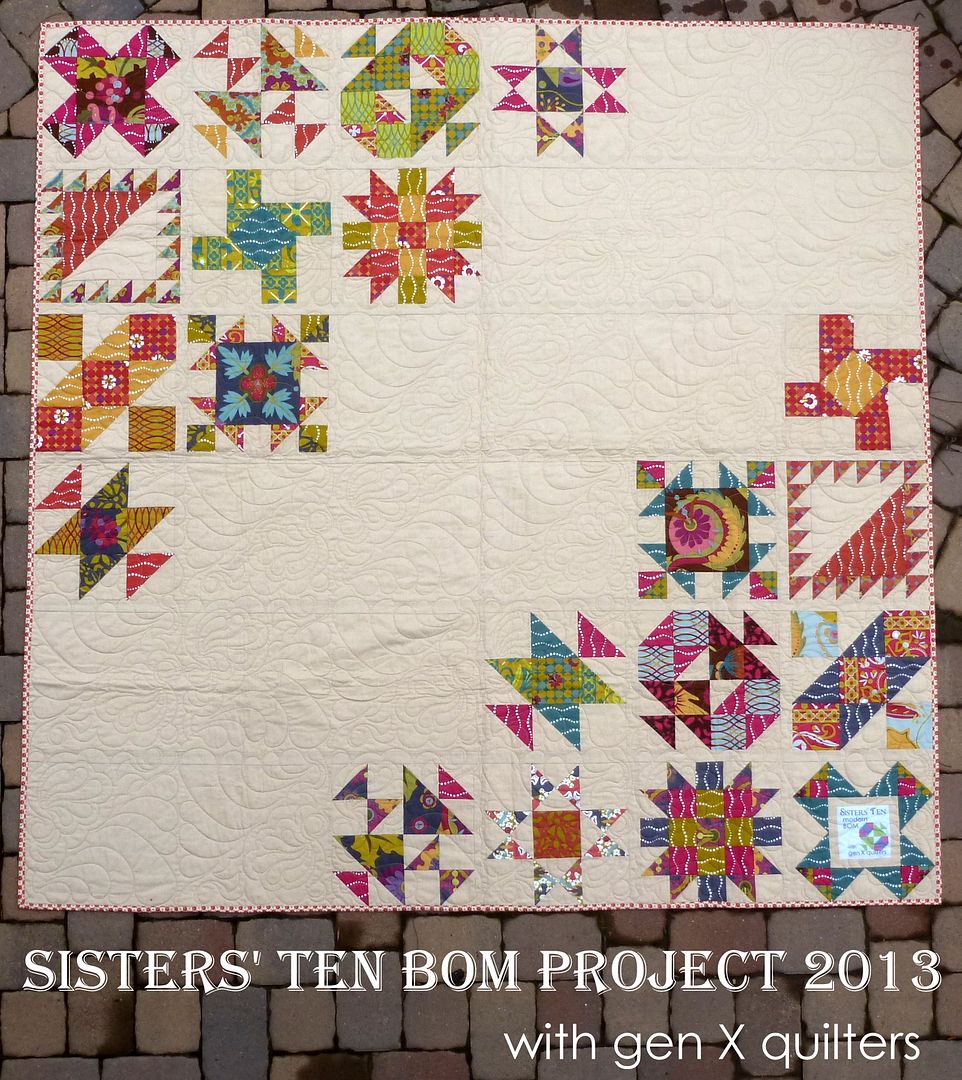
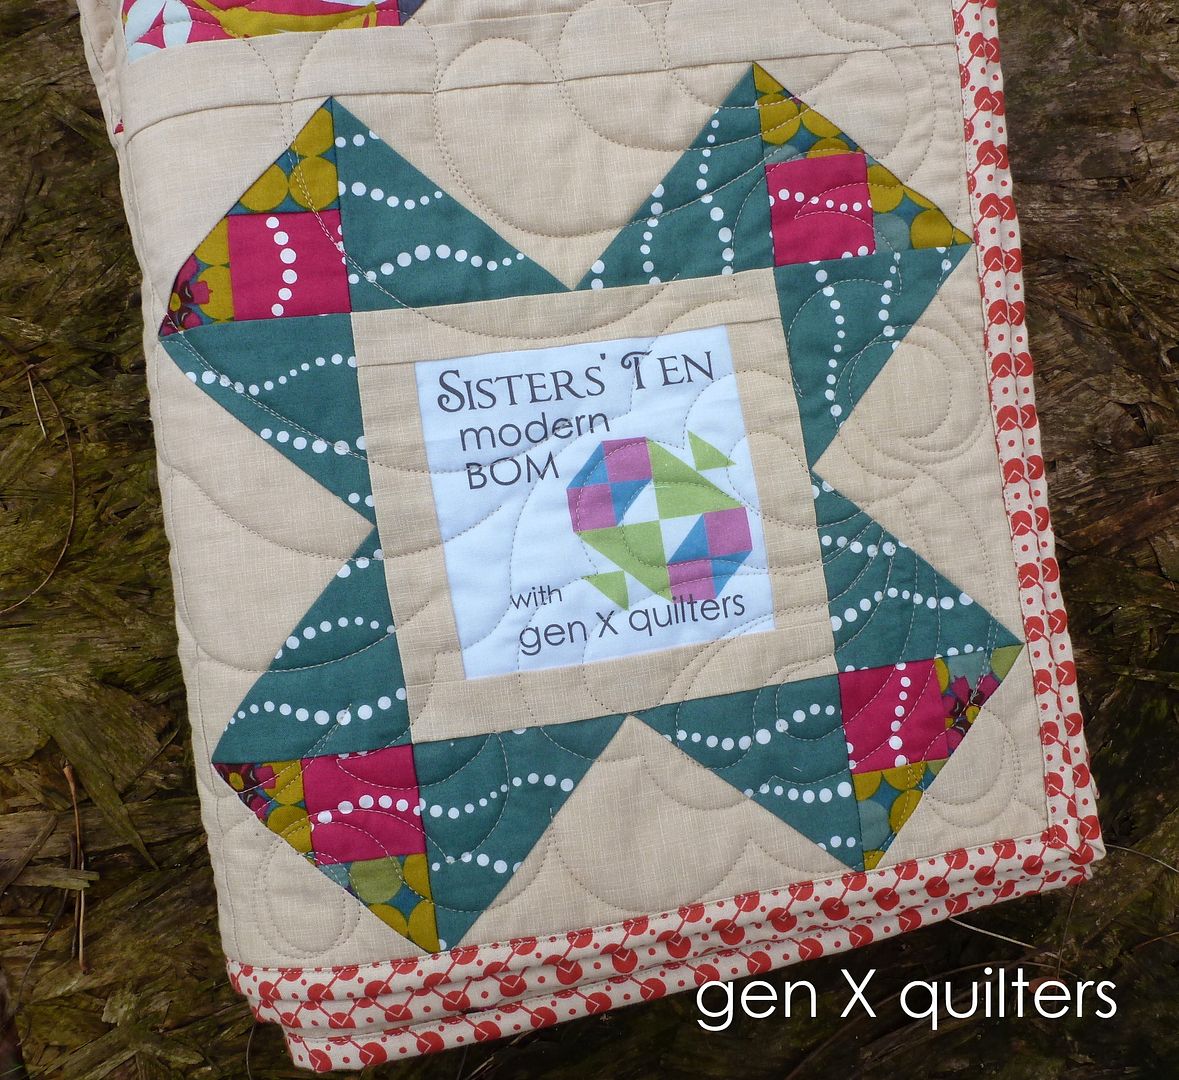
My Sisters' Ten Block of the Month Finish.
There is just something about making a quilt with a group. Be it a bee quilt, a charity quilt, a quilt-along or a block of the month, there is something special about making a quilt along side others. I have led quilt-alongs in the past, but never a project this involved. With 2 size offerings and 10 blocks, I learned volumes about pattern writing and instructing others during this past year. I feel as if I have grown so much.
A huge thank you to
Alison Glass and
Andover Fabrics for sponsoring the Sisters' Ten effort. I have loved working with the gorgeous Lucky Penny collection this past year and Alison continues to delight us with new vibrant fabric collections. Bike Path continues to be one of my favorite prints from the line because of it's versatility.
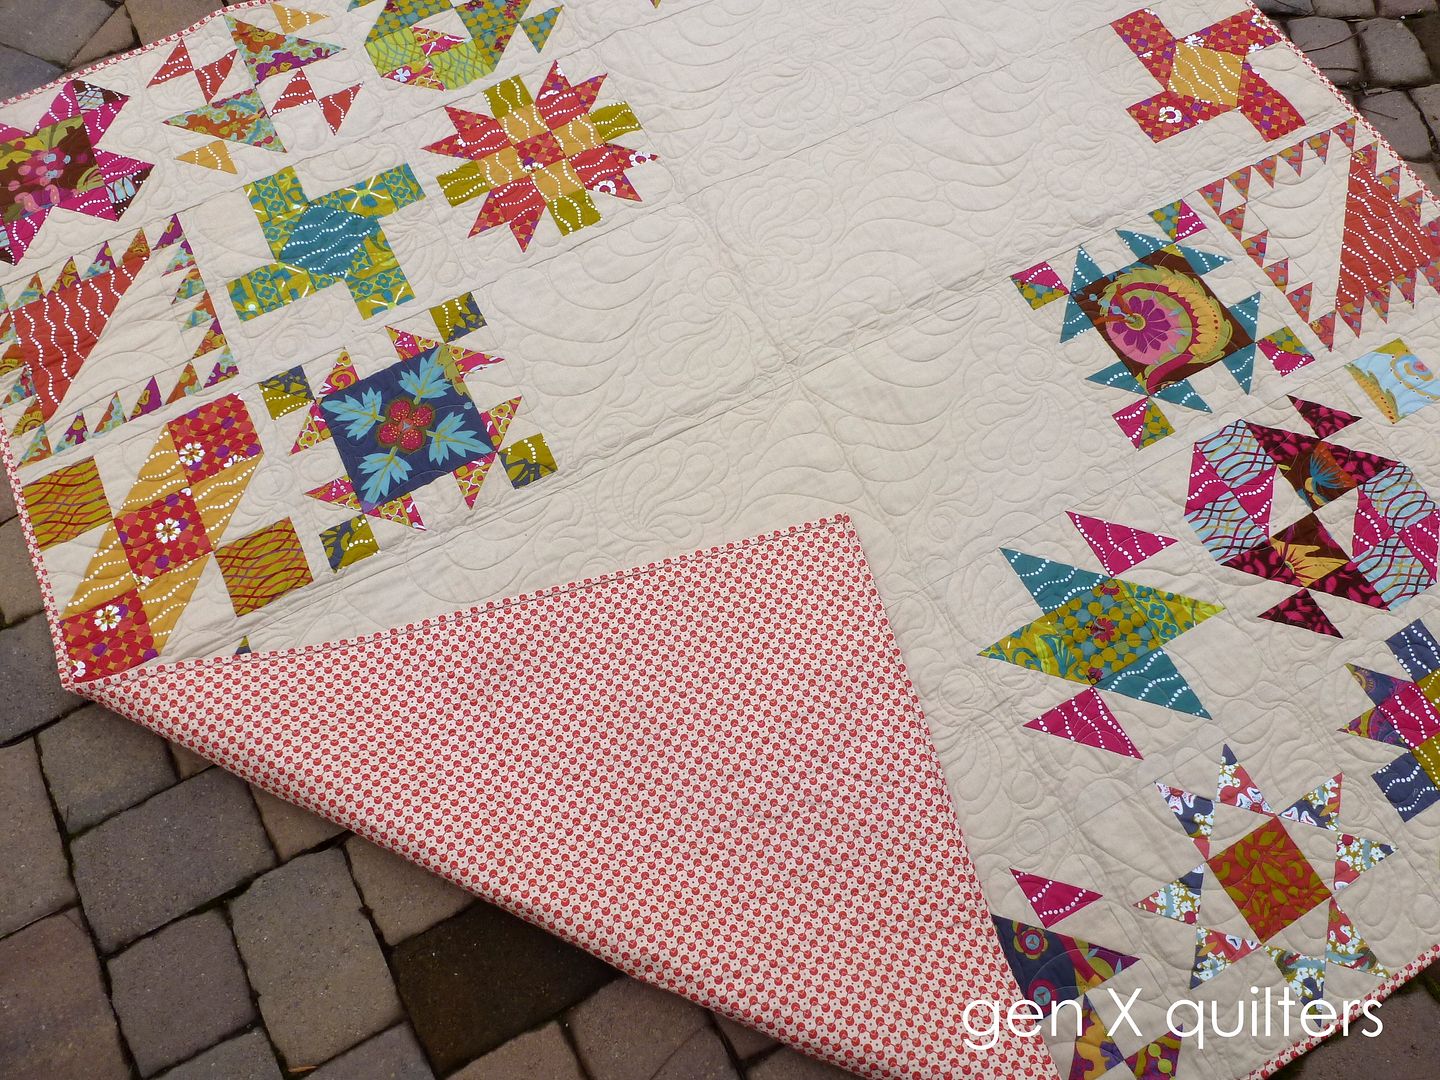
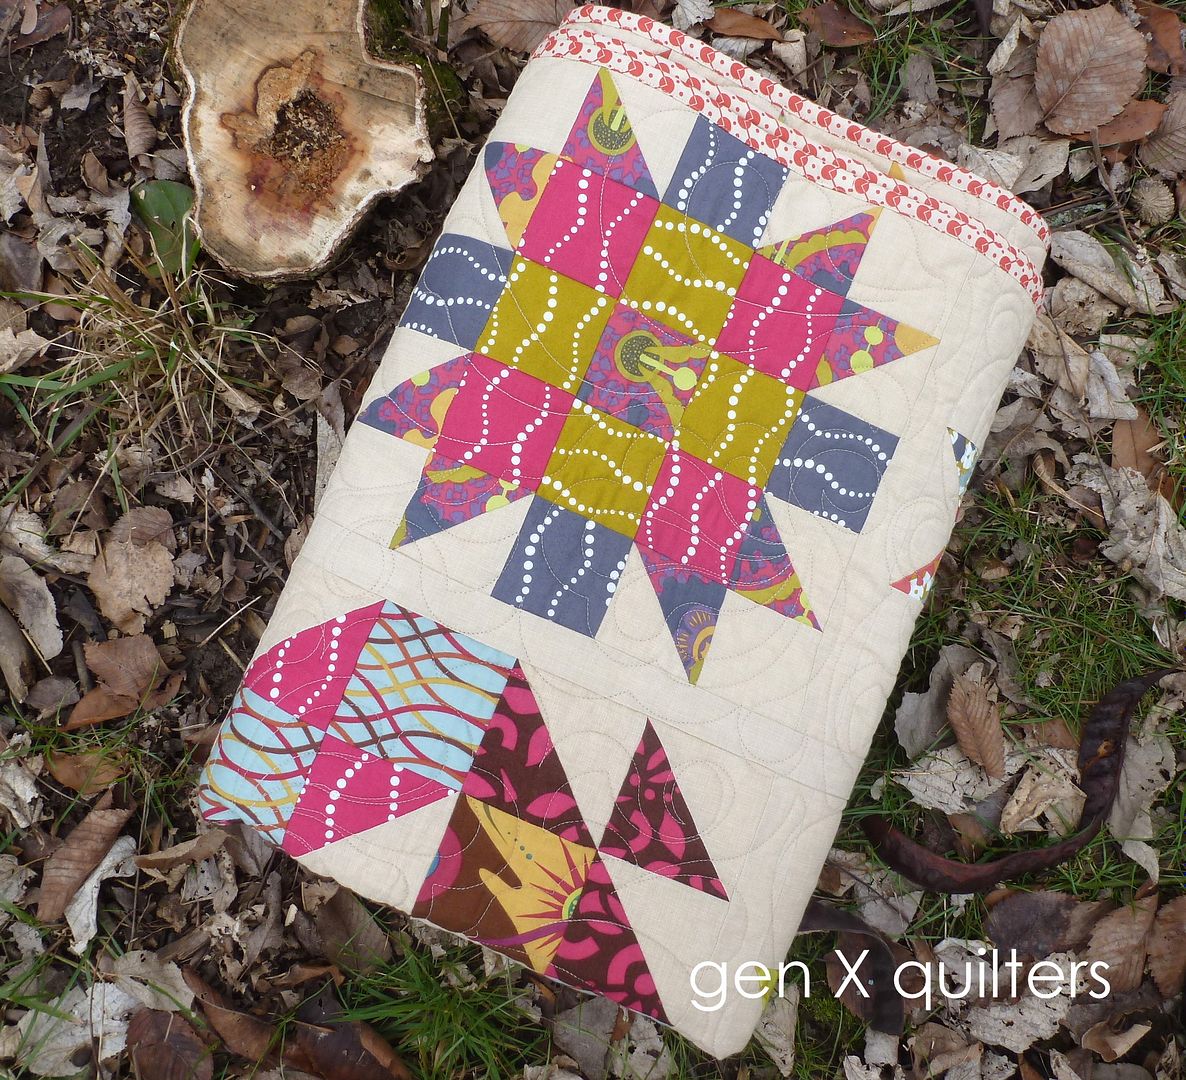
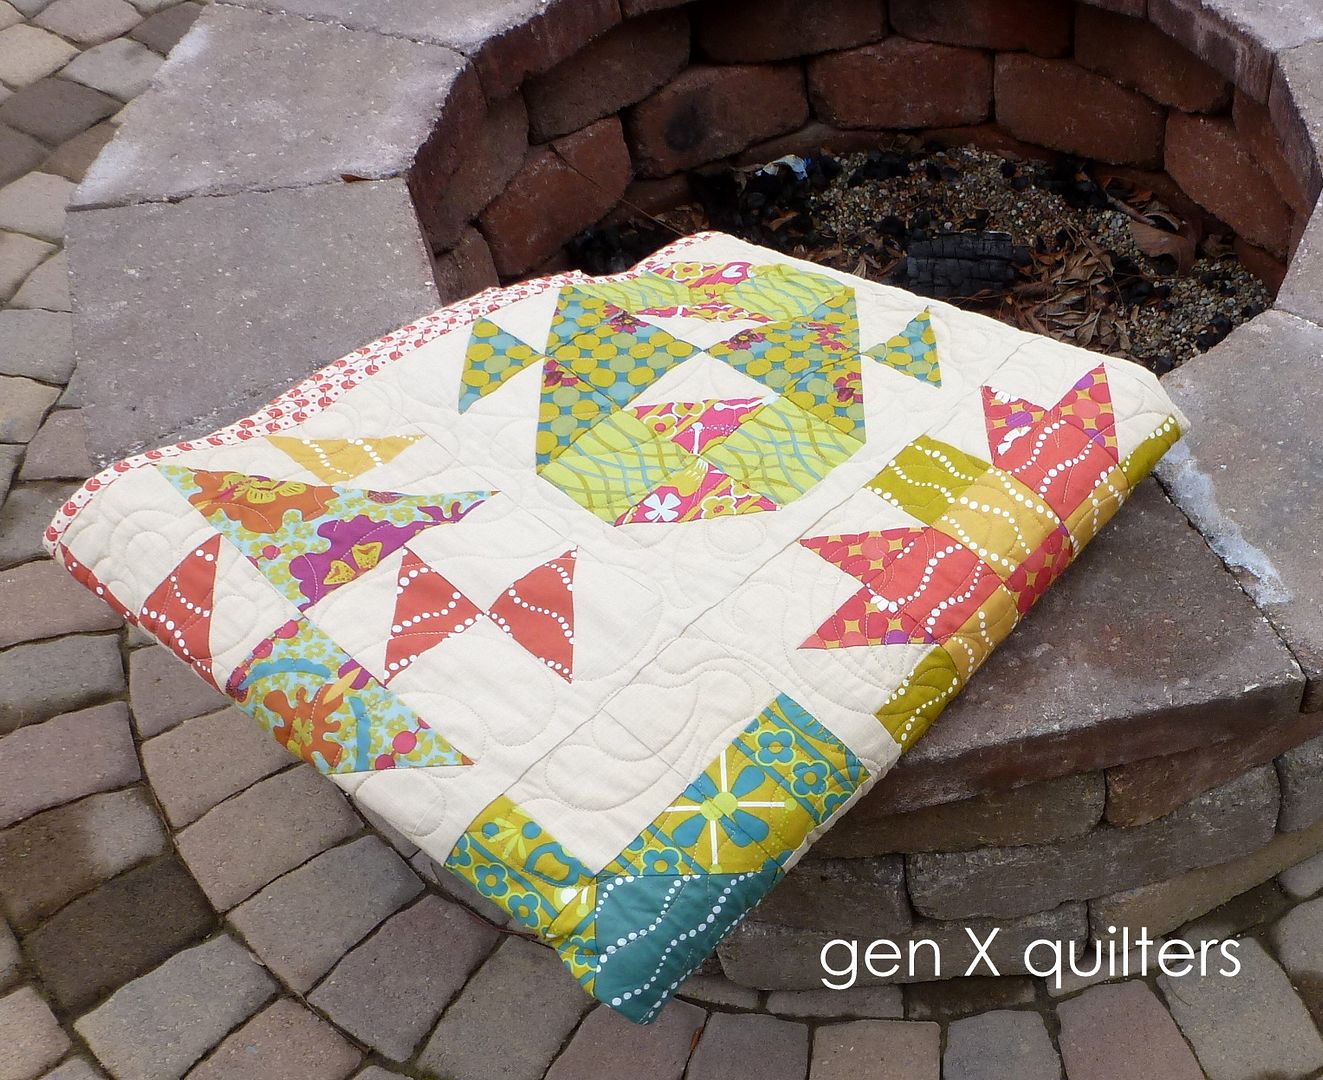
Doesn't this look like a great quilt to cuddle up under out at the fire?
I struggled to get a shot that really captures the quilting on this quilt. I sent out this quilt to my favorite local longarm quilter
Kathy, knowing that she had some cascading designs that would be perfect for this quilt. If you look hard, you can see the feathers and swirls that make their way directly up the diagonal negative space on the quilt. The pattern is repeated throughout the blocks, but it really makes a statement in the negative space. I wish we could see it better!
Thank you to all who participated!
Quilt Stats.
Name: Sisters' Ten Block of the Month Club 2013
Size: 78" x 78"
Design: traditional quilt blocks all with names leading to important women in our lives, set in a more modern setting with a large negative space on the diagonal - design and layout by me
Fabric: Lucky Penny by Alison Glass for Andover Fabrics, background is Quilters' Linen in Straw by Robert Kaufman. Backing and binding is Chicopee by Denyse Schmidt for FreeSpirit.
Piecing: Me
Quilting: Beany of Quilty Pleasures