• Home
    • PDF Quilt PATTERNS
    • PAPER PATTERNS
    • Wholesale
    • Policies
    • Hygge
    • Conversation
    • Chocolatier
    • Bonfire
    • Moccasin
    • Vice Versa
    • Sisters Ten
    • Blog
    • Tutorials
    • Quilt Alongs
    • Free Patterns
    • BIO
    • BOOKS
    • IN the news
    • CONTACT
  • Search
Menu

AnneMarie Chany Quilt Patterns

Modern + Traditional Quilt Patterns
  • Home
  • SHOP
    • PDF Quilt PATTERNS
    • PAPER PATTERNS
    • Wholesale
    • Policies
  • Block of the Month
    • Hygge
    • Conversation
    • Chocolatier
    • Bonfire
    • Moccasin
    • Vice Versa
    • Sisters Ten
  • Let's Sew
    • Blog
    • Tutorials
    • Quilt Alongs
    • Free Patterns
  • about
    • BIO
    • BOOKS
    • IN the news
    • CONTACT
  • Search
How to Sew Partial Seams Quilt Block Tutorial using the Flying Squares Block

How To Sew Partial Seams: Flying Squares Block Tutorial

September 5, 2012

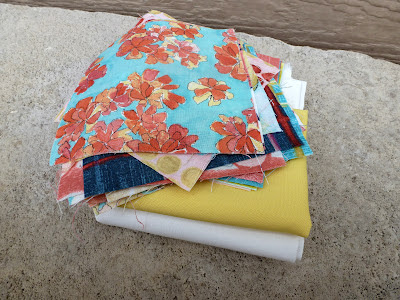
A little while ago, Laura Gunn sent me a charm pack of her new line Cosmos Collection from Michael Miller.

The prints are fresh and cheery, and paired very nicely with this bright buttery yellow from my stash.  Laura's gorgeous florals are typically large in scale - and Cosmos follows suit in her style.  It makes me think of lovely flowing skirts sitting down to a picnic.  That said, since I received a charm of each print, it made me think hard about how to show off the prints without chopping them up too much.

Here is a tutorial for the Flying Squares block.  It simply showcases two prints and uses partial seams. Never tried partial seams before?  No problem!  They are a snap.  Try something new with this sweet and simple block.

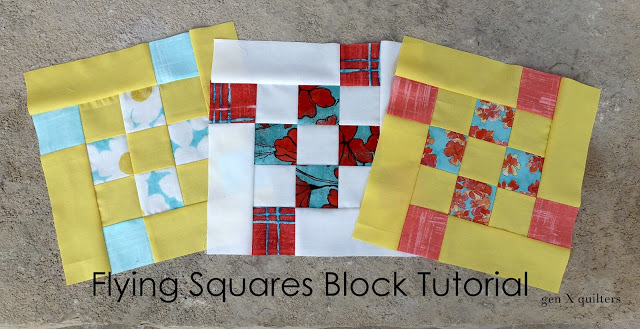
Flying Squares Block.

Finished Block = 10"
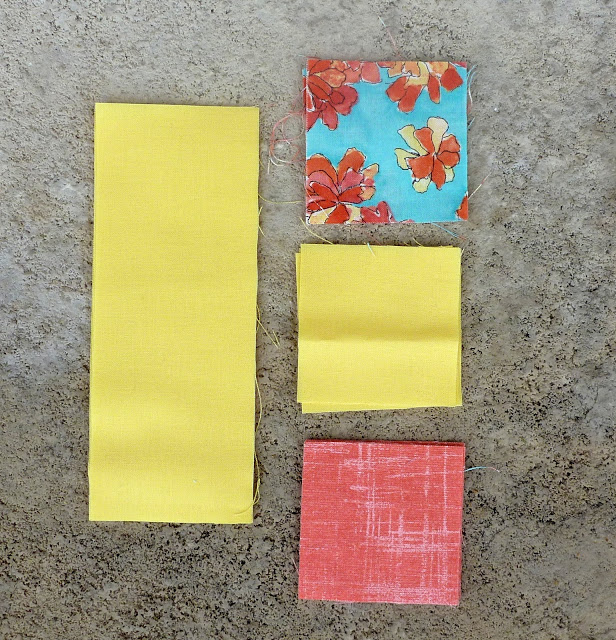
Materials.

4 - 2.5" x 6.5" solid

5 - 2.5"  solid squares

4 - 2.5"  print A squares

4 - 2.5"  print B squares

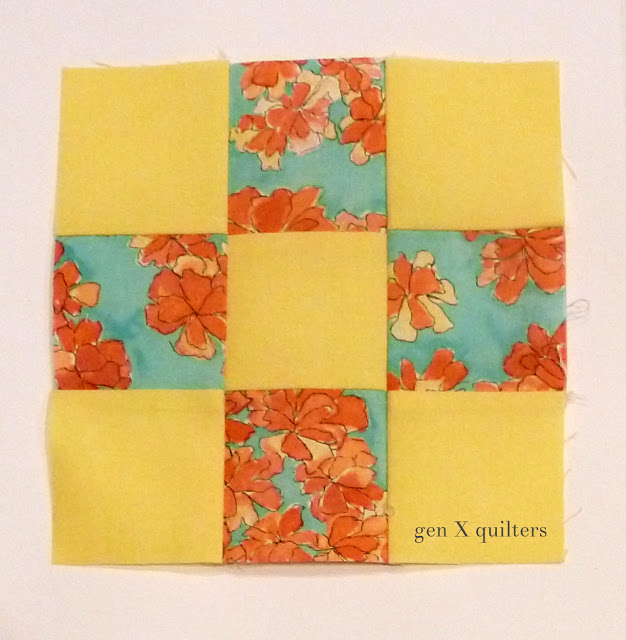
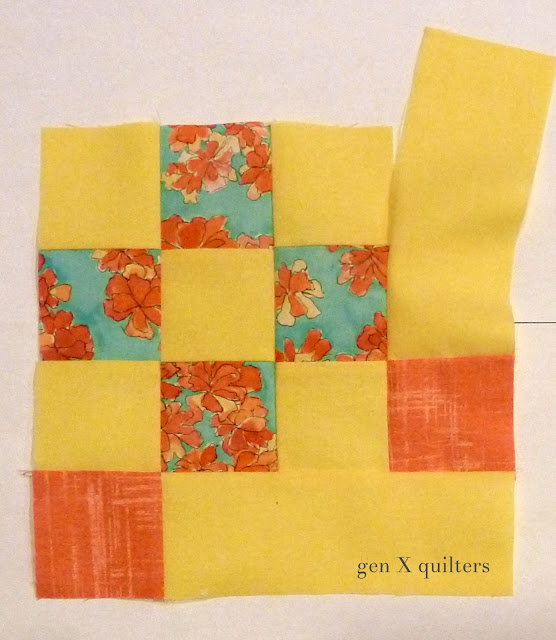
1.  Arrange the 5 - 2.5"  solid squares and the 4 - 2.5"  print A squares in a nine-patch block as shown below.

2.  Sew the 3 squares in each row together.  Press all seams toward the print.

3.  First sew the top row to the middle row.  Then sew the bottom row to the previous unit.  Press all seams.

4.  Next sew one 2.5" x 6.5" solid strip to a 2.5"  print B square.  Press toward the print square.  Repeat to make 4 units.

5.  Now comes the fun part!  The partial seam.  Join the nine-patch square and one rectangle unit, sewing only half of the seam.

Finger press the seam toward the rectangle unit.

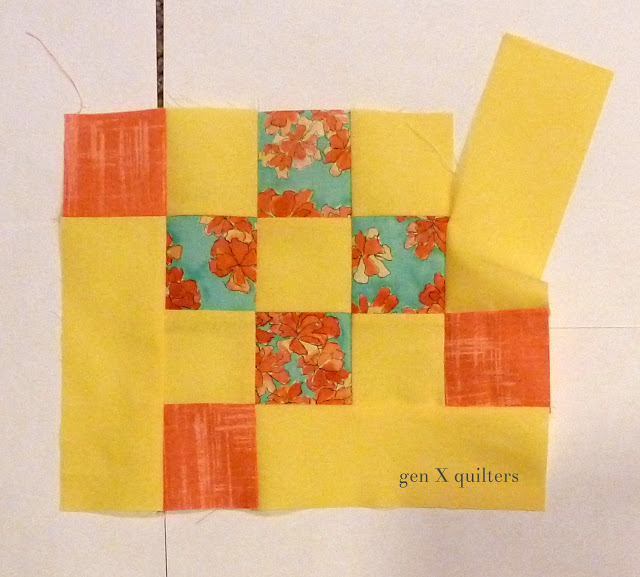
6.  Add the next rectangle unit, working clockwise around the nine-patch block.  Sew the entire length of the seam and then press toward the rectangle unit.  Continue in this manner unit you have sewn all the rectangle units to the block.

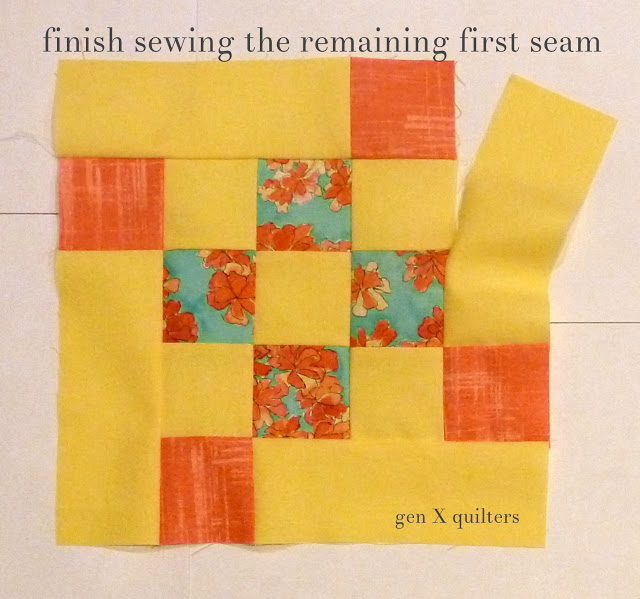
7.  Finish sewing the first seam to complete the block.  Press the seam toward the rectangle unit.  

There you have it!  A new skill and a nice way to showcase some prints.

Tags quilt blocks, tutorials
← Thank YouMy TV Debut: Quilting Arts TV →

Latest Posts

Featured
Gatekeeper Quilt in Nautical Blues
Feb 2, 2023
Gatekeeper Quilt in Nautical Blues
Feb 2, 2023
Feb 2, 2023
Hoop Quilts for Beginners: Book Trailer
Oct 27, 2022
Hoop Quilts for Beginners: Book Trailer
Oct 27, 2022
Oct 27, 2022
Hoop Quilts for Beginners: What's Inside the Book?
Sep 11, 2022
Hoop Quilts for Beginners: What's Inside the Book?
Sep 11, 2022
Sep 11, 2022
Free Chocolatier Supplement - Skittles Colorway Fabric Aide
$0.00
CHOCOLATIER BLOCK OF THE MONTH SAMPLER Pattern - PDF Download
$30.00
Lakeside Sampler Quilt Pattern - PDF Download
$24.00
Conversation Row of the Month Sampler Quilt Pattern - PDF Download
$24.00
Folk Star Quilt Pattern - PDF Download
$10.00