
Ok, so it's not really a rant per say.... but I wanted to ask if you've tested your 1/4" seam for accuracy? Don't make the same mistake I did! For years, YEARS!, I sewed with a true 1/4" seam. I never took the time to find the scant 1/4" and as a result, my seams and resulting block sizes were always a little off.
Spending just a few minutes to adjust your machine to a scant 1/4" will save you many headaches in the future. The term scant means just a thread shy of a 1/4". If you never test it, you don't realize that your thread and the pressed fold take up some space in the measurement, usually resulting in blocks being short of their required finished dimension.
Video tutorial here.
Here are some helpful hints:
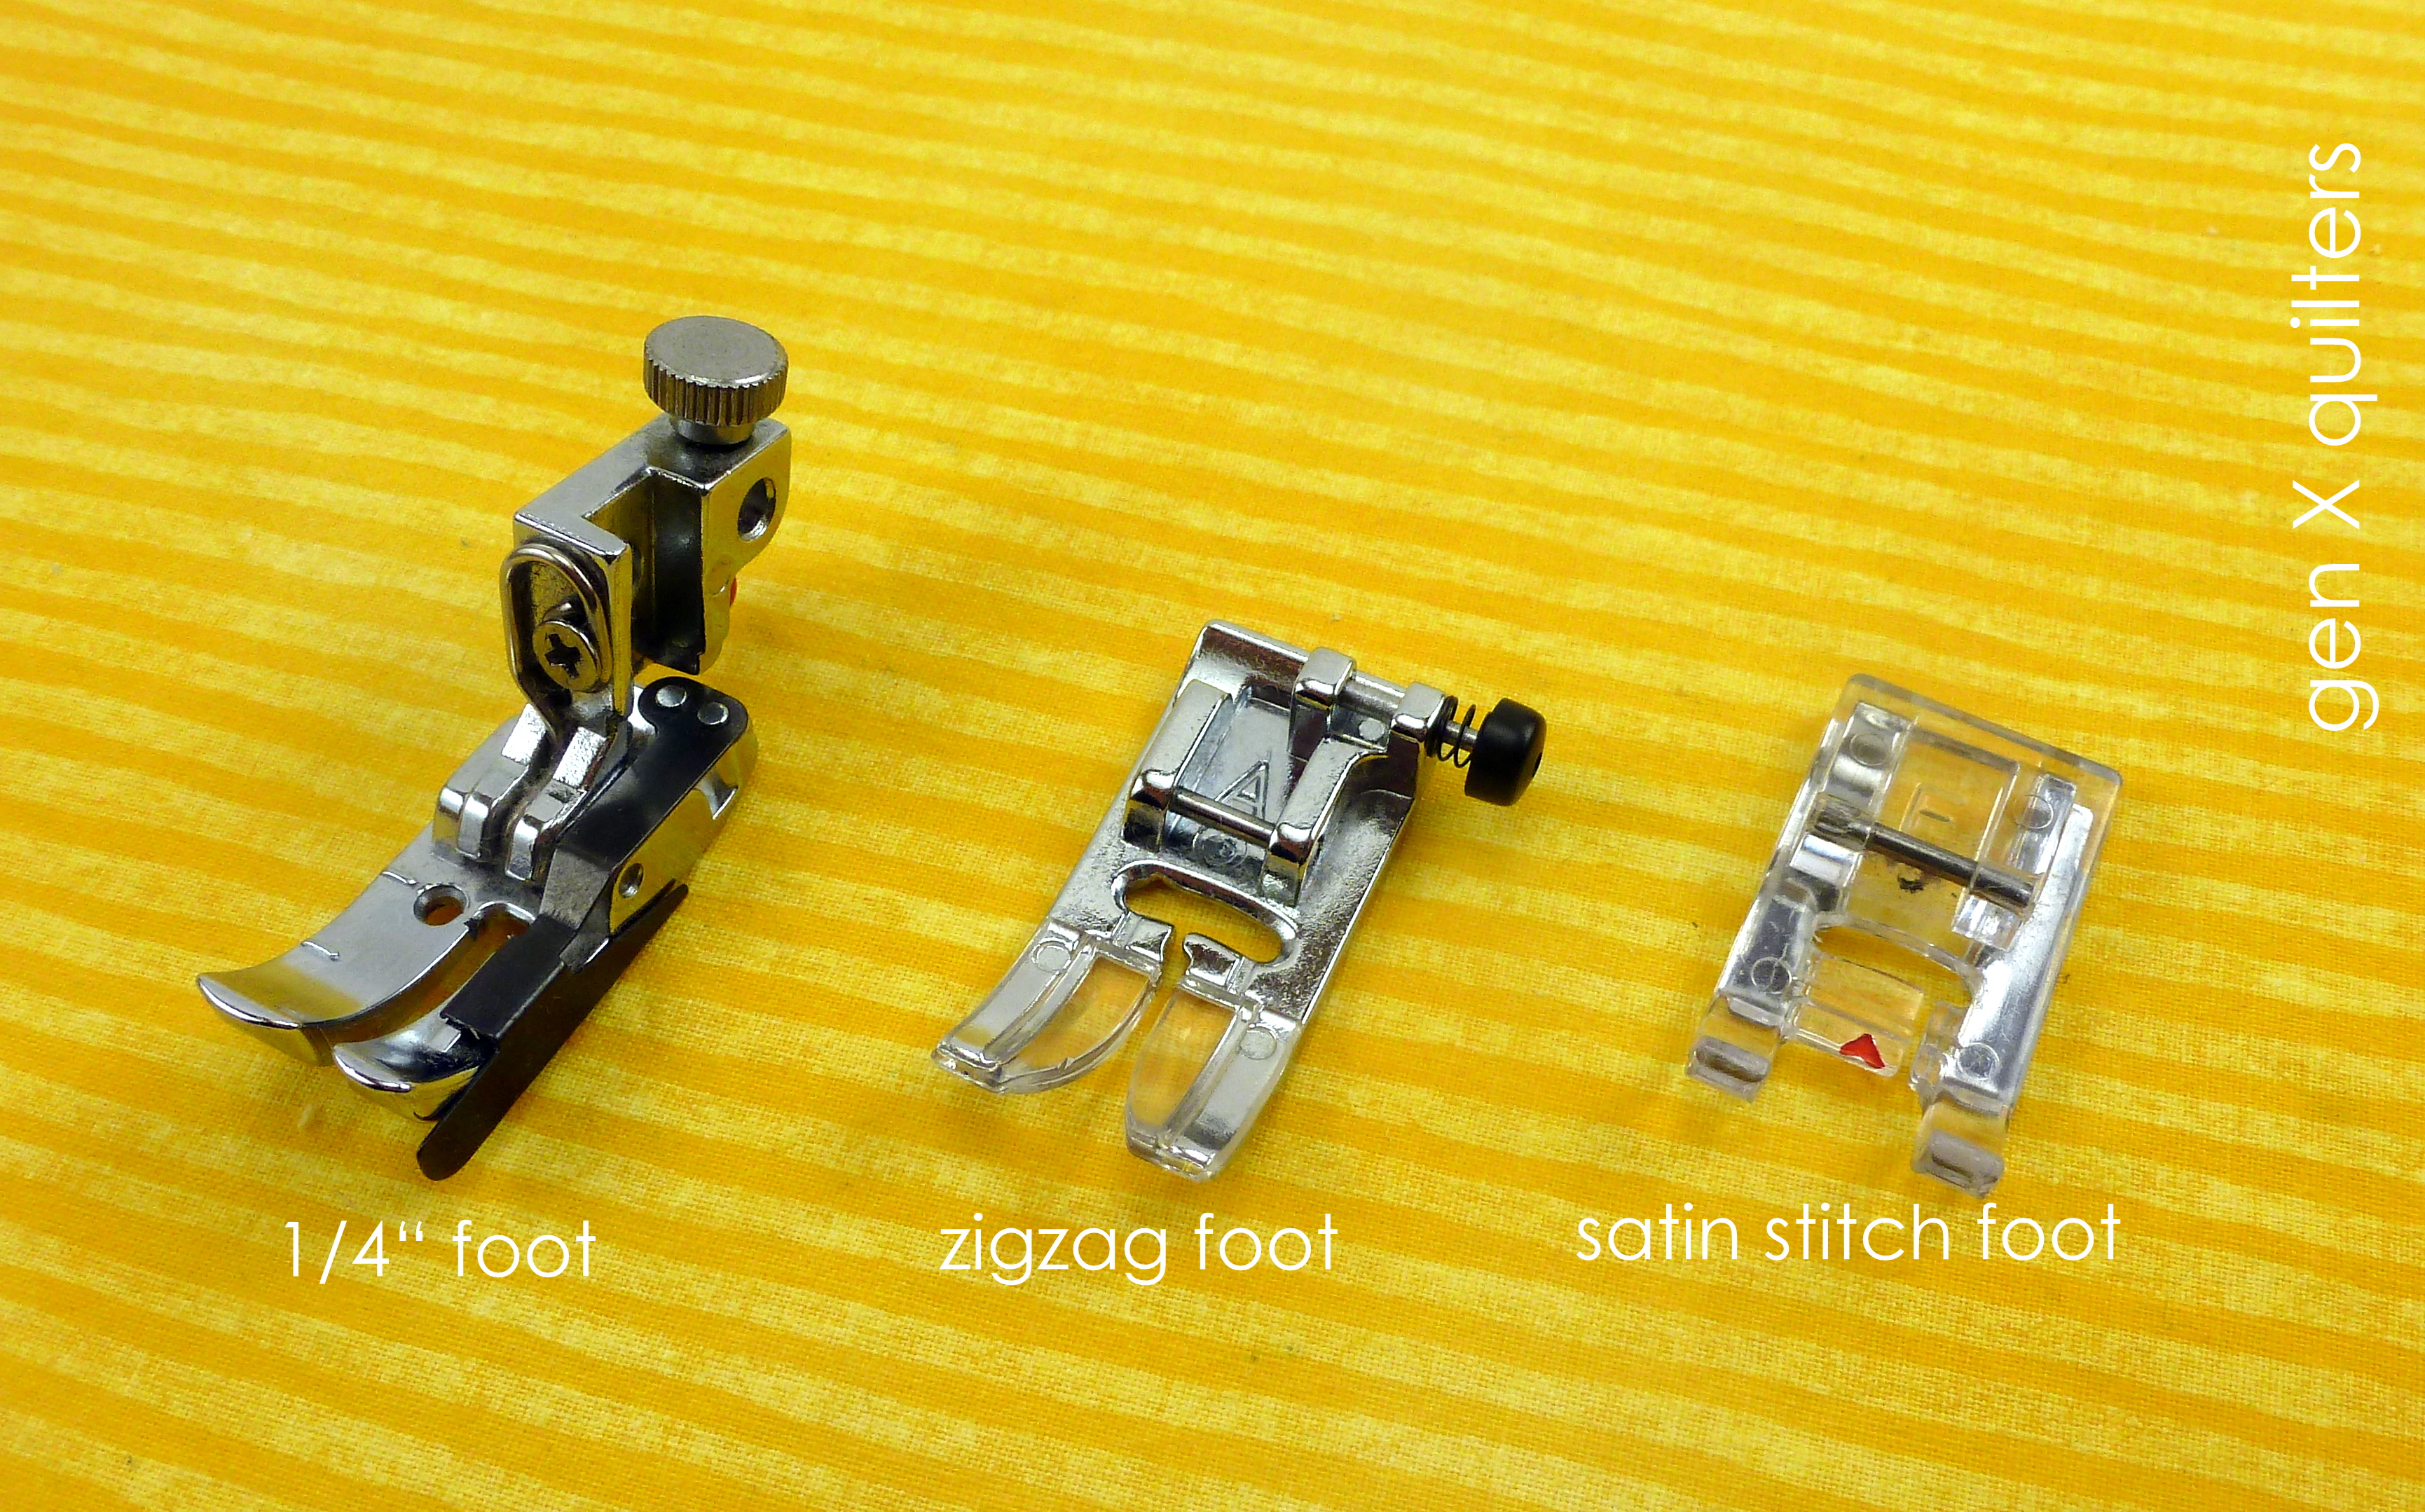
Presser foot. My machine comes with two default general presser feet. The zigzag foot and satin stitch foot are used for most stitches and straight line sewing. The 1/4" foot is specifically for quilters trying to sew that perfect 1/4" seam. If you don't have a 1/4" foot already, I highly recommend getting one. The black guide on the right hand side of the foot helps position your fabric by butting the edges of the squares right up against the guide. I sew with this foot 99% of the time. My accuracy (or should I say consistency) is much improved using the guide.

Needle Position. Many times, the needle position will need to be adjusted from it's default position to achieve the scant 1/4". In the photo above, you can see that when I try to sew a 1/4" seam with the needle in it's default position, the block is slightly shy of the 2" x 2" block is it supposed to be. It takes a little time to play with shifting the needle to find where it hits exactly on 2". After finding the correct position for the scant 1/4" seam, adjust your machine to that needle position every time you sew. It will seem like a hassle at first, then it will become an automatic part of sewing, just like grabbing that diet coke before you begin. :) I find it helpful to have a sticky note with the adjusted needle position written down stuck to the side of my machine.
--------------------------------------------------------------------------------------------------------------------------------
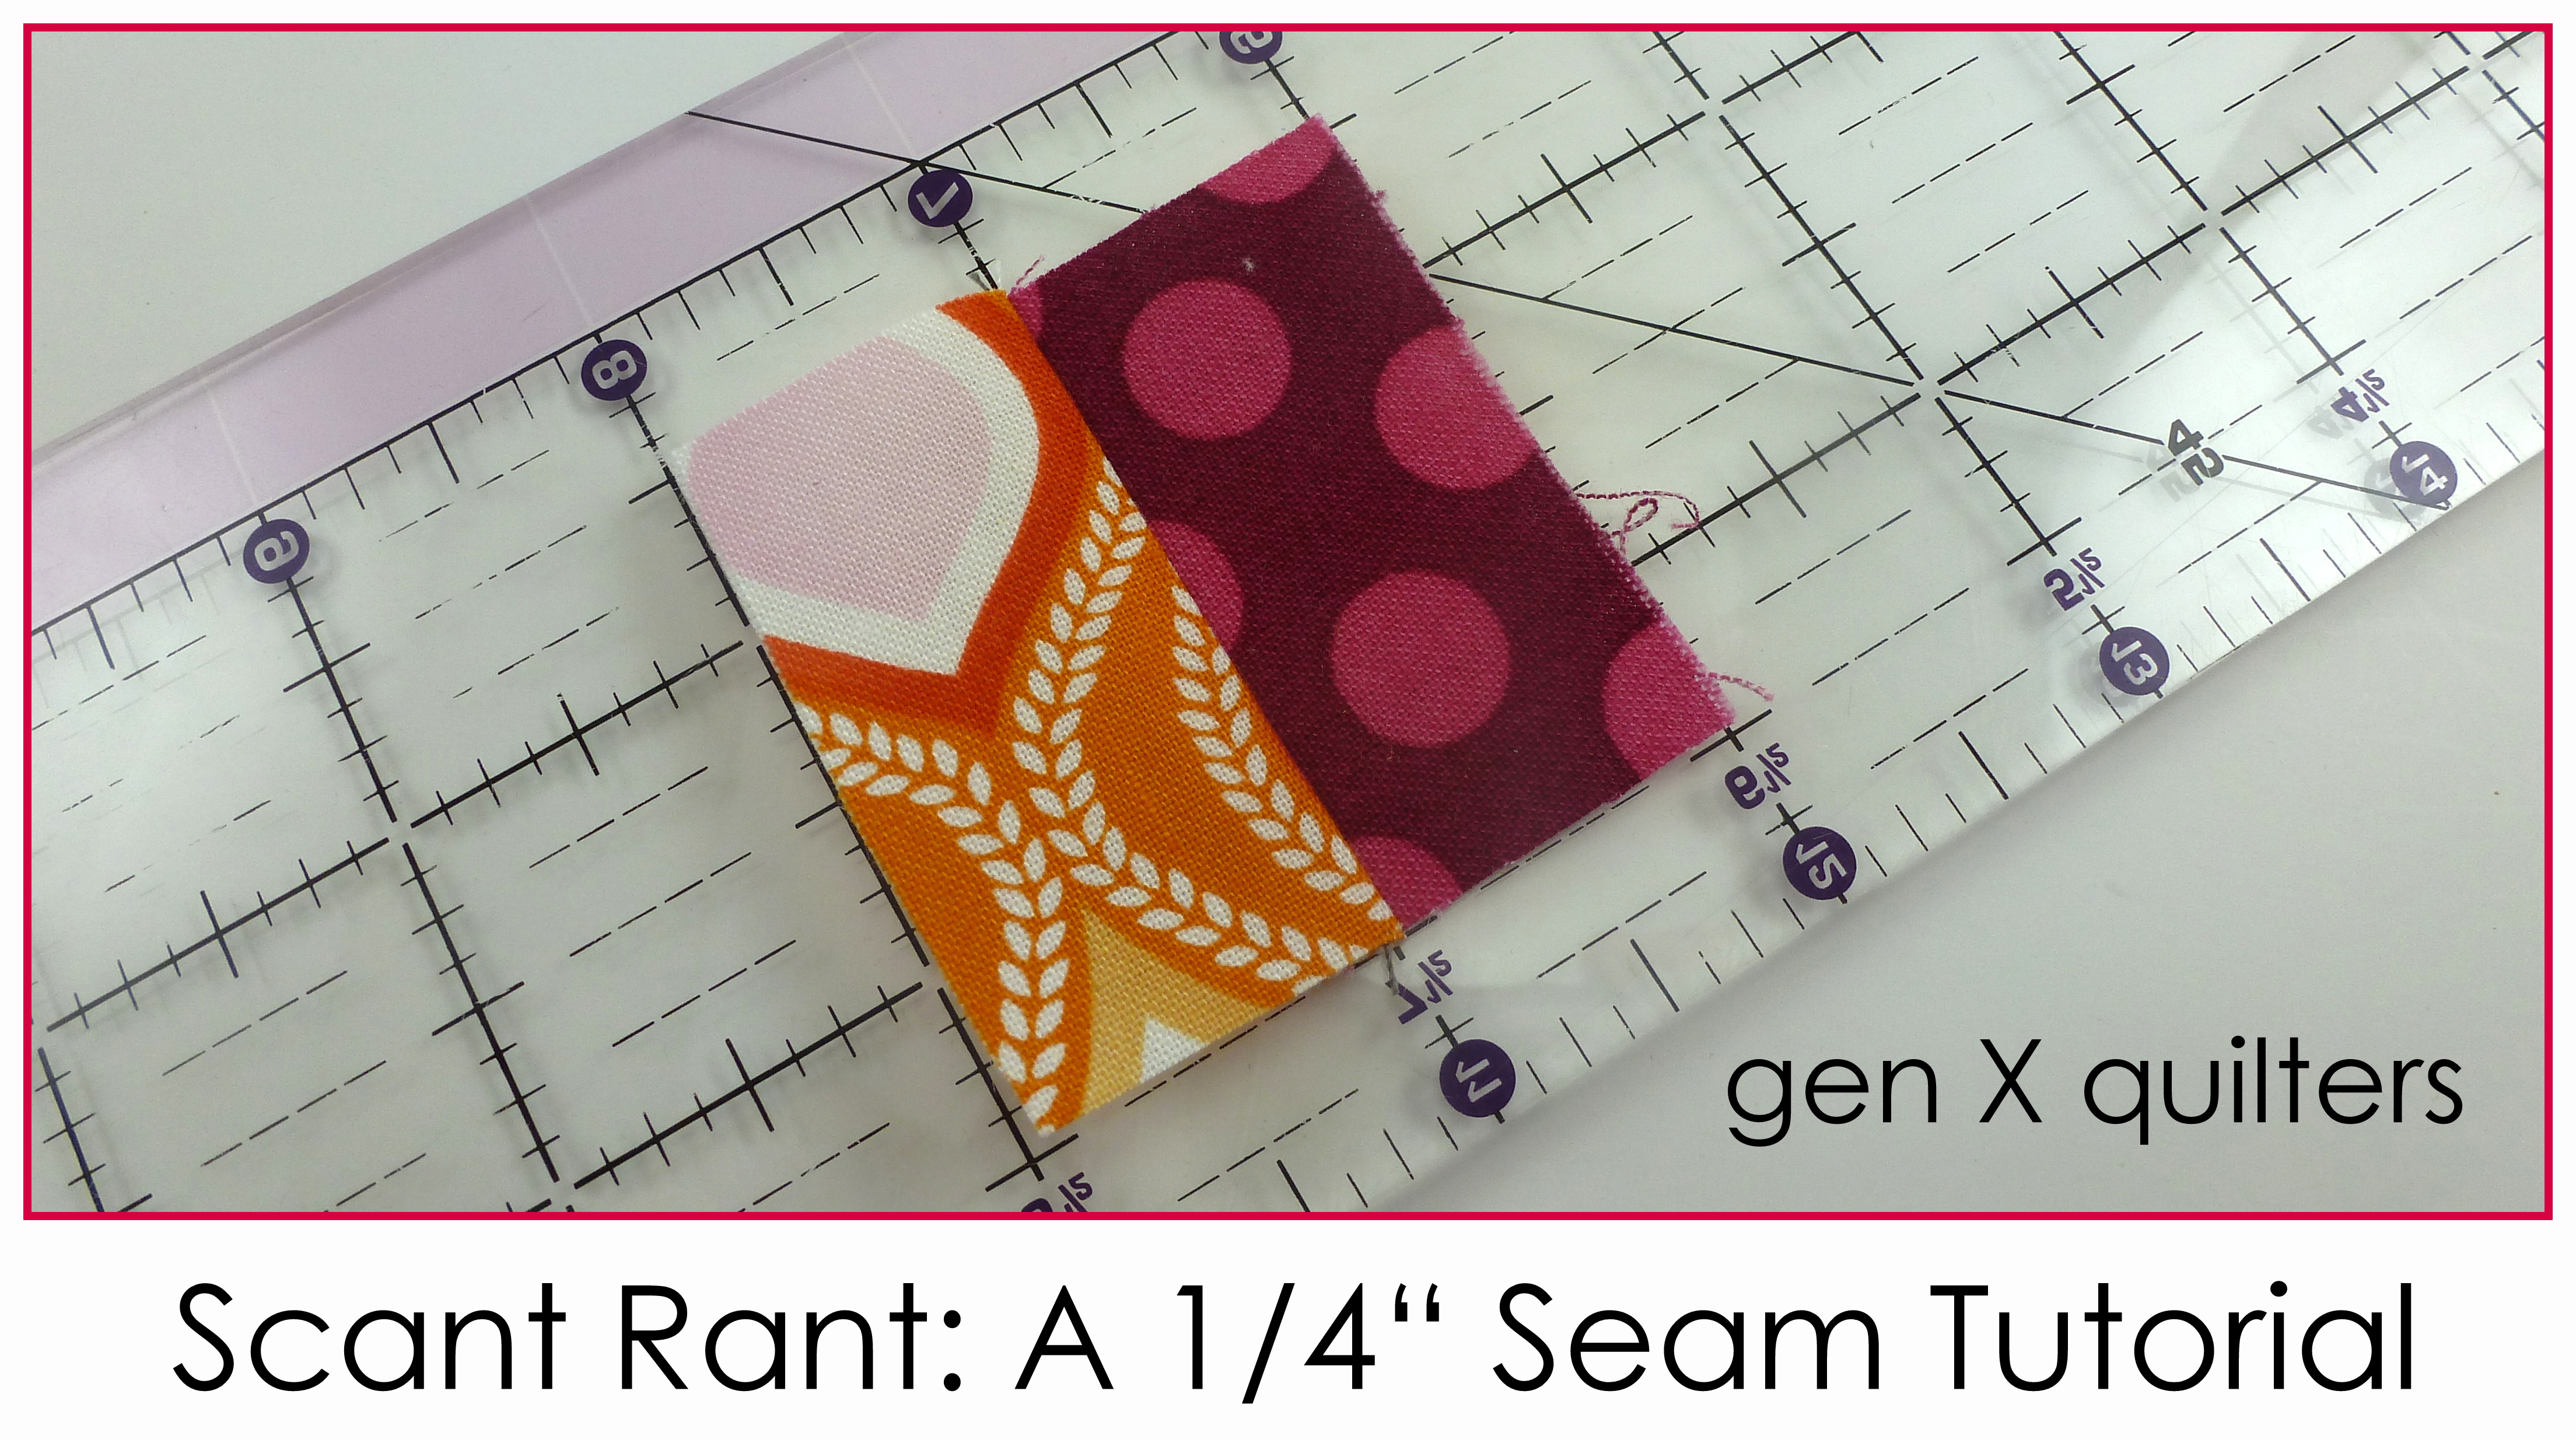
The Test.
- Cut (2) 1 1/4" x 2" rectangles. Sew along the 2" length with right sides together (RST). Press seam in one direction.
- Measure the block to see if it is a 2" x 2" square.
- If the block is short, your needle will need to shift to the right.
- If the block is too long, your needle will need to shift to the left.
- Shift the needle one or two notches at a time until you find the sweet spot where the block measures 2" x 2".
--------------------------------------------------------------------------------------------------------------------------------
Further Reading.
Part II: Does Pressing Affect the Scant Seam and Block Size?
Part III: Scant Rant: A 1/4" Seam Tutorial for Basic Sewing Machines
Part II: Does Pressing Affect the Scant Seam and Block Size?
Part III: Scant Rant: A 1/4" Seam Tutorial for Basic Sewing Machines