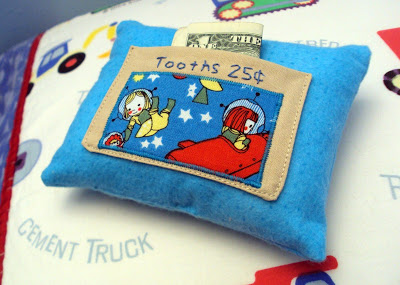
A great stocking stuffer!
Imagine my surprise at my 4-yr. old's visit to the dentist when she announces he has a loose tooth! 4! Already?!?
There's been a lot of talk about tooth fairies. I figured I'd better make a little pillow before he actually lost it.
The cutest thing is he calls it a "wiggly tooth"....
Here's a project you can whip up during nap time (serious - I designed, sewed start to finish, and took pics before the baby woke up)!
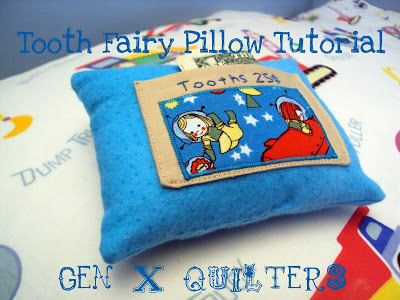
Tooth Fairy Pillow Tutorial
MATERIALS:
2 - 4 ¾" x 5 ¾" flannel rectangles
1 - solid neutral rectangle 4" x 5" for pocket
1 - 1 ½" x 2 ¾" rectangle novelty print
embroidery floss
coordinating thread
scrap of fusible web
pillow stuffing
coordinating thread
scrap of fusible web
pillow stuffing
1. Cut all fabrics to the required sizes listed above.

2. Fold neutral solid in half lengthwise, right sides together. Stitch ¼" from the edge around the 3 open edges, starting at the edge next to the fold. Leave about an inch gap in one side for turning. Make sure to backstitch at the beginning and end of each stitch line. When you come to a corner, simply stop with the needle down, lift the presser foot and rotate the piece so you can begin sewing on the next edge. Remember to put your presser foot down after turning! Clip the corners before turning the pocket right side out.
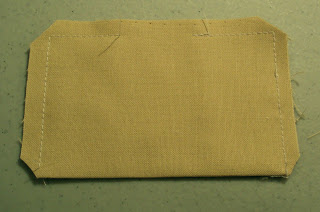
3. Once your pocket is turned right side out, press. The top lip of the pocket is the fold. The bottom edge of the pocket contains the small hole used to turn the pocket right side out. This hole will be stitched closed later when attaching the pocket to the flannel.

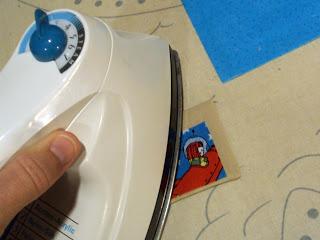
It is now time to add the novelty fabric!
Using a small scrap of fusible web, follow the manufacturer's instructions to adhere it to the 1 ½" x 2 ¾" novelty print rectangle. Then adhere the novelty fabric to the pocket, leaving space at the top of the pocket to embroider if desired.
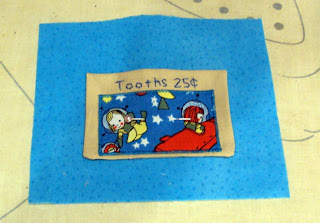
4. Use a zig zag or blanket stitch to secure the novelty fabric applique to the pocket. Embroider the wording "Tooths 25¢" using a marking pencil if desired or stitch free hand as I did.

5. Pin the pocket in place on one flannel rectangle as shown.
6. Stitch the pocket to the flannel starting at one edge next to the fold, making sure to backstitch a few stitches at the beginning to secure. Continue along this edge until reaching a corner. Stop with the needle down, lift the presser foot, and rotate the piece to continue stitching along the bottom edge of the pocket. When reaching the opposing corner, use the same method to turn the second corner. Stitch along the third and final edge until reaching the top of the pocket. Lockstitch here.

7. Next place the two flannel rectangles right sides together. Stitch ¼" from the edge around all four sides, leaving a 1 1/2" gap in one side for turning. Make sure to backstitch at the beginning and end of the stitching. Use the same method here as when sewing the pocket. When you come to a corner, simply stop with the needle down, lift the presser foot and rotate the piece so you can begin sewing on the next edge. Remember to put your presser foot down after turning! Clip the corners before turning the pillow right side out.

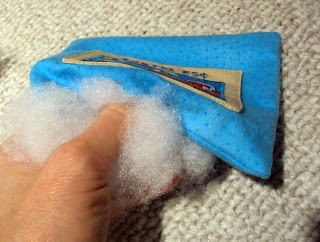
8. Turn the pillow right side out and stuff.
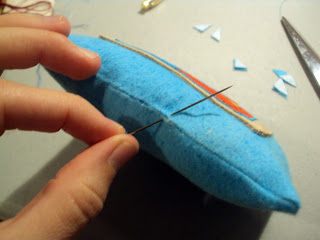
9. Stitch the stuffing opening closed for the final step!
And there you have it! Hope you like it!